
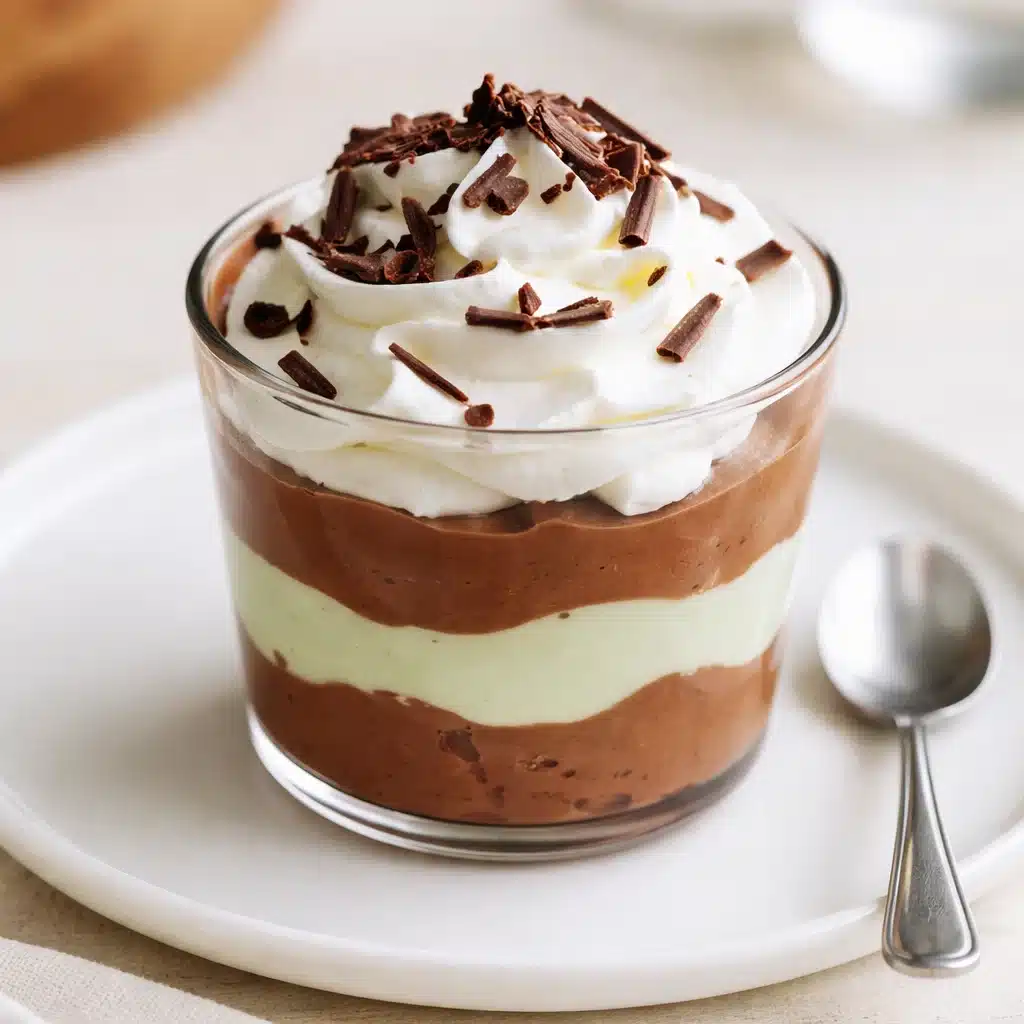
Shamrock Shake Pudding Cups are your new favorite way to shamrock and roll into St. Patrick’s Day without turning on the oven—or losing your sanity. These festive green and chocolate layered desserts are quick to make, kid-approved, and just the right amount of minty magic to satisfy your sweet tooth. Think of them as the love child of a minty milkshake and a chocolate parfait… only easier. Whether you’re wrangling kids or just want something cute to bring to a potluck, this dessert pulls double duty—it’s showy and simple. Best of all? You can make them ahead and forget about dessert until the party starts. Now that’s what we call luck of the Irish.
Table of Contents
What is Shamrock Shake Pudding Cups?
Shamrock Shake Pudding Cups are a no-bake dessert inspired by the famous minty green milkshake that shows up every March. But instead of ice cream, these pudding cups feature layers of silky chocolate and mint-flavored instant pudding—stacked in clear cups so you can admire all that green goodness. With whipped cream, chocolate shavings, and optional mint candies on top, they’re practically leprechaun bait. Think of them as a St. Paddy’s Day twist on a parfait that requires no special culinary skills (other than opening pudding packets and not eating all the whipped cream before it makes it to the cups). They’re perfect for themed parties, kid-friendly celebrations, or whenever you’re craving something sweet with a little green flair.
Reasons to Try Shamrock Shake Pudding Cups
First off, Shamrock Shake Pudding Cups are ridiculously easy to make. Like, “your 10-year-old could do it while you supervise with a cup of coffee” easy. They require no baking, minimal prep, and they can be made with basic grocery store ingredients—most of which you probably already have hanging out in your pantry. Plus, they’re festive without being fussy. The green-and-chocolate combo brings just the right amount of holiday spirit, without turning your kitchen into a Pinterest war zone. If you’re hosting or attending a party, they’re a great make-ahead option that travels well and earns plenty of oohs and ahhs.
Ingredients Needed to Make Shamrock Shake Pudding Cups
- 1 package (3.4 oz) instant chocolate pudding mix
- 2 cups cold milk
- 1 package (3.4 oz) instant mint pudding mix
- 2 cups cold milk
- 1 cup whipped cream or whipped topping
- Green food coloring (optional, but fun!)
- Chocolate shavings or mint candies for garnish
- Clear plastic cups or dessert glasses (makes about 4–6)
Instructions to Make Shamrock Shake Pudding Cups: Step-by-Step Guide
Making Shamrock Shake Pudding Cups is as easy as it is fun, and this step-by-step guide will walk you through every part of the process so you can whip up this no-fuss, festive dessert like a pro. Whether you’re making these for a school party, a casual gathering, or just because you’re craving something minty and magical, this guide breaks everything down into doable steps you can follow—no stress, no baking, and definitely no leprechaun mischief.
Step 1: Gather and Prep Your Ingredients
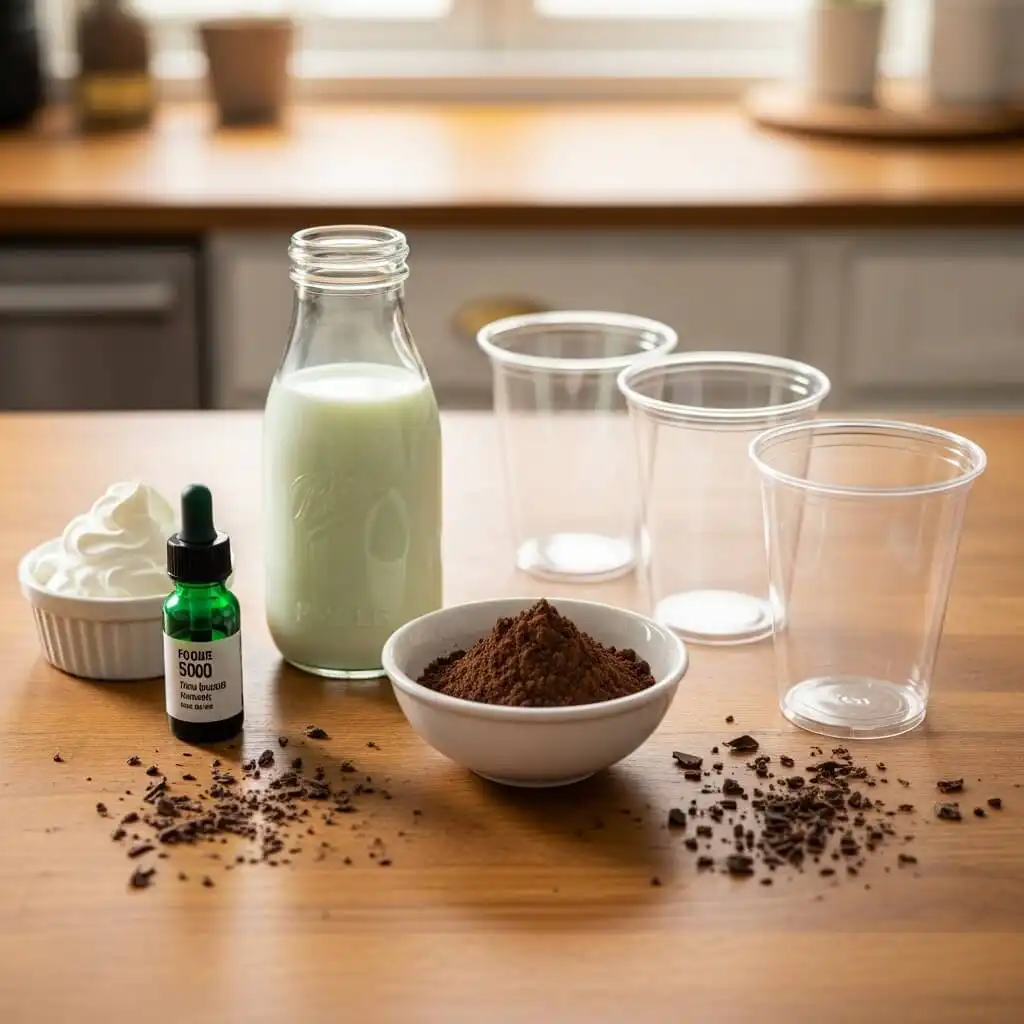
Before you start mixing, it’s a good idea to lay out everything you need. This keeps things smooth and stress-free once you begin. Grab your instant pudding mixes—one chocolate and one mint (or vanilla with peppermint extract if mint isn’t available). Measure out your cold milk, have your whipped cream or topping ready, and don’t forget the green food coloring if you’re going for that bright shamrock hue. Here’s a helpful ingredient substitution guide if you need to swap anything out due to allergies or preferences.
Don’t forget to prep your clear cups or dessert glasses—they’re key to showing off those gorgeous layers. You’ll also want a whisk, mixing bowls, a spoon or piping bag, and something fun for garnish like crushed mint candies or chocolate shavings.
Step 2: Mix the Chocolate Pudding
In a large mixing bowl, pour in the chocolate pudding mix and 2 cups of cold milk. Using a whisk, stir the mixture briskly for about 2 minutes until it’s smooth and creamy. The mixture will start to thicken slightly—this is your cue to stop whisking and let it sit for 5 more minutes to firm up. This rest time is important, so don’t rush it! If you want to boost the flavor or add some texture, you could fold in some crushed cookies or brownie crumbs at this stage. (Yes, it’s as indulgent as it sounds.)
Step 3: Make the Mint Layer
In another bowl, repeat the process with the mint pudding mix and 2 cups of milk. Whisk until smooth and let it thicken for 5 minutes. For that iconic green color, now’s the time to add a few drops of green food coloring—start with 2–3 drops and stir. Add more if you want it extra vibrant. If you’re using vanilla pudding with peppermint extract instead, this is also the step to add a few drops of the extract. If you love minty desserts, be sure to try our Mint Oreo Truffles too—they’re another no-bake favorite!
Step 4: Layer the Puddings in Cups
Now the fun part—step by step, you’ll build your pudding cups. Start by spooning or piping a layer of chocolate pudding into the bottom of each clear cup. Use the back of the spoon to smooth it out if needed. Next, carefully add a layer of mint pudding on top. Repeat the layers depending on your cup size and how much pudding you want to use.
For the neatest results, a piping bag (or zip-top bag with a snipped corner) works wonders. If you’re letting little ones help, it’s totally fine to embrace a more “rustic” look—charm over perfection, right?
Step 5: Top with Whipped Cream
Once your pudding layers are done, it’s time for the crown jewel—whipped cream! Spoon or pipe a generous dollop right on top of the final mint layer. You can use store-bought whipped topping or make your own if you’re feeling fancy (or have leftover cream from making our Strawberry Kiss Cookies).
Step 6: Garnish and Make it Festive
Now for the sparkle—literally. Sprinkle chocolate shavings, mini mint candies, crushed cookies, or green sprinkles over the whipped cream. Want to get creative? Let the kids decorate their own cups! This is a great way to get them involved and keep them busy while dinner finishes cooking.
Step 7: Chill Before Serving
Transfer your assembled cups to the refrigerator and chill for at least 30 minutes. This lets the pudding firm up and the flavors mingle. You can absolutely make these ahead—up to a day in advance is perfect. Just hold off on adding whipped cream and garnishes until just before serving so everything stays picture-perfect.
What to Serve with Shamrock Shake Pudding Cups
If you’re putting together a full spread for a St. Patrick’s Day bash, these pudding cups pair perfectly with other themed treats. Try serving them alongside something crispy or savory, like these Irish Cream Oreos or even a plate of Mint Oreo Truffles for a triple mint moment. If you want to break up the sweetness, add a Garlic Chicken Gnocchi Skillet or something hearty like Ground Beef Stuffed Peppers to the table for a balanced meal. Either way, these pudding cups are a perfect finale or mid-party treat.
Key Tips for Making Shamrock Shake Pudding Cups
Here’s where the magic really happens:
Color Boost: If your mint pudding looks more like pastel Easter than bold shamrock, add a few more drops of green food coloring.
Layer Cleanly: Want that Instagram-worthy look? Use a piping bag or zip-top bag with the tip snipped off for tidy layers.
Add Texture: Crushed Oreos or brownie crumbs in the chocolate layer give it a bit of crunch and surprise.
Chill Time Matters: Don’t skip the chilling—this helps the flavors set and gives that creamy, dreamy texture we’re all here for.
Let the Kids Help: This is a great one for little hands. Let them do the layering or go wild with the toppings.
Storage and Reheating Tips for Shamrock Shake Pudding Cups
Good news: these Shamrock Shake Pudding Cups actually like being made ahead. You can prepare them the night before your event and store them in the fridge for up to 3 days. Just be sure to hold off on the whipped cream and garnishes until you’re about ready to serve, so they stay fresh and fluffy. If you’re using homemade whipped cream, it may lose volume over time, so store that separately in a covered bowl. Reheating isn’t necessary—these babies are meant to be served cold and creamy, no microwave required. If transporting, pop them in a cooler or insulated bag to keep them fresh.
FAQs
Can I make these dairy-free?
Yes! Just use plant-based milk (like oat or almond) and a dairy-free whipped topping.
Can I skip the food coloring?
Absolutely. The mint flavor will still come through—it just won’t be as festive.
Can I make this boozy?
Why not? Add a splash of Irish cream liqueur to the pudding mix—but keep those away from the kids!
How far in advance can I make them?
Up to 24 hours ahead is ideal. Just garnish before serving.
What if I can’t find mint pudding?
Use vanilla pudding and stir in peppermint extract and food coloring for the same effect.
Final Thoughts
Shamrock Shake Pudding Cups are the ultimate dessert for when you want to make something festive without pulling your hair out. They’re simple, satisfying, and seriously cute on any dessert table. Whether you’re celebrating with little ones, hosting a green-themed party, or just want to treat yourself to something fun and minty, this recipe is a guaranteed crowd-pleaser. And if you’re already thinking about your next dessert project, check out these Mint Oreo Truffles—they’re another no-bake favorite you’ll want in your back pocket.
Visit our Pinterest for regular slow cooker recipe updates, or join our Facebook discussions where cooking fans exchange their favorite hearty meal ideas.
PrintShamrock Shake Pudding Cups
Festive and creamy Shamrock Shake Pudding Cups combine chocolate and mint pudding in beautifully layered desserts, perfect for celebrating St. Patrick’s Day.
- Prep Time: 15 minutes
- Cook Time: 0 minutes
- Total Time: 45 minutes
- Yield: 4–6 servings 1x
- Category: Dessert
- Method: No-Bake
- Cuisine: American
- Diet: Vegetarian
Ingredients
- 1 package (3.4 oz) instant chocolate pudding mix
- 2 cups milk
- 1 package (3.4 oz) instant mint pudding mix
- 2 cups milk
- 1 cup whipped cream or whipped topping
- Green food coloring (optional)
- Chocolate shavings or mint candies (for garnish)
Instructions
1. In a bowl, whisk together the chocolate pudding mix and 2 cups of milk until smooth. Let it sit for about 5 minutes to thicken.
2. In another bowl, whisk together the mint pudding mix and 2 cups of milk. For a brighter hue, add a few drops of green food coloring. Allow to thicken for 5 minutes.
3. In clear cups or glasses, start with a layer of chocolate pudding. Add a layer of mint pudding on top. Repeat the layers until the cups are filled.
4. Spoon or pipe whipped cream on top of the pudding layers.
5. Finish with chocolate shavings or crushed mint candies for a festive touch.
6. Refrigerate for about 30 minutes before serving for a cool, refreshing dessert.
Notes
Add extra green food coloring for a vibrant mint layer.
Use a piping bag for neater, even layers.
Chill for at least 30 minutes to set and intensify flavors.
Let kids decorate with candies or sprinkles for fun.
Store covered in the refrigerator for up to 3 days.
Wait to add whipped cream and garnish until just before serving.
Nutrition
- Serving Size: 1 pudding cup
- Calories: 250
- Sugar: 18g
- Sodium: 220mg
- Fat: 9g
- Saturated Fat: 5g
- Unsaturated Fat: 3g
- Trans Fat: 0g
- Carbohydrates: 35g
- Fiber: 1g
- Protein: 3g
- Cholesterol: 10mg


