
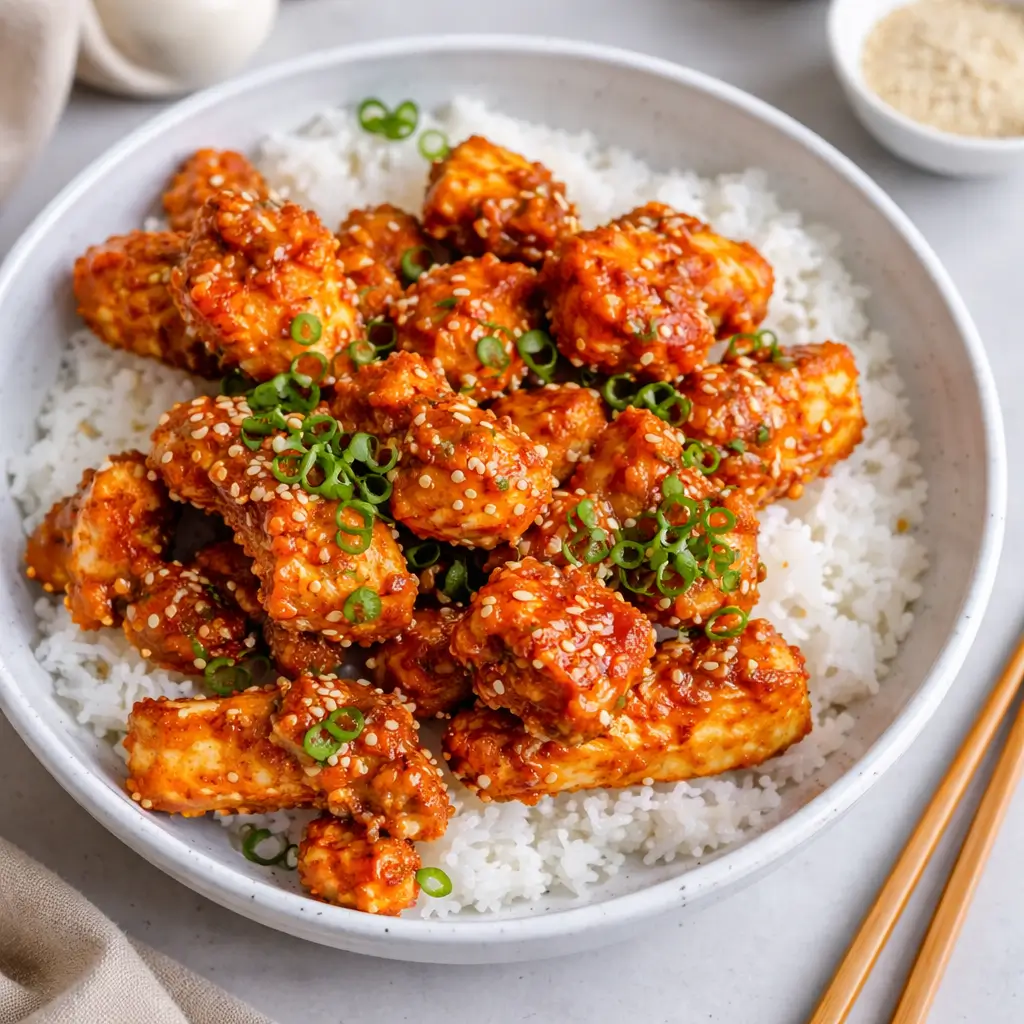
Crispy Sweet Chilli Chicken is that magical weeknight dinner that hits the sweet spot between homemade comfort and takeout satisfaction. Picture this: tender chunks of juicy chicken coated in a light, golden crust, tossed in a glossy, sticky-sweet chilli glaze with just enough heat to make your taste buds dance. It’s quick, it’s easy, and it’s ready in under 20 minutes—yes, faster than waiting for delivery.
Whether you’re feeding a hungry family, impressing your partner, or just treating yourself (because you deserve it), this Crispy Sweet Chilli Chicken recipe brings restaurant flavor right to your kitchen without the chaos. Pair it with fluffy steamed rice or even toss it into a salad for a lighter option—it’s that versatile. And here’s the best part: it’s simple enough for beginners but satisfying enough for seasoned home cooks who crave bold flavor without the fuss.
Table of Contents
What is Crispy Sweet Chilli Chicken?
Crispy Sweet Chilli Chicken is a classic Asian-inspired dish that beautifully balances crispy texture with sticky-sweet flavor. The chicken is first coated in a light cornflour batter and shallow-fried to golden perfection. Then, it’s tossed in a homemade sweet chilli sauce that’s both tangy and slightly spicy, creating that irresistible glossy coating we all crave. This dish draws inspiration from Thai flavors, but with an approachable, family-friendly twist. It’s like your favorite restaurant takeaway—but made fresher, lighter, and dare I say—better.
Reasons to Try Crispy Sweet Chilli Chicken
If you’ve ever had one of those nights when you’re craving takeout but want to skip the greasy guilt, this recipe is your saving grace. First, it’s fast—ready in just 20 minutes. Second, it uses simple pantry staples like soy sauce, rice vinegar, and sweet chilli sauce. Third, the combination of crispy coating and sticky sauce creates the ultimate comfort food. It’s also versatile—you can serve it over rice, with noodles, or alongside roasted veggies.
And let’s not forget, it reheats beautifully, making leftovers an actual joy. For those who love flavorful meals like Garlic Chicken Gnocchi Skillet or Korean Garlic Soy Chicken, this Crispy Sweet Chilli Chicken will feel like the next natural—and delicious—step in your kitchen adventures.
Ingredients Needed to Make Crispy Sweet Chilli Chicken
For the Chicken:
- 600 g (1 lb 5 oz) boneless, skinless chicken breast or thigh, cut into bite-sized pieces
- 1 tsp sweet paprika
- 1 tsp garlic powder
- ½ tsp sea salt flakes
- ½ tsp black pepper
- 1 egg
- ½ cup (60 g) cornflour (cornstarch)
- Oil for frying (vegetable, canola, or olive oil for a lighter version)
For the Sweet Chilli Sauce:
- 1 tsp freshly minced garlic
- 1 tsp freshly minced ginger
- ½ cup (125 ml) sweet chilli sauce
- ¼ cup (60 ml) tamari or soy sauce
- ¼ cup (60 ml) rice wine vinegar (or white vinegar, apple cider vinegar, or lime juice)
To Serve:
- Steamed rice
- 1 spring onion, finely sliced
- 1 tsp sesame seeds
Instructions to Make Crispy Sweet Chilli Chicken – Step by Step
Step 1: Prep and Coat the Chicken
Start by patting your chicken dry with a paper towel—this helps the coating stick better. Place the chicken pieces into a large bowl and add sweet paprika, garlic powder, salt, pepper, and the egg. Mix well with your hands or a fork until every piece is evenly coated. Then sprinkle the cornflour over the chicken, stirring again until the mixture turns into a slightly sticky paste. The cornflour and egg create a light batter that gives your chicken its signature crispy texture. If you’re feeling adventurous, check out my tips on achieving the perfect golden crust in my Oven-Baked BBQ Chicken Breast post—it’s a must-read for mastering that crunch!
Step 2: Mix Up the Sweet Chilli Sauce
In a medium bowl, whisk together minced garlic, ginger, sweet chilli sauce, soy sauce, and vinegar. The balance here is key—the sweetness of the chilli sauce meets the saltiness of the soy and the zing of vinegar. If you like extra heat, a touch of sriracha or red pepper flakes can kick things up. Set the sauce aside and let it rest; the flavors will meld beautifully while you cook the chicken.
Step 3: Fry the Chicken to Crispy Perfection
Heat oil in a deep, heavy-bottomed frying pan over medium–high heat. You don’t need to deep fry—just enough oil to cover the bottom of the pan, about ¼ inch deep. When the oil shimmers, add the chicken pieces in batches. Don’t crowd the pan—crowding traps steam and makes the coating soggy. Cook for about 5–6 minutes, flipping halfway through, until the chicken turns golden brown and crisp. Transfer to a paper towel-lined plate to drain. If you prefer a lighter version, try air frying! Coat the chicken as above but air fry at 400°F (200°C) for 6–8 minutes, shaking the basket halfway. This method keeps it just as crispy, minus the oil.
Step 4: Combine the Chicken with the Sauce
Pour off the used oil and wipe the pan clean. Return the pan to medium–low heat and pour in the sauce mixture. Let it simmer for about 2–3 minutes, stirring gently as it thickens and bubbles. The sauce will start to cling to the spoon—this is your cue to add the crispy chicken back in. Toss everything together so the chicken is evenly coated with the sticky glaze. Every piece should glisten like it’s been lacquered in sweetness and spice.
Step 5: Serve and Garnish
Scoop the chicken over fluffy steamed rice, sprinkle with sesame seeds, and top with finely sliced spring onion. For a little freshness, you can add a squeeze of lime or some chopped cilantro. This dish pairs perfectly with a side of crisp veggies or a light soup like Creamy Spinach and Potato Garden Soup.
Step 6: Optional – Make It Saucy
If you love a little extra sauce (and who doesn’t?), once the chicken is removed from the pan, add 1–2 tablespoons of boiling water to the remaining sauce. Stir and pour it over the plated chicken for that glossy restaurant-style finish.
What to Serve with Crispy Sweet Chilli Chicken
This dish is incredibly versatile. Serve it over jasmine or basmati rice for a comforting bowl meal. For a lighter twist, try it over cauliflower rice or alongside roasted vegetables. It also makes a great pairing with Asian-inspired sides like One Pan Honey Butter Garlic Chicken Rice or a bright cucumber salad to balance the sweetness.
Key Tips for Making Crispy Sweet Chilli Chicken
- Dry the chicken: Moisture is the enemy of crispiness, so pat your chicken dry first.
- Don’t overcrowd: Fry in batches to keep the coating crisp.
- Sauce timing: Only toss the chicken in the sauce right before serving to maintain that crunch.
- Oil type matters: Use a neutral, high smoke-point oil like canola or vegetable oil for even frying.
- Customize the spice: Add crushed red pepper flakes or a touch of sriracha for more heat.
Storage and Reheating Tips for Crispy Sweet Chilli Chicken
Store leftovers in an airtight container in the fridge for up to 3 days. While the coating softens slightly after storage, the chicken remains juicy. To reheat, pop it in a 350°F oven for 10 minutes or in an air fryer for 5 minutes to bring back some crispiness. Avoid microwaving—it tends to make the coating soggy. You can also store the sauce separately and toss freshly reheated chicken with it before serving for the best texture.
FAQs
Can I use chicken thighs instead of breasts? Absolutely! Thighs are juicier and hold up beautifully in this recipe.
Can I make it gluten-free? Yes—just use cornstarch and tamari instead of soy sauce.
Can I prep it ahead? You can cut and season the chicken ahead of time and refrigerate it until ready to cook.
Can I bake it instead of frying? Definitely. Coat the chicken, place it on a parchment-lined baking sheet, and bake at 425°F for about 18–20 minutes, flipping once.
Is it spicy? It’s more sweet than spicy, but you can easily adjust the heat level by choosing a mild or hot chilli sauce.
Final Thoughts
Crispy Sweet Chilli Chicken isn’t just a recipe—it’s a weeknight win. It’s quick, flavorful, and feels like a little celebration every time it hits the table. The combination of crispy texture and sweet-spicy glaze makes it a family favorite that rivals your favorite takeout spot. Try serving it with a light dessert like Easy Strawberry Crunch Poke Cake to end your meal on a sweet note. Once you make this once, trust me—you’ll be craving it again before the dishes are even done.
Visit our Pinterest for regular slow cooker recipe updates, or join our Facebook discussions where cooking fans exchange their favorite hearty meal ideas.
PrintCrispy Sweet Chilli Chicken – Quick, Easy, and Delicious

This quick and easy Crispy Sweet Chilli Chicken recipe is the perfect weeknight dinner for when you are wanting to skip the takeaway and eat a comforting meal at home.
- Prep Time: 10 minutes
- Cook Time: 10 minutes
- Total Time: 20 minutes
- Yield: 4 servings 1x
- Category: Dinner
- Method: Stovetop
- Cuisine: Asian
Ingredients
CHICKEN
- 600 g (1 lb 5 oz) boneless, skinless chicken breast or chicken thigh, cut into bite-sized pieces
- 1 tsp sweet paprika
- 1 tsp garlic powder
- ½ tsp sea salt flakes
- ½ tsp freshly cracked black pepper
- 1 egg
- ½ cup (60 g) cornflour (cornstarch)
- Oil, for frying (see note)
SWEET CHILLI SAUCE
- 1 tsp freshly minced garlic
- 1 tsp freshly minced ginger
- ½ cup (125 ml) sweet chilli sauce
- ¼ cup (60 ml) tamari or all-purpose soy sauce
- ¼ cup (60 ml) rice wine vinegar, plain white vinegar, apple cider vinegar or lime juice
TO SERVE
- Steamed rice
- 1 spring onion (scallion), finely sliced
- 1 tsp sesame seeds
Instructions
1. Place the chicken in a large bowl with the sweet paprika, garlic powder, salt, pepper, egg and cornflour. Mix the chicken well until the other ingredients form a paste around it. Set aside.
2. To make the sauce, combine all the sauce ingredients in a medium bowl. Set aside.
3. Heat the oil over medium–high heat in a large, deep, heavy-based frying pan. Cook the chicken for 5–6 minutes or until it is cooked through and golden all over, turning once halfway through. Set aside on a paper towel to drain excess oil.
4. Drain the oil from the frying pan and wipe the pan clean.
5. Heat the pan over medium–low heat and add the sauce. Stir for 2–3 minutes until the sauce begins to bubble gently and thicken. Turn the heat off and return the chicken to the pan, stirring so that it is evenly coated in the sauce.
6. Serve the chicken immediately, heaped on top of steamed rice. Top with finely sliced spring onion and a sprinkle of sesame seeds.
7. Optional: Add 1–2 tablespoons of boiling water to the pan after removing the chicken. Stir and pour the extra sauce over the finished dish.
8.
9. Air Fryer Option:
10. Coat the chicken in the egg, spices and seasoning as per the recipe, but don’t add the cornflour yet.
11. Once coated, dip each piece individually into the cornflour so it’s well covered.
12. Spray the base of your air fryer basket with oil. Place chicken in a single layer and spray generously with oil.
13. Air fry at 200°C (400°F) for 6–8 minutes, shaking or turning halfway through, until golden and cooked through.
14. Make the sauce on the stovetop and toss the crispy chicken through before serving.
Notes
The recipe uses a high smoke-point oil like vegetable or canola oil for a crispy result. Olive oil can be used for a denser texture.
Cut the chicken ahead of time and store it refrigerated to speed up prep.
Leftovers can be stored for up to 3 days in the refrigerator. The coating softens when reheated but remains tasty.
For air frying, follow the special coating and spraying steps for the best crispy finish.
Nutrition
- Serving Size: 1 portion with rice
- Calories: 450
- Sugar: 16g
- Sodium: 850mg
- Fat: 12g
- Saturated Fat: 2g
- Unsaturated Fat: 8g
- Trans Fat: 0g
- Carbohydrates: 40g
- Fiber: 1g
- Protein: 38g
- Cholesterol: 110mg


