
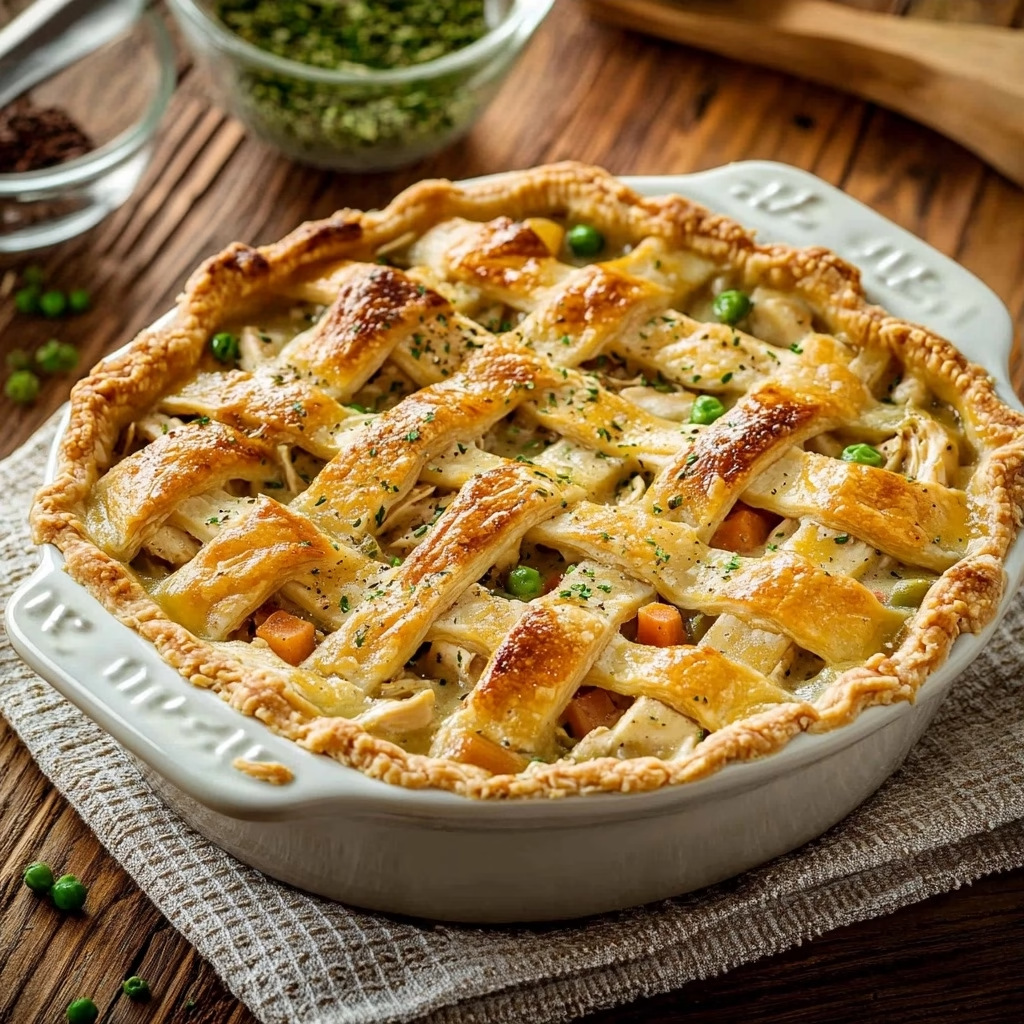
Old fashioned chicken pot pie is more than just a meal; it’s a warm hug on a plate. Imagine a creamy, savory filling brimming with tender chicken and garden-fresh vegetables, all nestled under a golden, flaky biscuit topping. This is the kind of dish that brings people together, sparking conversations and creating memories around the kitchen table. It’s the perfect recipe for those evenings when you crave something truly comforting, something that tastes like home, made with simple ingredients that you can feel good about serving to your family.
Pulling this out of the oven feels like a special occasion, even on a Tuesday. The aroma alone is enough to make everyone gather in the kitchen. It’s the kind of food that makes ordinary moments feel a little bit extraordinary, a gentle reminder of the simple joys that a home-cooked meal can bring. This recipe is designed to be approachable, so even if you’re new to making pot pie from scratch, you can achieve delicious, heartwarming results.
What is Old Fashioned Chicken Pot Pie?
Old fashioned chicken pot pie is a classic comfort food dish, essentially a hearty stew topped with a pastry crust. Its roots can be traced back to medieval times, evolving over centuries into the beloved dish we recognize today. The ‘old fashioned’ quality typically refers to a homemade, from-scratch approach, favoring a rich, creamy filling and a tender, flaky crust often made with biscuits or a pie dough.
At its heart, this pie is a celebration of simple, wholesome ingredients. Tender pieces of chicken are simmered in a velvety sauce made from chicken stock and milk, thickened just right. Then, generously mixed in are soft potatoes and vibrant frozen peas and carrots that add bursts of color and flavor. The crowning glory is the biscuit topping, baked until golden brown and slightly crispy on top while remaining fluffy and tender underneath when you cut into it.
Reasons to Try Old Fashioned Chicken Pot Pie
There are so many wonderful reasons to bring this Old Fashioned Chicken Pot Pie into your kitchen. It’s the ultimate comfort food, perfect for chilly evenings or any time you need a hearty, soul-warming meal. Beyond the incredible taste and comforting feel, this recipe is surprisingly adaptable, making it a go-to for family dinners where everyone has different preferences. Plus, the joy of seeing that golden crust bubbling in the oven is a reward in itself.
This recipe is especially perfect for beginner cooks looking to tackle a classic or for busy home cooks seeking a delicious meal that feels special without requiring hours of complicated prep. The ingredients are common, the steps are clear, and the result is a dish that looks and tastes like it came from a beloved family cookbook. It’s a wonderful way to gather everyone around the table for a truly satisfying experience.
Ingredients Needed to Make Old Fashioned Chicken Pot Pie
For the Biscuit Dough:
-
2 cups all-purpose flour, plus extra for dusting
-
½ teaspoon kosher salt
-
1 teaspoon baking powder
-
½ cup milk (any fat percentage works beautifully)
-
2 tablespoons unsalted butter, melted
For the Chicken Pot Pie Filling:
-
2 medium russet potatoes (about 1-inch cubes, peeled)
-
1 teaspoon kosher salt (for cooking potatoes)
-
¼ cup unsalted butter
-
¼ cup all-purpose flour
-
1½ cups low-sodium chicken stock
-
1 cup milk (any fat percentage)
-
1 teaspoon seasoned salt (or more kosher salt to taste)
-
1 teaspoon black pepper
-
2½ cups cooked chicken, diced or shredded (rotisserie chicken is a great shortcut!)
-
1½ cups frozen peas and carrots (no need to thaw)
For the Topping:
-
1 large egg (beaten with 1 tablespoon water for egg wash)
-
1 tablespoon sesame seeds, optional
-
1 tablespoon poppy seeds, optional
Instructions to Make Old Fashioned Chicken Pot Pie – Step by Step
Step 1: Let’s get our delicious biscuit dough started. In a large mixing bowl, combine the 2 cups of all-purpose flour, the ½ teaspoon of kosher salt, and the 1 teaspoon of baking powder. This dry mix is the foundation for our light and fluffy topping. Now, pour in the ½ cup of milk and the 2 tablespoons of melted unsalted butter. Mix everything together with a spoon or a spatula until it just comes together into a shaggy dough. It doesn’t need to be perfectly smooth at this stage.
Step 2: Turn the biscuit dough out onto a lightly floured surface. Gently pat it into a disk that’s about 1-inch thick. Try not to overwork the dough, as this can make the biscuits tough. Once you have your disk, wrap it up in some plastic wrap. Pop it into the refrigerator to chill while we get the filling ready. This chilling time helps the dough become easier to handle and ensures a lovely texture later on.
Step 3: Now, let’s prepare the potatoes. Place your peeled and cubed russet potatoes into a medium to large stockpot. Add 1 teaspoon of kosher salt to the water before it comes to a boil; this helps season the potatoes from the inside out. Cover the potatoes generously with cold tap water, making sure they are fully submerged. Bring this pot to a rolling boil over medium-high heat.
Step 4: Once the water is boiling, reduce the heat to medium-low. Let the potatoes simmer gently until they are nice and tender when you poke them with a fork, which usually takes about 15 minutes. Be careful not to overcook them into mush. When they’re perfectly tender, carefully drain all the hot water from the pot. Set these beautifully cooked potatoes aside for now; they’ll go back into our pie later.
Step 5: Time to make the creamy sauce for our filling base. In the same large stockpot (or a clean one if you prefer), melt the ¼ cup of unsalted butter over medium heat. Once the butter is fully melted and just starting to shimmer, whisk in the ¼ cup of all-purpose flour. Keep whisking to create a smooth, thick paste, often called a roux. Let this cook and toast for about 1 minute; this helps cook out the raw flour taste and adds a lovely depth of flavor to the sauce.
Step 6: This is where our sauce starts to come to life. Slowly begin to whisk in the 1½ cups of low-sodium chicken stock, adding a little at a time to ensure it’s perfectly smooth with no lumps. Once all the stock is incorporated, bring the mixture to a gentle boil while whisking constantly. It will start to thicken nicely.
Step 7: Now, stir in the 1 cup of milk. Once the milk is incorporated, season your sauce generously with 1 teaspoon of seasoned salt and 1 teaspoon of pepper. If you don’t have seasoned salt, just use more kosher salt and pepper to your liking. Bring the mixture back up to a gentle boil, whisking often to prevent sticking. Once it begins to bubble again, reduce the heat to low and let it simmer gently for 5 minutes, allowing the flavors to meld beautifully. Turn off the heat.
Step 8: Into this glorious, creamy sauce, add the cooked potatoes you set aside earlier. Now, add the 2½ cups of diced or shredded cooked chicken and the 1½ cups of frozen peas and carrots. Give everything a gentle fold with your spoon or spatula to evenly coat all the delicious ingredients in the rich sauce. We want everything to be nicely distributed throughout the filling.
Step 9: Preheat your oven to 350℉ (175℃). While the oven heats up, lightly grease a 2-quart or a 9×13 casserole dish with butter. This ensures nothing sticks and gives a lovely golden edge to the filling as it bakes.
Step 10: Pour the wonderful chicken and vegetable mixture into your prepared casserole dish. Spread it out evenly so you have a nice, consistent layer of filling ready for its topping.
Step 11: Retrieve your chilled biscuit dough from the refrigerator. Place it onto a lightly floured surface. Gently roll the dough out into a rectangle shape, aiming for about ¼-inch thickness. Using a pizza wheel or a sharp knife, cut the dough lengthwise into ½-inch-wide strips.
Step 12: Now for the beautiful lattice topping! Lay the dough strips in parallel lines, spaced about ½ inch apart, across the filling of your pot pie. If you like, you can weave additional strips crosswise over the first set to create a lovely lattice pattern. This adds a touch of elegance and ensures a delightful crust on top.
Step 13: For that perfect golden-brown finish, prepare an egg wash. In a small bowl, whisk together the 1 large egg with 1 tablespoon of water until well combined. Brush this mixture gently over all the dough strips. If you’re using them, sprinkle the optional sesame seeds and poppy seeds over the top for added texture and visual appeal.
Step 14: Place your assembled pot pie into the preheated oven. Bake for 30 to 40 minutes, or until the biscuit topping is a beautiful golden brown and the filling is bubbling hot around the edges. This bubbling indicates that everything is heated through and ready to be enjoyed.
Chef’s Tips for a Perfect Result
-
Cook your potatoes until fork-tender but not mushy; overcooked potatoes can break apart too easily in the filling.
-
Ensure your roux (butter and flour mixture) toasts for at least a minute before adding liquids to build a deeper flavor for your sauce.
-
Don’t overmix the biscuit dough; a light touch creates a tender topping.
-
For an extra flaky biscuit topping, use very cold milk and butter when making the dough, though this recipe successfully uses melted butter.
-
Use pre-cooked chicken like rotisserie chicken, which is already tender and flavorful, to save time and effort.
-
If you want a richer sauce, you can substitute half-and-half for some of the milk, but be sure to keep an eye on it to prevent scorching.
Variations and Substitutions
Vegan Option
-
What to change: Replace chicken with firm tofu or extra vegetables. Use dairy-free milk and butter. For the filling’s creaminess, a plant-based milk and a bit of nutritional yeast can work wonders. For the topping, use a plant-based milk and oil or vegan butter.
-
Suggested substitute: For the filling, use a rich mushroom or vegetable broth and incorporate extra veggies like broccoli or celery. For the topping, a simple scone or biscuit recipe using vegan butter and almond milk is a great alternative.
-
How it impacts flavor or texture: This will create a lighter, perhaps nuttier flavor profile. The texture of the topping might be slightly different depending on the vegan ingredients used.
Gluten-Free Alternative
-
What to change: Use a good quality 1:1 gluten-free flour blend for both the sauce roux and the biscuit topping. Ensure your chicken stock and any other pre-made ingredients are certified gluten-free.
-
Suggested substitute: A gluten-free all-purpose flour blend that contains xanthan gum will work well. For the topping, look for gluten-free biscuit mixes or a specific gluten-free flour blend.
-
How it impacts flavor or texture: The texture of the sauce might be slightly different, and gluten-free baked goods can sometimes be a bit denser or more crumbly. However, modern blends are excellent and yield very satisfying results.
Vegetarian Version
-
What to change: Omit the chicken and add more vegetables. Consider hearty options like mushrooms, celery, parsnips, or green beans for substance. Use vegetable broth instead of chicken stock.
-
Suggested substitute: A medley of roasted root vegetables or sautéed mushrooms can provide a satisfying meaty texture and deep flavor.
-
How it impacts flavor or texture: This version will be lighter and will highlight the fresh vegetable flavors more prominently. The earthiness of mushrooms or the sweetness of root vegetables will come through beautifully.
Budget Swap
-
What to change: Use leftover cooked chicken from a previous meal or even canned chicken for a quick fix. Swap some of the milk for a lighter milk or even water in the sauce, though this will make it less creamy. Use a simpler biscuit topping made with just flour, baking powder, salt, and milk.
-
Suggested substitute: If fresh chicken is pricey, a whole chicken roasted at home yields plenty of meat for this dish and other meals throughout the week.
-
How it impacts flavor or texture: Using less rich liquids in the sauce will make it thinner. A simpler biscuit will be less rich but still delicious. The goal is to make it accessible without sacrificing too much flavor.
How to Serve and Pair
This Old Fashioned Chicken Pot Pie is a complete meal in itself, so often it doesn’t need much else. However, if you’re looking to round out the meal, a simple side salad with a light vinaigrette makes a refreshing contrast to the rich pie. A side of steamed green beans or a crisp coleslaw also pairs beautifully. For a more casual family meal, it’s wonderful served as is, perhaps with some crusty bread for dipping into any extra creamy sauce.
Presentation-wise, serving the pot pie directly from the casserole dish allows everyone to see its golden, bubbling glory. You can also scoop generous portions onto individual plates, ensuring each person gets a hearty helping of filling and that lovely biscuit topping. It’s perfect for a cozy family dinner, a potluck where it’s sure to be a favorite, or even a comforting Sunday lunch.
Storage and Reheating
Refrigerator
Leftover chicken pot pie is a treat! Store any cooled portions in an airtight container in the refrigerator for up to 3 days. The creamy filling and biscuit topping will hold up well, making it perfect for planned leftovers.
Freezer
To freeze baked chicken pot pie, ensure it’s completely cooled. Store in a freezer-safe, oven-safe container. Wrap it tightly to prevent freezer burn, and it should keep well for up to 1 month. For unbaked pot pie, assemble everything, but skip the egg wash. Cover tightly with plastic wrap and a layer of foil and freeze for up to 1 month. Thaw overnight in the refrigerator before baking.
Room Temperature
It’s best to not leave chicken pot pie at room temperature for extended periods, as it is a dairy and chicken-based dish. Consume or refrigerate within 2 hours of it coming out of the oven.
Reheating
The best way to reheat is in the oven. For a whole pie or larger portions, reheat, covered loosely with foil to prevent the topping from getting too dark, at 350°F (175℃) for about 25-35 minutes, until heated through and bubbling. For individual servings, the microwave is a convenient option; reheat on 50% power in 1-minute intervals until warm, being careful not to dry out the biscuit topping.
Frequently Asked Questions (FAQ)
What are the best chicken substitutes for this Old Fashioned Chicken Pot Pie?
You can easily substitute the cooked chicken with shredded turkey, diced ham, or even firm tofu for a vegetarian option. Rotisserie chicken is a fantastic quick and flavorful choice if you don’t have leftover cooked chicken.
How can I tell when my Old Fashioned Chicken Pot Pie is perfectly done?
Your pot pie is done when the biscuit topping is beautifully golden brown, and the filling is visibly bubbling hot around the edges of the dish. A quick poke with a knife into the center should confirm the filling is heated through.
My biscuit topping is soggy, how can I prevent this?
Ensure the filling isn’t too wet before adding the topping, and always preheat your oven thoroughly. Baking the pot pie uncovered until the topping is golden and bubbling helps it crisp up. If reheating, using the oven is preferred over the microwave to maintain crispness.
Can I make the Old Fashioned Chicken Pot Pie filling ahead of time?
Yes, the filling can be made up to 2 days in advance and stored in an airtight container in the refrigerator. Assemble and bake just before serving to ensure the best texture for the biscuit topping.
What are some easy ways to customize or serve this pie?
You can customize this pie with different vegetables like celery, broccoli, or leeks. For serving, a sprinkle of fresh parsley over the top after baking adds a nice touch of green and fresh flavor.
CONCLUSION
This Old Fashioned Chicken Pot Pie offers a wonderfully comforting and familiar taste that’s deeply satisfying. It’s a perfect centerpiece for any family meal, bringing warmth and deliciousness to your table. We encourage you to try this recipe; it truly embodies the simple joy of home cooking with its creamy filling and delightful biscuit topping. The combination of tender chicken, savory vegetables, and that golden crust is simply irresistible.
PrintOld Fashioned Chicken Pot Pie

A comforting classic with tender chicken, hearty vegetables, and a golden biscuit topping. This creamy, homemade pie brings warmth to any meal with its rustic charm and nostalgic flavors.
- Prep Time: 30
- Cook Time: 40
- Total Time: 70
- Yield: 6 servings 1x
- Category: Dinner
- Method: Baking
- Cuisine: American
Ingredients
1.5 lbs boneless, skinless chicken thighs
2 tbsp butter
1 medium onion, chopped
3 cloves garlic, minced
3 cups frozen mixed vegetables (peas, carrots, corn)
2 cups peeled and cubed potatoes
2 cups chicken stock
1 cup milk
1/4 cup all-purpose flour
1 tsp dried thyme
1 tsp salt
1/2 tsp black pepper
1 1/2 cups biscuit dough or 2 cups flour, 1 tbsp sugar, 1 tsp baking powder, 1/2 tsp salt, 1/2 cup softened butter, 3/4 cup milk, 1 egg
Instructions
Preheat oven to 400°F (200°C)
Sauté chicken in butter until browned; set aside
Cook onions and garlic in remaining butter
Add flour and stir to make a roux
Gradually whisk in chicken stock and milk; bring to a boil
Stir in vegetables, potatoes, thyme, salt, and pepper
Simmer until thickened; add cooked chicken
Transfer to a 9-inch pie dish
Prepare biscuit dough (or use pre-made)
Drop mounds of dough over mixture
Brush with milk/egg wash
Bake 30-35 minutes until golden
Notes
For shortcut version, use refrigerated biscuit dough
Add a splash of lemon juice for brightness
Leftovers freeze well up to 2 months
Bake in a cold oven (no preheating) for a moister base
Nutrition
- Serving Size: 1 slice (1/6 of pie)
- Calories: 450
- Sugar: 5g
- Sodium: 630mg
- Fat: 22g
- Saturated Fat: 10g
- Carbohydrates: 42g
- Fiber: 3g
- Protein: 28g
- Cholesterol: 110mg


