
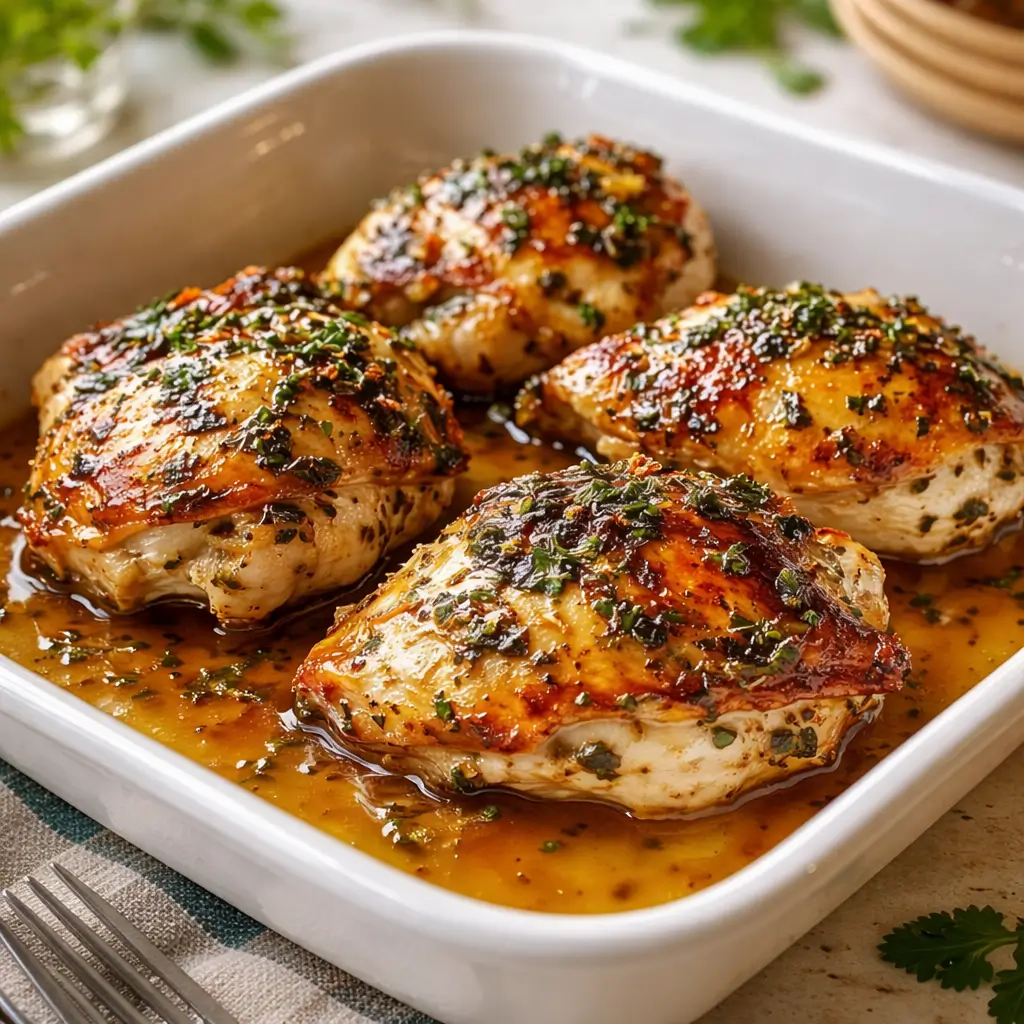
Addictively Good Baked Chicken Thighs are the kind of meal that makes you forget every other chicken recipe you’ve ever tried. When you’re staring at the fridge after a long day, wondering how to feed a hungry family without spending hours over a hot stove, this Addictively Good Baked Chicken Thigh recipe swoops in to save the day. It’s a massive hit because it combines that coveted, shatter-crisp skin with meat so juicy it practically melts. Honestly, I used to struggle with dry poultry, but once I figured out the right spice blend and oven temp, it changed my life. You don’t need fancy culinary skills to pull this off; you just need a hearty appetite and a few basic pantry staples. Whether you’re a busy mom juggling a million tasks or a professional looking for a reliable win, these Addictively Good Baked Chicken Thighs deliver every single time.
What is Addictively Good Baked Chicken Thigh?
When we talk about an Addictively Good Baked Chicken Thigh, we are talking about the holy grail of weeknight dinners. Specifically, this dish features bone-in, skin-on thighs that we coat in a savory blend of garlic, onion, and paprika. The magic happens in the high-heat oven, which renders the fat from the skin until it becomes golden and crackling, while the bone keeps the interior remarkably tender. It isn’t just “another chicken dish”; it is a reliable, budget-friendly powerhouse that tastes like a luxury meal. If you’ve ever felt like healthy eating is boring, this recipe will flip that perspective immediately because it feels like a total feast without the grease of deep frying. It’s the kind of meal that smells so good while cooking that your neighbors might just start knocking on your door.
Reasons to Try Addictively Good Baked Chicken Thigh
There are so many reasons why this Addictively Good Baked Chicken Thigh should become your new go-to. First, it is unbelievably simple; you basically toss everything in a bowl and let the oven do the heavy lifting. Second, it’s a total crowd-pleaser for picky eaters who usually turn their noses up at anything “healthy.” Third, the cleanup is a breeze if you use parchment paper, which is a major victory for anyone who hates scrubbing pans. Additionally, chicken thighs are much more forgiving than breasts, so even if you leave them in for an extra five minutes, they stay succulent. You also get a great bang for your buck since thighs are often the most affordable cut at the grocery store. It’s a win for your wallet and your taste buds, providing a high-protein dinner that keeps everyone full and happy.
Ingredients Needed to Make Addictively Good Baked Chicken Thighs
- 4 pieces chicken thighs: Make sure they are skin-on and bone-in for that spectacular texture.
- 2 tablespoons olive oil: This helps the spices stick and makes the skin extra crispy; feel free to use avocado oil if you prefer.
- 1 teaspoon garlic powder: It adds a punchy flavor that seeps deep into the meat.
- 1 teaspoon onion powder: This provides a subtle sweetness and depth to the crust.
- 1 teaspoon paprika: Use smoked paprika if you want a daring, earthy kick.
- Salt: Add this to taste to bring all the savory notes to life.
- Pepper: Freshly ground black pepper adds just the right amount of grit and heat.
Instructions to Make Addictively Good Baked Chicken Thighs – Step by Step
Step 1: Prep Your Space and Heat the Oven
To start this Addictively Good Baked Chicken Thigh Step by Step process, you need to get your oven roaring. Preheat it to 425°F (220°C). This high temperature is the secret to getting that skin to pop and sizzle rather than just getting soggy. While the oven heats up, grab a baking sheet and line it with parchment paper. This is a pro move because it prevents the chicken from sticking and makes your post-dinner cleanup amazingly fast. If you don’t have parchment, a light coating of oil on the pan works, but the paper is a total game-changer for maintaining that crisp bottom.
Step 2: Whisk Your Flavor Bomb
Next in our Step by Step guide, grab a medium bowl to mix your seasoning. Pour in your olive oil and then dump in the garlic powder, onion powder, paprika, salt, and pepper. Use a whisk or a fork to stir it until it looks like a thick, vibrant red paste. This step is where the soul of the dish lives. By mixing the spices into the oil first, you ensure that every single inch of the chicken gets a fair share of the flavor. You won’t end up with one bite that’s too salty and another that’s bland; it’s all about that perfect, uniform distribution.
Step 3: Coat the Chicken Thoroughly
Now, take your chicken thighs and pat them dry with a paper towel. This is a crucial Step by Step tip—dry skin equals crispy skin! Once they are dry, drop them into the bowl with your spice mixture or use a brush to coat them. You want to be generous here. Don’t be afraid to get your hands dirty and really rub that oil and spice into the nooks and crannies. Make sure the underside is coated too, but focus most of your energy on that beautiful skin on top.
Step 4: Arrange for Success
Carefully place the chicken thighs on your prepared baking sheet. You want to keep them skin-side up so the heat can hit that fat directly. One big mistake people make is crowding the pan; ensure there is a little breathing room between each piece. If they are touching, they will steam instead of roast, and you’ll lose that jaw-dropping crunch. This Step by Step placement ensures the hot air can circulate around the whole thigh, cooking it evenly from every angle.
Step 5: The Golden Roast
Slide the tray into the center of the oven and let the magic happen for 35 to 45 minutes. You are looking for a deep, golden-brown color on the skin. If you have a meat thermometer, this is the time to use it. You want the internal temperature to hit 165°F (75°C) right at the thickest part of the meat without hitting the bone. If the skin isn’t quite as dark as you’d like by the time the meat is done, you can always flip on the broiler for the last two minutes. Just stay close—the broiler is a fickle friend and can burn your masterpiece in seconds!
Step 6: The Vital Rest
The final move in our Step by Step journey is often the hardest: waiting. Once you pull that tray out, let the chicken rest for 5 minutes. I know it smells incredible and you want to dive in, but resting allows the juices to settle back into the meat. If you cut into it immediately, all that delicious moisture will run out onto the plate, leaving you with a drier piece of chicken. Give it a moment to breathe, and then serve it up while it’s still hot and crackling.
What to Serve with Addictively Good Baked Chicken Thighs
These thighs are so versatile that they play well with almost anything on your table. For a classic American comfort meal, serve them alongside some fluffy mashed potatoes or a pile of roasted root vegetables. If you’re looking for something a bit lighter, a crisp green salad with a zesty vinaigrette provides a wonderful contrast to the rich, savory chicken. I also love pairing them with steamed green beans or sautéed spinach for a quick hit of nutrition. If you have some crusty bread handy, use it to soak up any of the juices left on the plate—trust me, you won’t want to waste a single drop of that flavor.
Key Tips for Making Addictively Good Baked Chicken Thighs
The biggest tip I can give you is to never skip the “pat dry” step. Moisture is the enemy of a good sear. Also, if you want to experiment, try adding a pinch of cayenne pepper for a spicy surprise or some dried thyme for a more herbal, earthy vibe. Another great trick is to use a wire rack set inside your baking sheet; this lifts the chicken up and allows the heat to get underneath, making the bottom just as firm as the top. Lastly, always buy the best quality chicken you can afford, as the natural flavor of the meat really shines through in such a simple preparation.
Storage and Reheating Tips Addictively Good Baked Chicken Thighs
If you actually have leftovers—which is rare in my house—store them in an airtight container in the fridge for up to three days. To keep the skin from getting rubbery when you reheat them, avoid the microwave if possible. Instead, pop them back into a 350°F oven or an air fryer for about 8 to 10 minutes. This will wake up the fats and bring back some of that original crunch. They are also fantastic cold, sliced up over a salad for a quick lunch the next day.
FAQs
Can I use boneless thighs? Yes, but they will cook much faster, usually in about 20-25 minutes, and they won’t be quite as juicy as the bone-in version.
Is paprika necessary? It’s mostly for that gorgeous color and a hint of sweetness, but you can swap it for chili powder if you want more heat.
Can I prep these in advance? Absolutely! You can coat them in the spice rub and keep them in the fridge for a few hours before baking to let the flavors penetrate even deeper.
Final Thoughts
Making these Addictively Good Baked Chicken Thighs is a surefire way to bring a little joy to your dinner routine. It’s a reliable, fantastic recipe that proves you don’t need a huge budget or a lot of time to create something truly spectacular. The combination of simple pantry spices and the natural richness of the chicken creates a result that is better than any takeout you could order. I hope this becomes a staple in your kitchen just like it has in mine. It is a powerful reminder that the best meals are often the simplest ones, made with love and a little bit of heat. Give this recipe a try tonight, and prepare to be the hero of your household!
PrintAddictively Good Baked Chicken Thigh: Best Crispy Recipe

Tender, juicy baked chicken thighs with crispy skin and bold seasoning. This easy oven-baked recipe is simple to prepare and packed with savory flavor.
- Prep Time: 15 minutes
- Cook Time: 45 minutes
- Total Time: 1 hour
- Yield: 4 pieces 1x
- Category: Dinner
- Method: Baking
- Cuisine: American
- Diet: Gluten Free
Ingredients
- 4 chicken thighs, skin-on
- 2 tablespoons olive oil (or avocado oil)
- 1 teaspoon garlic powder
- 1 teaspoon onion powder
- 1 teaspoon paprika (smoked paprika optional)
- Salt to taste
- Freshly ground black pepper to taste
Instructions
1. Preheat the oven to 425°F (220°C) and line a baking sheet with parchment paper.
2. In a medium bowl, whisk together olive oil, garlic powder, onion powder, paprika, salt, and pepper.
3. Coat each chicken thigh thoroughly with the seasoning mixture.
4. Place the chicken thighs skin-side up on the prepared baking sheet, leaving space between each piece.
5. Bake for 35–45 minutes until the skin is golden brown and the internal temperature reaches 165°F (75°C).
6. Allow the chicken to rest for about 5 minutes before serving so the juices redistribute.
Notes
For extra crispy skin, broil the chicken thighs for the last 2–3 minutes of cooking while watching carefully to prevent burning.
Fresh minced garlic can be used instead of garlic powder if preferred.
Serve with roasted vegetables, rice, or a fresh salad for a complete meal.
Nutrition
- Serving Size: 1 piece
- Calories: 400
- Sugar: 0g
- Sodium: 250mg
- Fat: 30g
- Saturated Fat: 8g
- Unsaturated Fat: 20g
- Trans Fat: 0g
- Carbohydrates: 1g
- Fiber: 0g
- Protein: 25g
- Cholesterol: 100mg


