
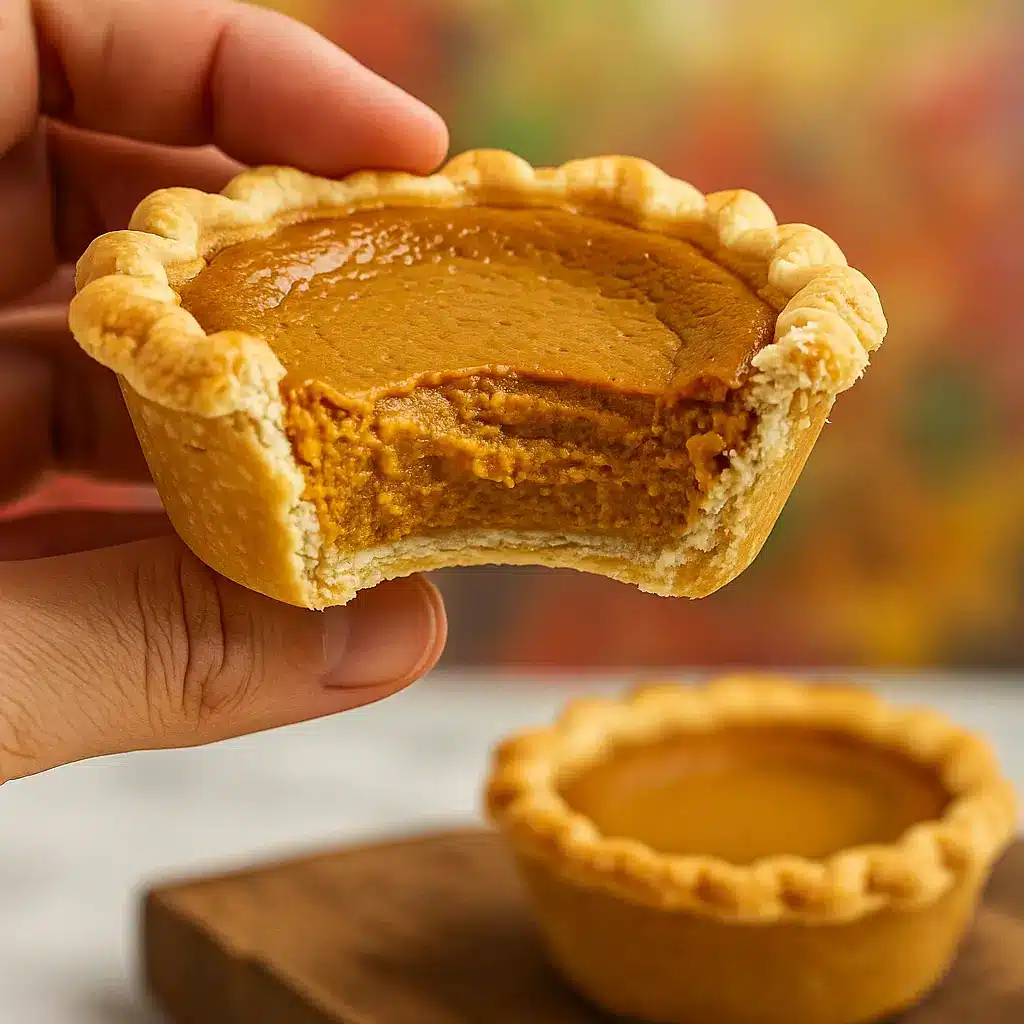
How to Make Perfect Mini Pumpkin Pies at Home is a question I hear every fall from friends who crave pumpkin spice but don’t want to commit to a whole pie. If you’ve ever looked at a giant slice of pie after a hearty meal and thought, “I just want a taste,” this recipe is your answer. Mini pumpkin pies are cozy, flavorful, and—let’s be real—downright adorable. Plus, they’re the kind of treat that makes you look like you tried really hard (even if you didn’t). The primary keyword How to Make Perfect Mini Pumpkin Pies at Home isn’t just the title—it’s your new favorite fall trick. Let’s jump into the buttery, spiced goodness.
Table of Contents
What is a Mini Pumpkin Pie?
A mini pumpkin pie is just what it sounds like—your favorite classic pumpkin pie shrunk down into a single-serving treat. Think of it as the cupcake version of pie: individually portioned, perfectly crusted, and full of creamy, spiced filling that hits every warm, nostalgic note of fall. These cuties are baked in muffin tins, making them easy to serve, pack, and share. And here’s the kicker—no slicing, no mess, no one fighting for the biggest piece. Just sweet simplicity. Whether you’re prepping for Thanksgiving or a cozy weekend at home, knowing how to make perfect mini pumpkin pies at home gives you the edge in every fall gathering.
Reasons to Try How to Make Perfect Mini Pumpkin Pies at Home
First of all, they’re ridiculously easy. With store-bought crust and a quick filling, you’ll have these babies in the oven before your coffee cools. Second, the serving size is genius. No more “just a sliver” lies—everyone gets their own, and you can even sneak one with your morning coffee (no judgment here). Third, they travel well. Heading to a potluck or planning a bake sale? These mini pies are grab-and-go gold. Lastly, you can customize them. Add whipped cream, sprinkle with cinnamon, or drizzle on some caramel. So if you’ve been wondering how to make perfect mini pumpkin pies at home, just know—it’s easy, it’s fun, and it’s bound to impress.
Ingredients Needed to Make Mini Pumpkin Pies
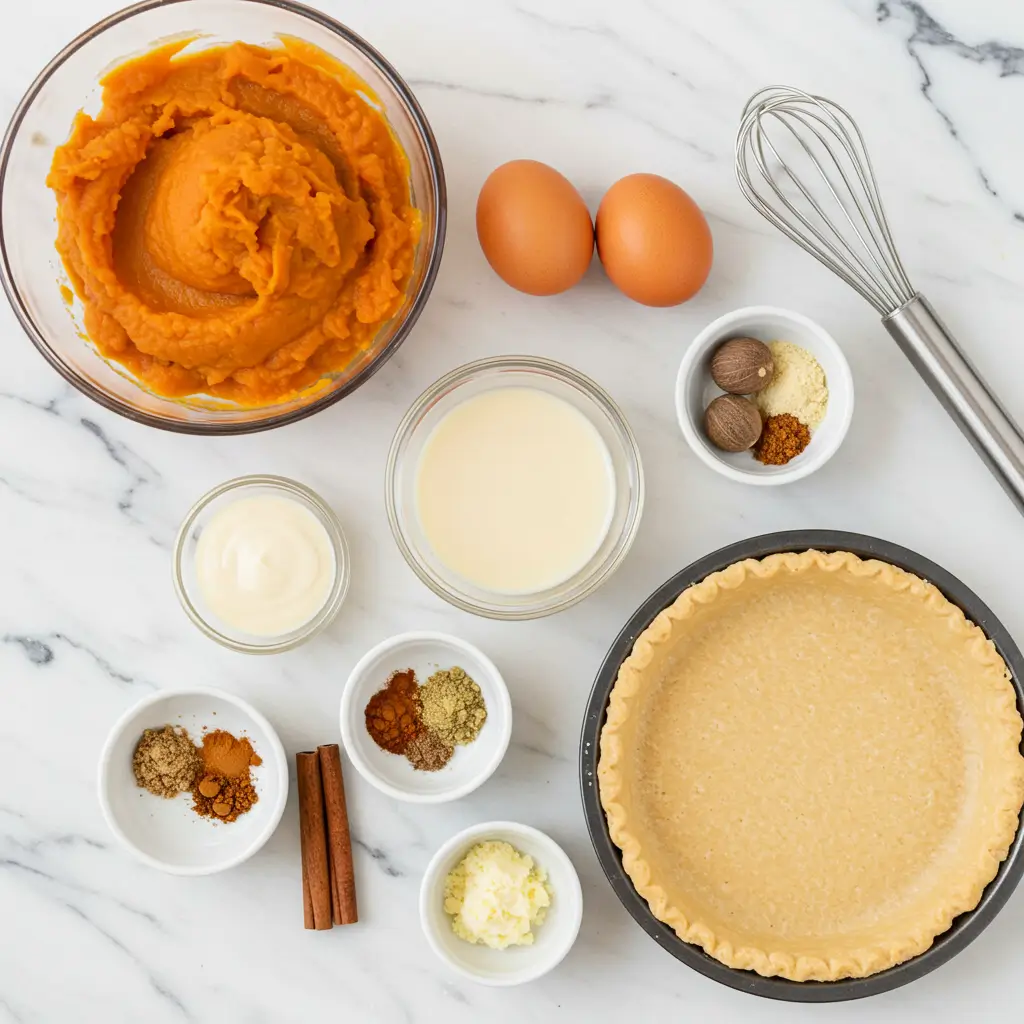
- 1 box store-bought pie crust, kept chilled
- 1 can (15 oz) pumpkin puree, unsweetened
- 1 can (14 oz) sweetened condensed milk
- 2 medium eggs + 1 extra yolk, room temperature
- 1 teaspoon ground cinnamon
- ½ teaspoon ground ginger
- ½ teaspoon ground nutmeg
- A small pinch of salt
Instructions to Make Mini Pumpkin Pies – A Step-by-Step Guide
If you’re wondering exactly how to make perfect mini pumpkin pies at home, this step-by-step guide is here to make it a total breeze. Whether you’re a seasoned baker or still learning what a pastry cutter is, this process breaks everything down into clear, doable stages—so there’s no guesswork, just cozy success. Let’s dive into each step with all the tips, tools, and know-how you need.
Step 1: Preheat the Oven and Prep Your Pan
Before anything else, preheat your oven to 400°F (200°C). This higher temperature kickstarts the baking process and helps that buttery crust get crisp and golden right out of the gate. While the oven’s warming up, grab a standard muffin tin (12 or 24-cup, depending on your batch size). Lightly spray each muffin cup with non-stick cooking spray, or for a richer finish, dab a little butter into each one using a paper towel. Don’t skip this step—it keeps your mini pies from sticking and helps the crust bake evenly. For more ideas on prepping baking pans like a pro, check out these helpful preparation tips.
Step 2: Cut and Shape Your Mini Pie Crusts
Roll out your chilled store-bought pie crust on a lightly floured surface. Using a round cookie cutter (about 3.5–4 inches) or even the rim of a drinking glass, cut out circles slightly larger than the openings of your muffin tin. Press each crust round gently into the muffin wells, letting the edges rise up and fold naturally. It’s okay if they look a little rustic—that’s part of the charm. If the dough softens too much while working, just pop the pan in the fridge for 10 minutes. For those looking to get creative or go the homemade route, you can learn how to make an easy homemade pie crust in advance and freeze it for later use.
Step 3: Mix the Creamy Pumpkin Filling
In a medium mixing bowl, combine 1 can of pumpkin puree, 1 can of sweetened condensed milk, 2 whole eggs, 1 egg yolk, and your spices: 1 tsp cinnamon, ½ tsp ground ginger, ½ tsp nutmeg, and just a small pinch of salt. Use a whisk or silicone spatula to stir everything together until silky smooth. The key here is to gently mix—you want a velvety texture, not a bubbly or airy one. Overmixing can cause the filling to crack while baking. If you’re looking to tweak the flavors, adding a drop of vanilla extract or maple flavoring can deepen that autumnal richness
Step 4: Fill the Mini Crusts with Pumpkin Mixture
Using a spoon or small scoop, carefully fill each crust with your pumpkin mixture, stopping just below the rim. Leave a bit of room for the filling to puff up slightly while baking. A small offset spatula or the back of a spoon is perfect for smoothing the tops if you want that flawless finish (especially if you’re dressing them up for a party or bake sale). This is also the time to get creative—feel free to sprinkle a little extra cinnamon on top, or press a pecan into the center for a decorative touch.
Step 5: Bake in Two Stages for the Perfect Texture
Here’s the secret to these mini pies: the two-stage bake. Slide the muffin tin into your preheated oven and bake at 400°F for 10 minutes. This sets the crust and helps the filling start to firm up. After 10 minutes, reduce the oven temperature to 325°F (160°C) without opening the door. Bake for another 10 minutes, or until the centers are set but still have a slight jiggle—like the center of a cheesecake. This method prevents cracks and keeps the texture creamy and dreamy. Want to avoid over-browned crust edges? Loosely cover the tops with small strips of foil during the second half of baking.
Step 6: Cool and Serve (Or Sneak a Bite)
Once baked, let the mini pumpkin pies cool in the tin for about 10 minutes. This helps the filling settle and makes them easier to remove. Run a butter knife gently around the edges if needed, then use a spoon or offset spatula to lift them out and transfer to a cooling rack. Let them cool completely if you plan to store or decorate them, or serve warm with a dollop of cinnamon whipped cream for a cozy, just-out-of-the-oven treat.
By following this step-by-step guide, you’ll master how to make perfect mini pumpkin pies at home—no fuss, no fancy tools, just real ingredients and real flavor. Whether you’re prepping for Thanksgiving, a fall party, or a sweet weekend snack, this method guarantees success.
What to Serve with Mini Pumpkin Pies
Mini pumpkin pies are stars on their own, but here’s how to give them a supporting cast that sings. Pair them with a dollop of cinnamon-spiced whipped cream—light, fluffy, and basically a sweater for your pie. Or, pour a warm maple latte or chai tea for that full fall experience. Want a little crunch? Add candied pecans or toasted walnuts on top. For an extra cozy touch, try serving them alongside sautéed apple slices with butter and cinnamon. It’s like a fall dessert board. Want another comforting fall treat? Try spiced apple zucchini bread for a sweet-savory balance.
Key Tips for Making Mini Pumpkin Pies
- Keep the crust cold until ready to use. A cold crust means flaky layers that bake up golden and crisp.
- Room temp eggs are your filling’s best friend. Cold eggs can mess with the texture and cause uneven baking.
- Don’t overfill the crusts. Leave just a little space at the top. Overflow = cleanup you don’t want.
- Two-stage baking keeps the crust from overbaking and helps avoid cracked tops.
- Got darkened edges? Cover them with small foil strips halfway through baking.
- A small spatula is magic for lifting them out cleanly.
Storage and Reheating Tips for Mini Pumpkin Pies
For short-term munching, keep them at room temp in an airtight container for up to 2 days. Hosting a weekend brunch? You’re covered. For longer freshness, refrigerate them for up to 5 days. Just bring them to room temp before serving or give them a quick zap in the microwave to bring back that just-baked warmth. Want to stash some for later? Wrap each pie in plastic wrap, place in a freezer bag, and freeze for up to 2 months. When the craving hits, thaw overnight in the fridge and warm them up for a minute. It’s the homemade magic—on demand.
FAQs
Can I use homemade crust?
Totally! Just roll it out thin and chill it well before cutting your circles.
Can I make them dairy-free?
Yes—swap the sweetened condensed milk for a dairy-free version or full-fat coconut milk with a little maple syrup for sweetness.
Why did my crust shrink?
It’s probably too warm. Chill the dough before pressing it into the muffin tin, and don’t stretch it too tight.
Can I make these ahead?
Yep! Bake and store them in the fridge or freezer. They’re perfect make-ahead treats for holidays and parties.
Final Thoughts
If you’ve ever wondered how to make perfect mini pumpkin pies at home, this recipe is your cozy answer. Easy to bake, hard to resist, and adorable enough to steal the dessert spotlight. Whether you’re hosting Thanksgiving or just want something sweet while bingeing your favorite fall show, these mini pies deliver.
Visit our Pinterest for regular slow cooker recipe updates, or join our Facebook discussions where cooking fans exchange their favorite hearty meal ideas.
PrintPerfect Mini Pumpkin Pies: Easy Fall Dessert You’ll Love
Bite-sized and cozy, these Mini Pumpkin Pies are pure fall delight. Flaky, buttery crust and creamy spiced pumpkin filling make each one feel like a warm hug. Easy to make, shareable, and perfect for any autumn day.
- Prep Time: 10 minutes
- Cook Time: 20 minutes
- Total Time: 30 minutes
- Yield: 15 mini pies 1x
- Category: Pies & Tarts
- Method: Baking
- Cuisine: American
- Diet: Vegetarian
Ingredients
- 1 can pumpkin puree (15 oz, unsweetened)
- 1 can sweetened condensed milk (14 oz)
- 2 medium eggs plus 1 extra yolk, room temperature
- 1 box store-bought pie crust, kept chilled
- A small pinch of salt
- 1 teaspoon ground cinnamon
- ½ teaspoon ground ginger
- ½ teaspoon ground nutmeg
Instructions
1. Set the oven to 400°F (200°C) and lightly butter or spray a muffin tin.
2. Roll the chilled pie dough flat and cut circles a bit larger than the muffin wells, using whatever round cutter you have on hand.
3. Press the crust into the cups and let the edges fold naturally; those little rustic folds give each mini pie a homemade charm.
4. Place the pumpkin puree in a medium bowl, then pour in the condensed milk. Add the eggs along with the extra yolk, followed by the cinnamon, ginger, nutmeg, and a light touch of salt.
5. Whisk everything together until the batter turns silky and evenly mixed. Be gentle, you want a silky filling, not a frothy one.
6. Spoon the filling into each prepared crust, filling just below the top to leave room for a gentle rise.
7. Bake at 400°F for 10 minutes to set the crust and start cooking the filling, then reduce the oven to 325°F (160°C) and bake for another 10 minutes.
8. Keep an eye on the crust edges, if they start browning too fast, cover them loosely with foil.
9. Once baked, transfer the mini pies to a cooling rack for at least 10 minutes to allow the filling to firm up.
10. Admire the warm, golden edges for a moment, then treat yourself.
Notes
Wrap several in parchment paper, finish with a twine bow, and you’ve got an instant autumn treat to give.
You can add a pinch of ground cloves or allspice to the filling for a subtle, warm depth of flavor.
Also you can add a drop of vanilla or maple extract to the filling for a warm, inviting smell.
Nutrition
- Serving Size: 1 mini pie
- Calories: 135
- Sugar: 12g
- Sodium: 95mg
- Fat: 6g
- Saturated Fat: 2g
- Unsaturated Fat: 3g
- Trans Fat: 0g
- Carbohydrates: 18g
- Fiber: 1g
- Protein: 3g
- Cholesterol: 35mg


