
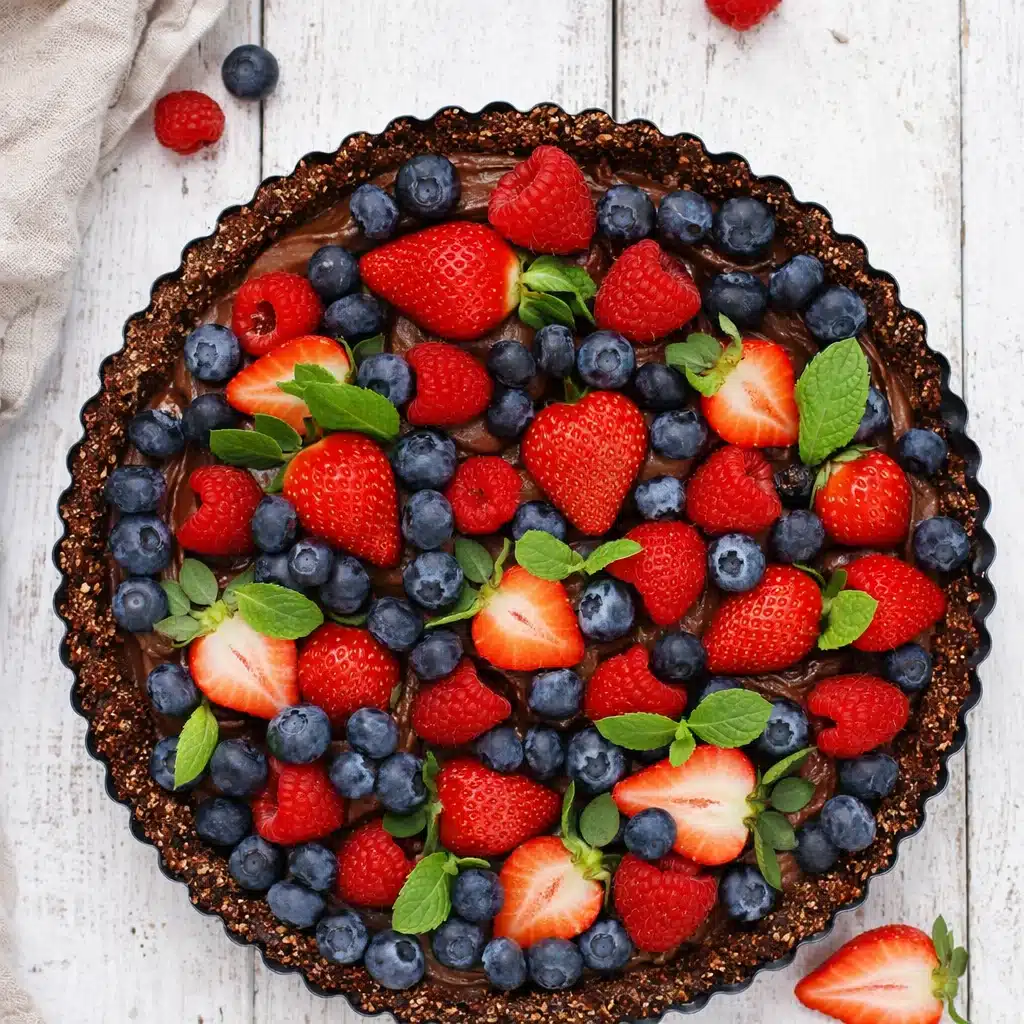
Looking for a dessert that’s as easy as it is delicious? The No Bake Chocolate Berry Tart is a game changer. It’s perfect for anyone craving a rich, chocolatey dessert but doesn’t want to deal with turning on the oven. Plus, it’s vegan, gluten-free, and free of refined sugars—making it a treat you can feel good about. Whether you’re hosting a party, prepping for a family dinner, or just need a sweet pick-me-up, this tart is here to steal the show. Fresh berries on top add a burst of color and sweetness, while the chocolate filling is so creamy, it’ll have you wondering why you didn’t try this sooner. Let’s get started!
Table of Contents
What is No Bake Chocolate Berry Tart?
The No Bake Chocolate Berry Tart is exactly what it sounds like—a decadent chocolate tart that requires zero baking! Made with wholesome ingredients like oats, coconut oil, and maple syrup, this dessert is the perfect balance of indulgent and guilt-free. The crust is a simple blend of oats and cocoa powder, creating a satisfying crunch that perfectly complements the smooth chocolate filling. Topped with fresh berries, it’s a dessert that’s as visually stunning as it is delicious. And because it’s both vegan and gluten-free, it’s the ideal treat for just about any dietary need.
Reasons to Try No Bake Chocolate Berry Tart
There are plenty of reasons why the No Bake Chocolate Berry Tart deserves a spot on your dessert table. First, it’s no-bake, meaning you don’t have to worry about heating up the oven or spending hours in the kitchen. Perfect for busy nights, this recipe comes together in about 45 minutes and sets in the fridge. Second, it’s a crowd-pleaser. Whether you’re serving it at a dinner party, a holiday gathering, or just a casual family meal, it’s sure to impress. Last but not least, it’s made with wholesome ingredients that are both dairy-free and gluten-free. You get to indulge in a rich chocolate dessert without the guilt—because, let’s be honest, who can resist chocolate and berries?
Ingredients Needed to Make No Bake Chocolate Berry Tart
For the crust:
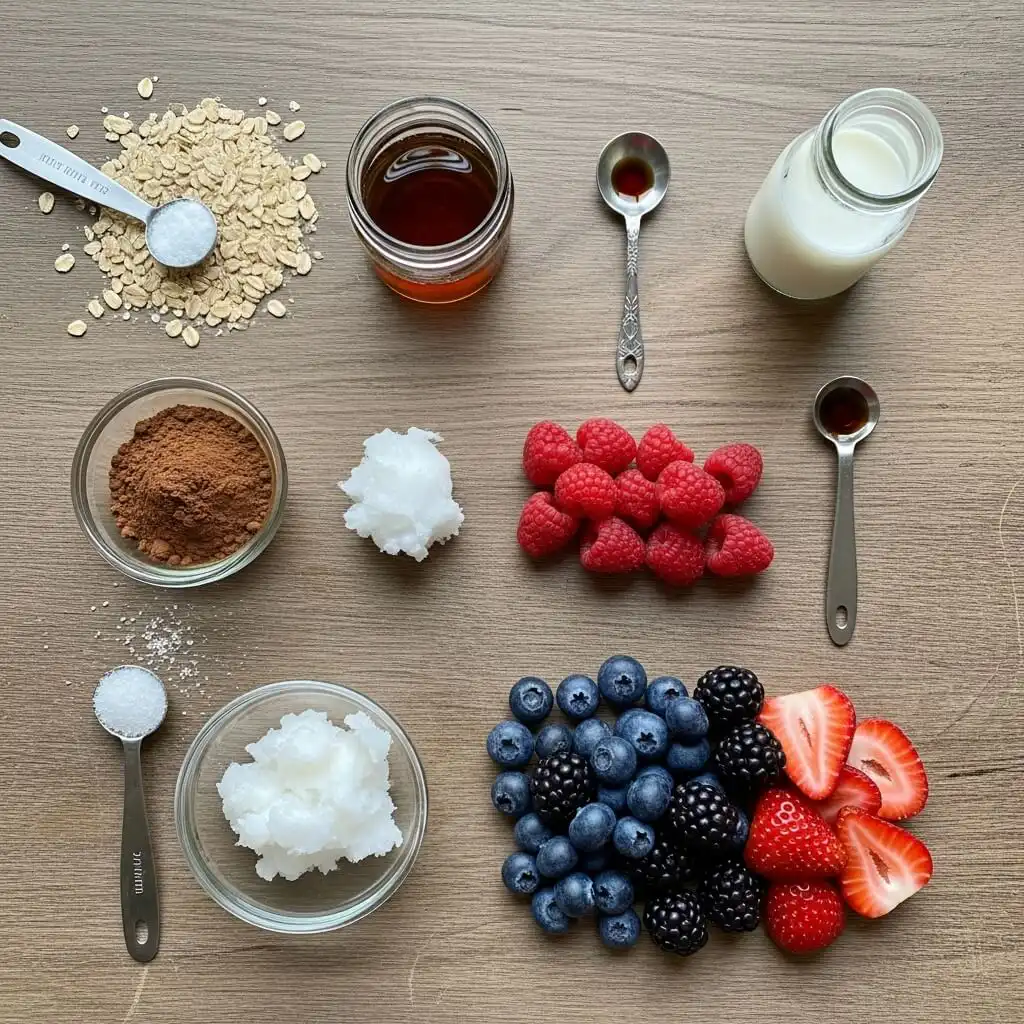
- 1 3/4 cup rolled oats (certified gluten-free if needed)
- 2/3 cup unsweetened cocoa powder
- 1/3 cup pure maple syrup
- 2 tablespoons coconut oil
- A pinch of kosher salt
For the chocolate filling:
- 1/3 cup pure maple syrup
- 1/3 cup coconut oil
- 1/3 cup coconut milk
- 2/3 cup unsweetened cocoa powder
- 1 1/2 teaspoons vanilla extract
- 1/4 teaspoon kosher salt
For the topping:
- 1 1/2–2 cups fresh berries (raspberries, strawberries, blueberries)
- Fresh mint leaves (optional), for garnish
Instructions to Make No Bake Chocolate Berry Tart: Step by Step Guide
Making the No Bake Chocolate Berry Tart is as simple as it is satisfying. Follow this step-by-step guide to create a dessert that’s guaranteed to impress. It requires just a few ingredients, a little bit of patience, and, of course, the magic of fresh berries and rich chocolate. Let’s dive in!
Step 1: Make the Crust
The crust is the foundation of any tart, and this one is made from rolled oats, cocoa powder, and a hint of maple syrup for natural sweetness. Here’s how to get it just right:
- Prepare the Oats – Begin by placing 1 3/4 cups of rolled oats in a food processor. Pulse them a few times to break them up slightly. The goal is to create a rough oat flour texture but not turn it into a fine powder. You want a bit of texture for the crust, so don’t over-process!
- Add the Cocoa Powder – Next, add 2/3 cup of unsweetened cocoa powder to the oats. This is what gives your crust that deep, rich chocolate flavor. If you’re looking for an extra boost of chocolate, you can add a pinch more cocoa powder, but this amount is perfect for a balanced taste.
- Sweeten and Bind – Pour in 1/3 cup of pure maple syrup and 2 tablespoons of coconut oil. The maple syrup will sweeten the crust naturally, while the coconut oil helps everything stick together and adds richness. Sprinkle in a pinch of kosher salt to bring out all the flavors.
- Process Until Combined – Blend everything in the food processor until the mixture starts to come together. It should look crumbly, but when you pinch it between your fingers, it should hold together. If it’s too dry, add coconut oil 1/2 teaspoon at a time until it’s just right.
- Form the Crust – Transfer the dough into a tart pan (preferably one with a removable bottom for easy serving). Use your fingers or the bottom of a cup to press the mixture evenly along the base and up the sides of the pan. It’s okay if it’s not perfect—this rustic look adds to the charm!
- Chill the Crust – Refrigerate the crust while you prepare the chocolate filling. This helps the crust set and firm up, making it easier to fill later. You can even make the crust in advance, just store it in the fridge or freezer until you’re ready.
For more tips on creating perfect crusts or ingredient substitutions (like using almond flour instead of oats), check out our Ultimate Guide to Tart Crusts.
Step 2: Make the Chocolate Filling
The chocolate filling is the star of the show—smooth, velvety, and irresistible. Follow these steps for the perfect chocolate layer:
- Combine the Ingredients – In a clean food processor or blender, add 1/3 cup of pure maple syrup, 1/3 cup of coconut oil, and 1/3 cup of coconut milk. This creamy base will give your filling that luscious texture. Add in 2/3 cup of unsweetened cocoa powder, 1 1/2 teaspoons of vanilla extract, and 1/4 teaspoon of kosher salt. The vanilla and salt will round out the flavor, so don’t skip these ingredients!
- Blend Until Smooth – Process the mixture until it’s perfectly smooth. Check the consistency; it should be thick, creamy, and pourable. If you notice any lumps of cocoa powder or oil, give it another quick blend or use a spatula to stir it until everything is completely combined.
- Spread Over the Crust – Take your chilled crust from the fridge and pour the smooth chocolate filling into it. Use a spatula or knife to spread it evenly across the surface. If you want to get creative, you can use the back of a spoon or an offset spatula to gently make swoops or decorative swirls in the filling for an elegant touch.
Step 3: Add the Toppings
Now comes the fun part—decorating your tart with fresh berries. Here’s how to make it look as beautiful as it tastes:
- Choose Your Berries – Gather 1 1/2–2 cups of fresh berries. Raspberries, strawberries, and blueberries are perfect for this tart because they add color, flavor, and a bit of tang to balance out the richness of the chocolate filling. You can mix them or focus on your favorites—whatever you like best!
- Arrange the Berries – Gently place the berries on top of the chocolate filling. You can be as creative as you like with the design—arrange them in concentric circles, random patterns, or even make a fun berry heart for a special occasion. Get your kids involved in this step if you’re making it as a family treat!
- Refrigerate to Set – Once your tart is topped with berries, return it to the fridge for at least 30-40 minutes. This allows the chocolate to set and firm up, making it easier to slice. If you’re making the tart ahead of time, you can cover it with plastic wrap and refrigerate it for a longer period (just remember to add the berries before serving).
Step 4: Serving and Enjoying
After the tart has chilled and set, it’s time to serve!
Storing Leftovers – If you have leftovers (though that’s unlikely!), store the tart in an airtight container in the fridge for up to 3-4 days. The crust will hold up well, and the chocolate filling stays smooth and creamy. If you’re storing it for a few days, be sure to add the berries just before serving to keep them fresh.
Serve Immediately or Later – If you’re ready to enjoy your No Bake Chocolate Berry Tart right away, slice it into wedges and serve. It pairs beautifully with a dollop of whipped coconut cream or a scoop of dairy-free vanilla ice cream. You can also add a few extra mint leaves on top for a fresh, herby twist. If you’re serving it later, keep it refrigerated until you’re ready to enjoy.
What to Serve with No Bake Chocolate Berry Tart
While this tart is fabulous all on its own, there are a few things you can serve alongside it to elevate your dessert experience. A dollop of whipped coconut cream or a scoop of dairy-free vanilla ice cream makes a perfect complement to the rich, chocolate filling. For a little extra crunch, you can add some crushed nuts or even a drizzle of raspberry or chocolate sauce. If you’re hosting a dinner party, consider pairing the tart with a refreshing citrus salad or a light, crisp white wine to balance out the sweetness. You could also serve this alongside some of our favorite desserts, like No-Bake Raspberry Cheesecake.
Key Tips for Making No Bake Chocolate Berry Tart
Making this tart is pretty straightforward, but here are a few tips to get it just right. First, don’t skip the chilling time. Refrigerating the crust and filling helps them set properly and gives the tart its smooth, creamy texture. If you’re pressed for time, you can also pop the tart in the freezer for a quicker set. Second, feel free to get creative with the toppings. While I love a mix of raspberries, strawberries, and blueberries, you could easily swap them out for your favorite fruits. Just make sure the berries are fresh for the best flavor and texture. Lastly, if you’re making this ahead of time, you can freeze the tart without the berries.
Storage and Reheating Tips No Bake Chocolate Berry Tart
Once your No Bake Chocolate Berry Tart is made, you’ll want to store it properly to keep it fresh. Refrigerate any leftovers in an airtight container for up to 3–4 days. If you have a bit of tart left, don’t worry, it’s just as delicious the next day. The texture holds up well, so feel free to enjoy it as a treat after dinner, or grab a slice for breakfast (no judgment here!). If you’ve frozen the tart, just let it thaw in the fridge overnight before serving, and then top it with fresh berries when you’re ready to enjoy it.
FAQs
Can I use a different sweetener?
Yes, you can use other sweeteners like agave nectar or coconut sugar, but keep in mind that this might change the flavor slightly.
How can I make the crust firmer?
If you prefer a firmer crust, you can add a little more coconut oil. Just be sure to keep an eye on the consistency when blending the ingredients, as you don’t want the crust to become too greasy.
Can I make this recipe without coconut milk?
If you’re not a fan of coconut milk, you can substitute it with any plant-based milk of your choice, like almond milk or oat milk.
Can I make mini tarts instead?
Absolutely! This recipe is versatile, and you can easily make mini versions of this tart by dividing the mixture into smaller tart pans. Just be sure to adjust the chilling time accordingly.
Final Thoughts
There you have it, the No Bake Chocolate Berry Tart, your new go-to dessert for any occasion. Whether you’re planning a dinner party or just want a sweet treat to enjoy at home, this tart delivers on flavor, texture, and ease. Best of all, it’s a dessert that almost everyone can enjoy, thanks to its gluten-free and vegan ingredients. So go ahead, treat yourself, and maybe even share a slice with a friend—if you’re feeling generous!
Visit our Pinterest for regular slow cooker recipe updates, or join our Facebook discussions where cooking fans exchange their favorite hearty meal ideas.
PrintNo Bake Chocolate Berry Tart: The Perfect Gluten-Free Delight
No Bake Chocolate Berry Tart – This gluten free vegan chocolate tart tastes so fresh and luscious. It’s gluten free, dairy free, refined sugar free, and really makes a statement. The belle of the ball at any dinner or party!
- Prep Time: 45 minutes
- Cook Time: 0 minutes
- Total Time: 45 minutes
- Yield: 1 (9 inch) tart, or 12 mini tarts 1x
- Category: Dessert
- Method: No-Bake
- Cuisine: American
- Diet: Gluten Free
Ingredients
- For the Crust:
- 1 3/4 cup (190 grams) rolled oats (certified gluten free, if needed)
- 2/3 cup (65 grams) unsweetened cocoa powder
- 1/3 cup pure maple syrup
- 2 Tablespoons coconut oil
- pinch kosher salt
- For the Chocolate Filling:
- 1/3 cup pure maple syrup
- 1/3 cup coconut oil
- 1/3 cup coconut milk
- 2/3 cup (65 grams) unsweetened cocoa powder
- 1 1/2 teaspoons vanilla extract
- 1/4 teaspoon kosher salt
- For the Topping:
- 1 1/2 – 2 cups fresh berries (I like a mix of fresh raspberries, strawberries, and blueberries)
- Fresh mint leaves (optional), for garnish
Instructions
1. Put the oats in a food processor and pulse to break up a bit.
2. Add cocoa powder, syrup, coconut oil, and salt. Process until mixture starts to come together and it sticks together when you pinch it between your fingers. If your mixture is too dry, you can add more coconut oil 1/2 teaspoon at a time until it comes together.
3. Transfer dough to a tart pan (preferably one with a removable bottom) and pat out using fingers or the bottom of a cup until crust is spread evenly. Refrigerate the crust while you make the filling.
4. Place syrup, coconut oil, coconut milk, cocoa powder, vanilla, and salt in a food processor (or blender) and puree or pulse until well combined. Give the filling a stir to make sure there are no lumps remaining.
5. Spread filling over the crust and smooth out with a spatula or knife. If desired, use an offset spatula or the back of a spoon to make gentle swoops in the filling.
6. If serving within a few (4-5) hours, place the berries on top of the chocolate filling in any design you like, and chill for at least 30-40 minutes in the refrigerator to allow filling and crust to set. Store tart in the refrigerator until ready to serve.
7. If you are making this ahead of time (more than 4-5 hours before eating), cover the tart with plastic wrap or food wrap and refrigerate the tart (crust and filling). When ready to serve, top with berries. Store tart in the refrigerator.
8. If you are making this far in advance, you can make and freeze the tart without the berry topping and store in the freezer in an airtight bag up to 2-3 weeks. Wrap with plastic wrap or food wrap and cover with a large freezer bag. Thaw tart in the refrigerator before adding berries and serving.
Notes
Use a tart pan with a removable bottom for easy serving.
Feel free to swap in your favorite fruits or use seasonal berries.
To save time, prep the crust and filling ahead and decorate just before serving.
Nutrition
- Serving Size: 1 slice (1/12th tart)
- Calories: 219
- Sugar: 12.3 g
- Sodium: 77.7 mg
- Fat: 10.9 g
- Saturated Fat: 8.9 g
- Trans Fat: 0 g
- Carbohydrates: 29.4 g
- Fiber: 5.1 g
- Protein: 3.7 g
- Cholesterol: 0 mg


