
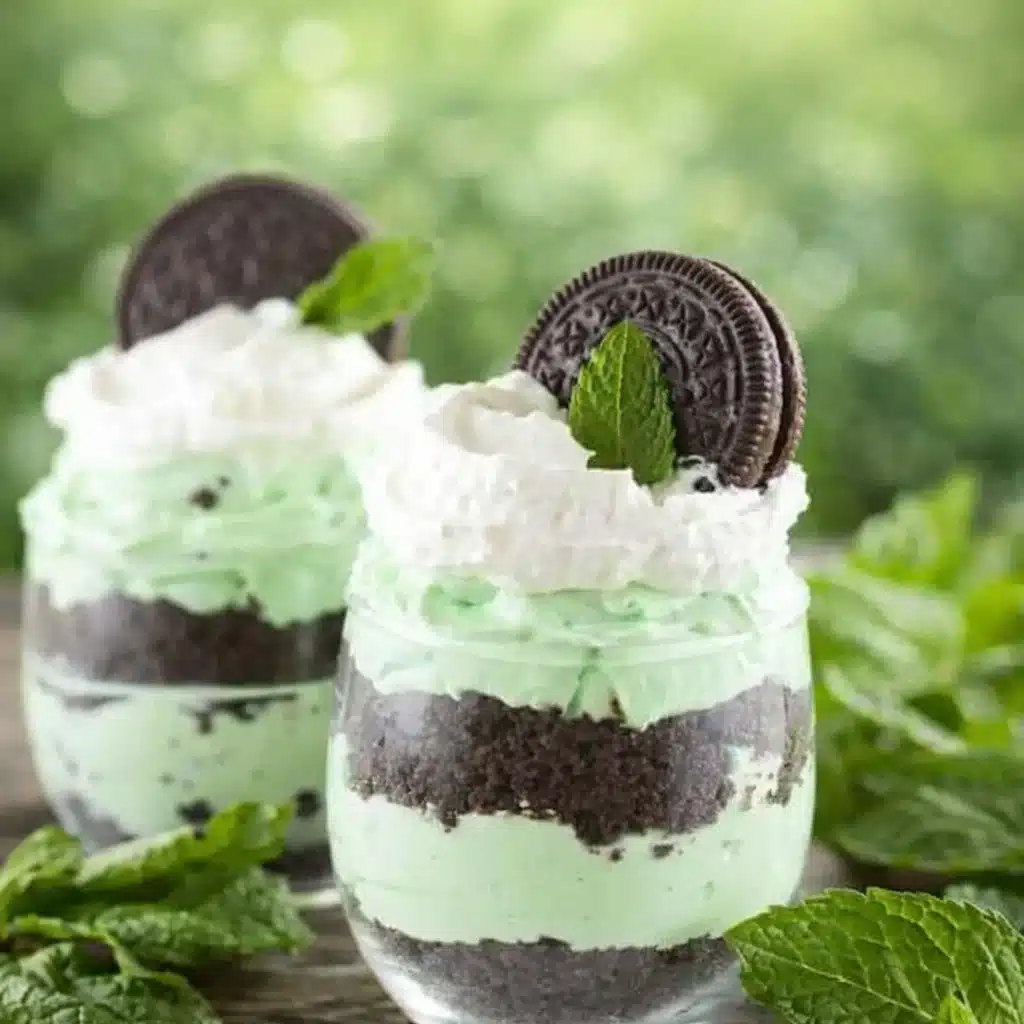
St Paddy’s Day Mint Cheesecake Cups are the ultimate no-bake treat for anyone looking to bring a little leprechaun magic to the dessert table—without the stress. Whether you’re hosting a green-themed party, wrangling sugar-hyped kids, or just craving something creamy, minty, and ridiculously easy, this dessert’s got you. Picture it: layers of crushed Oreos, fluffy mint cheesecake filling, and mini chocolate chips tucked into cute little cups. Honestly, it’s like a shamrock shake met a cheesecake and said, “Let’s make this a party!” These little green cups are perfect for St. Patrick’s Day celebrations but also work whenever you need a quick, festive, and crowd-pleasing dessert that tastes as fun as it looks.
Table of Contents
What is St Paddy’s Day Mint Cheesecake Cups?
St Paddy’s Day Mint Cheesecake Cups are no-bake, individually portioned dessert cups filled with layers of Oreo cookie crumbs and minty cheesecake goodness. They’re made with whipped cream, cream cheese, peppermint and vanilla extracts, plus a few drops of green food coloring to bring in that festive Irish vibe. The mini chocolate chips add a pop of texture and chocolate flavor that plays perfectly with the mint. Think of them as the cool, green cousin to your classic cheesecake—light, fluffy, refreshing, and way easier to throw together. No oven, no water baths, no stress. Just mix, layer, chill, and enjoy.
Reasons to Try St Paddy’s Day Mint Cheesecake Cups
There’s a whole rainbow of reasons to make St Paddy’s Day Mint Cheesecake Cups—and you don’t need a pot of gold to get started. First off, they’re a no-bake dream. That means no heating up the kitchen, no worrying about cracks or water baths, and absolutely no fuss. Second, the flavor is a knockout. That combo of mint and chocolate? Timeless. Plus, the creamy texture with cookie crunch? Chef’s kiss. They’re also super customizable. Want to use Thin Mints instead of Oreos? Go for it. Need to make them ahead? Perfect—they chill beautifully.
Ingredients Needed to Make St Paddy’s Day Mint Cheesecake Cups
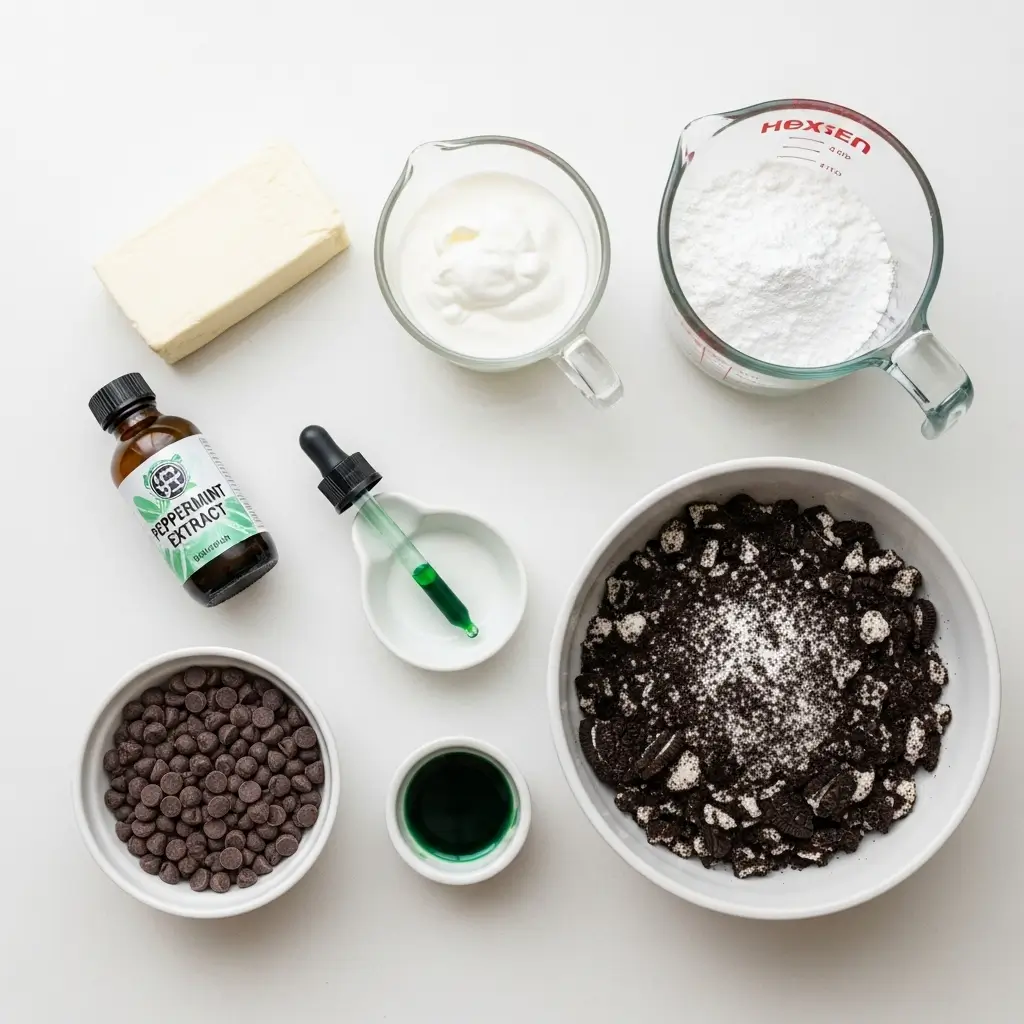
- 10+ Oreo cookies, crushed into crumbs
- 1 cup heavy cream
- 8 ounces cream cheese, softened
- 1 cup powdered sugar
- ½ teaspoon peppermint extract
- ½ teaspoon vanilla extract
- 2–4 drops green food coloring
- 1 cup mini chocolate chips
Optional toppings: Extra whipped cream, Oreo cookie halves, Thin Mint cookies, or chopped Andes mints
Instructions to Make St Paddy’s Day Mint Cheesecake Cups (Step by Step)
Let’s walk through how to make these St Paddy’s Day Mint Cheesecake Cups step by step, so even if this is your first no-bake dessert, you’ll feel like a pro. From whipping cream to layering like a dessert artist, this guide’s got your back. Ready? Grab your apron and let’s dive in.
Step 1: Crush the Cookies
Start by crushing your Oreo cookies into fine crumbs. You can use a food processor if you’re all about speed, or place the cookies in a zip-top bag and roll over them with a rolling pin if you’re more old-school. You’ll need about 10 or more cookies—enough to get a good layer at the bottom of each cup. These cookie crumbs form that chocolaty, slightly crunchy base that balances out the creamy cheesecake layer beautifully. For a fun twist, try mixing in some chopped Mint Oreo Truffles if you’ve got any leftovers on hand!
Step 2: Whip the Heavy Cream
Pour your cold heavy cream into a chilled mixing bowl. Whip on medium-high speed until stiff peaks form. This will take a few minutes, so be patient—when it’s ready, the cream should stand up straight when you lift the beater. Set a few spoonfuls aside for topping later. The rest goes in the fridge while we prep the cheesecake filling. This whipped cream gives your cheesecake cups their fluffy, mousse-like texture. Want to get more tips on perfect whipped cream? Check out our No-Bake Chocolate Berry Tart for ideas on customizing textures and flavors.
Step 3: Make the Cream Cheese Base
In a large bowl, add the softened cream cheese. It’s super important that the cream cheese is room temperature—it’ll mix smoother and faster. Beat for about a minute until creamy, then add the powdered sugar. Beat again until fully combined and smooth. No clumps allowed! If your cream cheese is giving you a hard time, see our Shamrock Swirl Pie recipe for more cream cheese tips.
Step 4: Add the Flavor and Color
Now it’s time to make the magic happen. Add ½ teaspoon each of peppermint extract and vanilla extract to your cream cheese mixture. Then drop in 2 to 4 drops of green food coloring. Start with less—you can always add more. Mix until the color is evenly distributed and there are no streaks of white left. This step gives your dessert that festive green hue and that minty-fresh flavor that’s pure St. Patrick’s Day bliss. If you’re not into food coloring, no judgment—just go au naturel!
Step 5: Fold in Whipped Cream and Mini Chocolate Chips
Take your chilled whipped cream out of the fridge and gently fold it into the cream cheese mixture using a spatula. The goal is to keep the mixture light and airy, so don’t overmix! Once blended, fold in 1 cup of mini chocolate chips. They add just the right amount of texture and chocolatey goodness. This step brings the whole cheesecake filling together—and let me tell you, it’s hard not to eat it straight from the bowl.
Step 6: Assemble the Cups (Layer Like a Pro)
Grab your dessert cups, mason jars, or even small wine glasses for a fancy flair. Spoon a layer of Oreo cookie crumbs into the bottom of each cup. Then, add a layer of the mint cheesecake filling. Repeat the layers if your cup is tall enough. You’re going for that classic parfait vibe—pretty and layered. Need help picking the best cups or containers? Our Andes Mint Mini Cheesecakes give some great visual inspiration for presentation.
Step 7: Top and Decorate
Take that whipped cream you set aside earlier and add a dollop to the top of each cup. Now comes the fun part—garnishing! Add a half Oreo cookie, a Thin Mint, or even a piece of Andes mint candy on top. Feeling extra festive? Toss on some green sprinkles or mini shamrock candies. This is your chance to go full Pinterest if you want.
Step 8: Chill Before Serving
Place the finished cups in the fridge and let them chill for at least 2 hours. This helps the layers set and the flavors meld together. If you’re prepping ahead for a party, you can easily make these a day before. For more make-ahead dessert ideas, don’t miss our crowd-pleasing Valentine’s Day Caramel Pretzel Bites—just as easy, just as festive.
What to Serve with St Paddy’s Day Mint Cheesecake Cups
These cheesecake cups are fun on their own, but if you’re building out a full St. Patrick’s Day menu, they’re a sweet way to wrap things up. Want to really lean into the mint theme? Pair them with a Shamrock Shake Pudding Cup or some Mint Oreo Truffles for a minty dessert table. If you’re mixing sweet and savory, a hearty dish like Neiman Marcus Chicken Casserole balances all that sweetness with something creamy and comforting. And don’t forget some festive green drinks or Irish cream liqueur on the side!
Key Tips for Making St Paddy’s Day Mint Cheesecake Cups
- Soften the cream cheese: This is non-negotiable. Cold cream cheese will make your filling lumpy, and no one wants that.
- Don’t overdo the mint extract: A little goes a long way. Too much and you’ll feel like you’re brushing your teeth with dessert.
- Chill your whipped cream bowl: Cold tools help your cream whip up faster and fluffier.
- Go easy on food coloring: Start with two drops and build from there—nobody needs neon-green cheesecake (unless that’s your vibe).
- Use clear cups or jars: It lets those pretty layers shine!
Storage and Reheating Tips for St Paddy’s Day Mint Cheesecake Cups
Technically, there’s no “reheating” for a no-bake dessert like this—but here’s how to store them so they stay fresh. Keep the cups covered in the fridge for up to 3 days. Use plastic wrap or pop lids on mason jars if that’s what you used. The texture stays soft and creamy, and the flavor actually deepens a bit with time. Avoid freezing—they’ll get icy and lose that fluffy texture. If you need to transport them, use a cooler bag with a cold pack to keep them firm. Bonus: they travel well for potlucks or school parties!
FAQs
Can I make these ahead of time?
Absolutely! You can make them up to 2 days ahead. Just store them covered in the fridge.
Can I use a different cookie?
Yup. Try Thin Mints, chocolate graham crackers, or even crushed shortbread cookies.
What if I don’t like mint?
Skip the peppermint extract and just go vanilla—or swap in a fun flavor like almond.
Can I make this gluten-free?
Yes! Use gluten-free Oreos or chocolate cookies, and you’re good to go.
Do I have to use green food coloring?
Nope. They’ll still taste amazing, but the green does add that festive St. Paddy’s charm.
Final Thoughts
There’s something downright fun about digging your spoon into these St Paddy’s Day Mint Cheesecake Cups. They’re creamy, crunchy, cool, and completely stress-free. Whether you’re planning a green-themed party, surprising your coworkers with a festive Friday treat, or just want an excuse to whip up something sweet without turning on the oven, these are the way to go. And if you’re into minty desserts, don’t miss our Andes Mint Mini Cheesecakes or Shamrock Swirl Pie for even more St. Patrick’s Day dessert ideas. However you serve them, these little green cups are sure to steal the show—and maybe a few hearts while they’re at it.
Visit our Pinterest for regular slow cooker recipe updates, or join our Facebook discussions where cooking fans exchange their favorite hearty meal ideas.
PrintSt Paddy’s Day Mint Cheesecake Cups
A festive no-bake mint cheesecake dessert layered in cups with cookie crumbs, perfect for St. Patrick’s Day.
- Prep Time: 15 minutes
- Cook Time: 0 minutes
- Total Time: 2 hours 15 minutes
- Yield: 4 servings 1x
- Category: Dessert
- Method: No Bake
- Cuisine: American
Ingredients
- 10+ Oreo cookies, crushed into crumbs
- 1 cup heavy cream
- 8 ounces softened cream cheese
- 1 cup powdered sugar
- ½ teaspoon peppermint extract
- ½ teaspoon vanilla extract
- 2–4 drops green food coloring
- 1 cup mini chocolate chips
Instructions
1. Whip heavy cream until stiff peaks form and set in refrigerator. Set aside a little to put on top.
2. Add softened cream cheese to mixer bowl and beat 1 minute.
3. Add powdered sugar and beat until combined.
4. Next, add peppermint & vanilla extracts and green food coloring.
5. Mix until the cream cheese mixture is green with no white streaks, scraping the sides of the bowl as needed.
6. Fold in chilled whipped cream and mini chocolate chips.
7. Put a layer of cookie crumbs on the bottom of a glass and layer with cheesecake. Repeat, topping with the left over whipped cream and garnish with an Oreo cookie, Thin mint cookie or Andes mints.
8. Refrigerate 2 hours before serving.
Notes
These make-ahead dessert cups are perfect for parties and easy to customize. Use any chocolate mint garnish of your choice on top for a fun festive flair.
Nutrition
- Serving Size: 1
- Calories: 275
- Sugar: 22g
- Sodium: 140mg
- Fat: 15g
- Saturated Fat: 9g
- Unsaturated Fat: 5g
- Trans Fat: 0g
- Carbohydrates: 32g
- Fiber: 1g
- Protein: 3g
- Cholesterol: 45mg


