
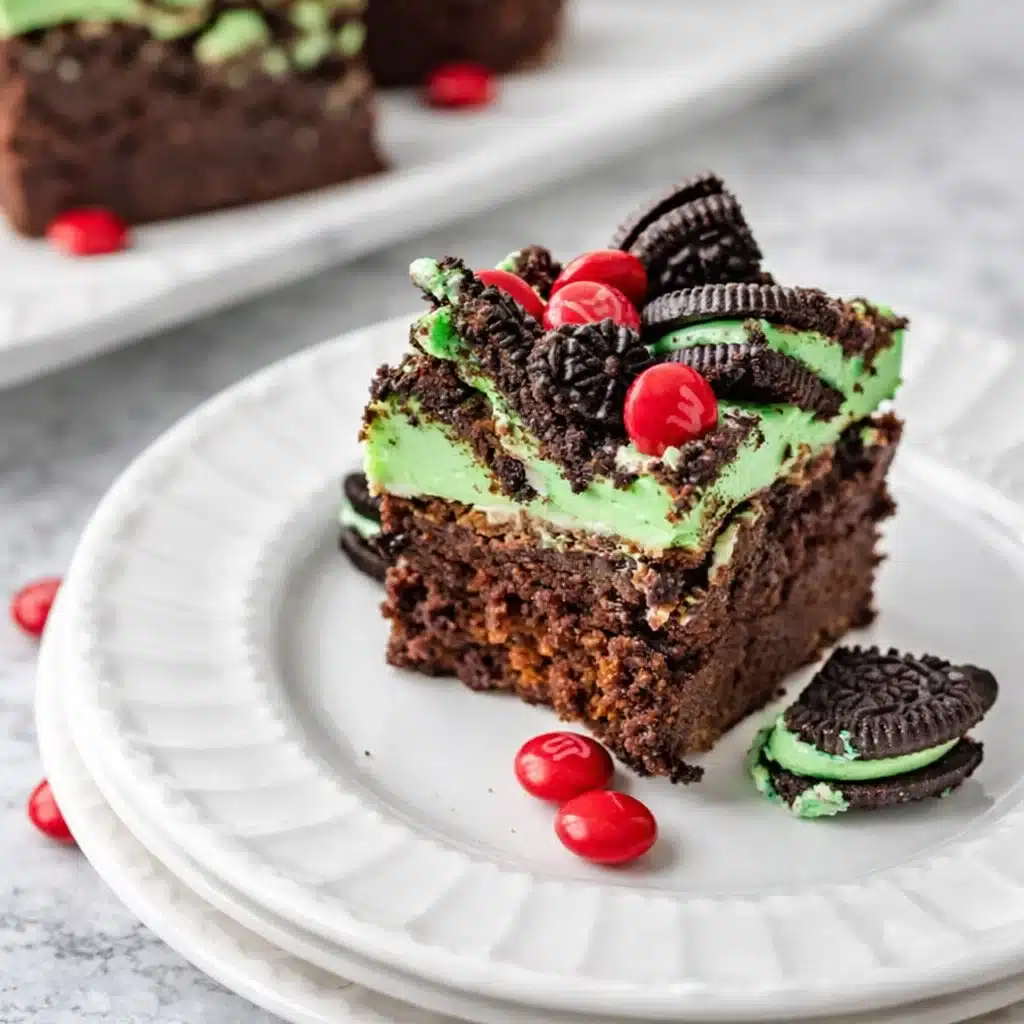
Best Grinch Brownies might just be the most festive, crowd-pleasing treat you bring to your holiday table this year. These aren’t your everyday brownies. Oh no, these are fudgy, chocolatey squares of holiday joy topped with minty white chocolate icing, crushed mint Oreos, and cheerful red M&Ms—yes, they’re basically edible Christmas spirit. Whether you’re baking for a kids’ Christmas party, a cookie exchange, or just trying to distract yourself from wrapping the tenth oddly shaped gift, this recipe is a total win. The bright green frosting and Grinchy vibes make them fun, but the rich brownie base and peppermint crunch? That’s what’ll keep people coming back for “just one more.”
Table of Contents
What are Best Grinch Brownies?
Best Grinch Brownies are the perfect mashup of a classic fudgy brownie and whimsical holiday fun. Think rich, gooey chocolate base that feels like a warm hug on a winter day, topped with a white chocolate peppermint frosting that’s dyed Grinchy green. And then, just when you think it can’t get more festive, it’s showered with chunks of mint Oreos and red M&Ms. The whole thing screams Christmas in every bite. It’s like the Grinch’s heart grew three sizes and then got baked into dessert form. They’re especially fun if you’re planning a themed party or just want to surprise the kids with something that looks like it stepped straight out of Whoville.
Reasons to Try Best Grinch Brownies
Let’s be honest—holiday baking can get a little too ambitious. Gingerbread houses collapse. Sugar cookies turn into sugar blobs. But Best Grinch Brownies? They’re low-stress, high-reward. First, they’re a total visual standout—those vibrant green tops with candy bling practically beg to be posted on Instagram. Second, the flavor combo is a dream: rich chocolate + cool mint + creamy white chocolate. Third? Kids love ‘em. Adults love ‘em. Santa would probably ditch the milk and cookies if you left him one of these. And if you’re someone who enjoys giving baked goodies as gifts, these slice up beautifully and hold their shape like a champ.
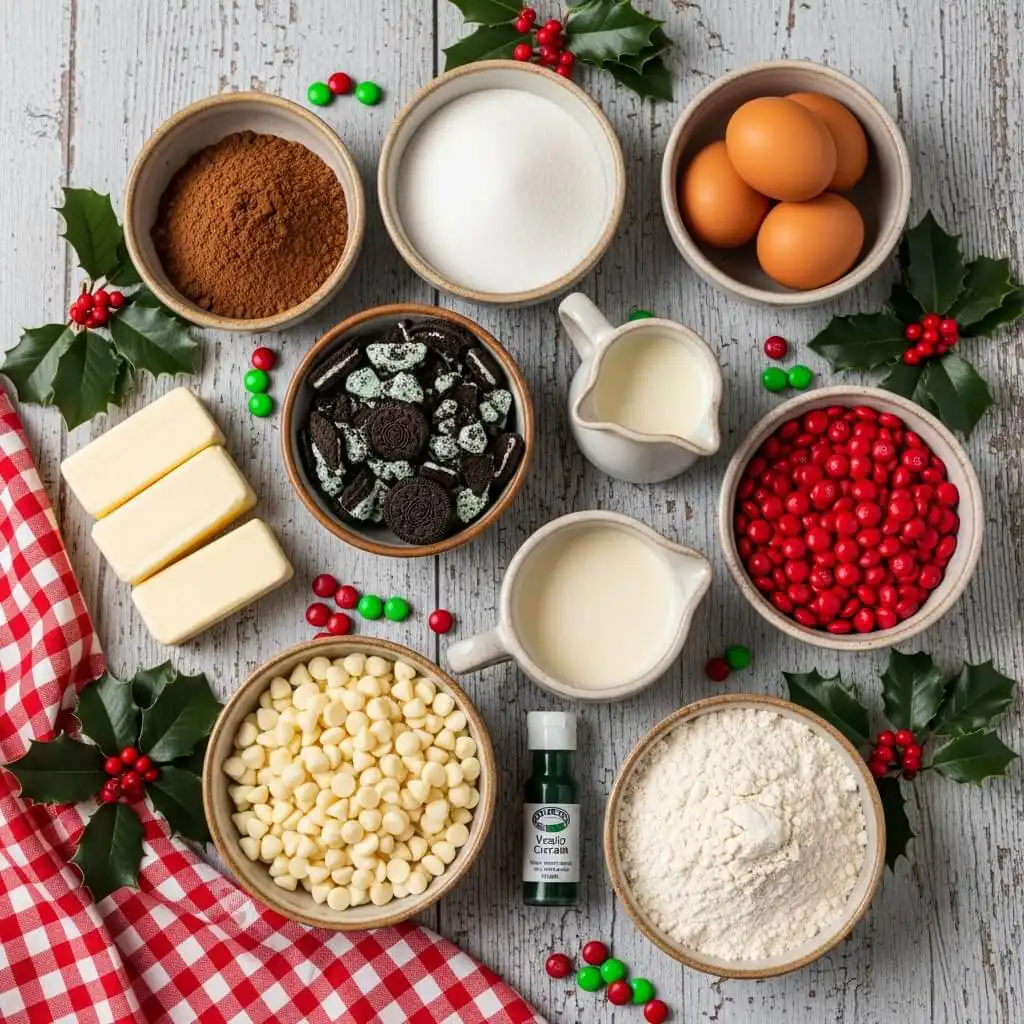
Ingredients Needed to Make Best Grinch Brownies
For the Brownie Base:
- ¾ cup butter
- 1 cup sugar
- ¾ cup packed brown sugar
- 3 large eggs
- 3 tsp vanilla extract
- ¾ cup all-purpose flour
- ¾ cup cocoa powder
- ½ tsp salt
- ½ tsp baking powder
For the Frosting and Decorations:
- 2 cups white chocolate chips (Ghirardelli preferred)
- 2–4 tbsp heavy whipping cream
- ¼ tsp peppermint extract
- Green food coloring (gel preferred)
- Icing sugar (as needed for thickness)
- 20 mint Oreos (halved or quartered)
- ¼ cup red M&Ms
Instructions to Make Best Grinch Brownies (Step by Step)
Making the Best Grinch Brownies is a total joy—especially when you follow this step-by-step guide that breaks everything down into easy, manageable pieces. Whether you’re baking with little helpers or flying solo, these instructions walk you through every part of the process, with helpful notes and fun tips to keep things stress-free and delicious.
Step 1: Prep Your Pan and Preheat Your Oven
Start by setting your oven to 350°F and position the rack in the top third of the oven. This helps the brownies bake evenly and develop that crackly top we all love. While the oven’s heating up, line an 8×8 or 9×9 inch baking pan with parchment paper—leave a little overhang on the sides so you can lift the brownies out easily later. Give the paper a quick spray with non-stick cooking spray to avoid any sticking drama.
Pro tip: Need a refresher on how to line pans like a pro? Check out this guide to easy baking prep for more step-by-step tips that make cleanup a breeze.
Step 2: Melt the Butter and Sugars Together
In a large microwave-safe bowl, combine ¾ cup of butter, 1 cup of sugar, and ¾ cup of packed brown sugar. Microwave the mixture for 30 seconds, then stir. Repeat for another 30 seconds and stir again until everything looks silky and well blended.
Let this mixture cool for about 5 minutes before moving to the next step. We don’t want to scramble the eggs when we add them—nobody wants scrambled egg brownies.
Need to swap ingredients? If you’re out of brown sugar, you can easily make your own by mixing white sugar with a little molasses. Learn more in our ingredient substitution guide.
Step 3: Add Eggs and Vanilla Extract
Once your butter-sugar mixture has cooled slightly, whisk in 3 large eggs and 3 teaspoons of vanilla extract. Stir until the mixture becomes smooth and glossy. This is where your brownies start getting their rich, chewy texture.
Don’t rush this step—take a minute to make sure the eggs are fully mixed in. You want that batter nice and cohesive before moving on.
Step 4: Combine Dry Ingredients Separately
In a second bowl, whisk together your dry ingredients:
- ¾ cup of all-purpose flour
- ¾ cup of cocoa powder
- ½ teaspoon salt
- ½ teaspoon baking powder
Use a whisk or fork to blend these together evenly, breaking up any cocoa clumps. This step helps distribute the leavening agents, giving your brownies the perfect rise and texture.
Looking for more chocolatey dessert inspo? These Green Velvet Brownies with Cream Cheese Frosting are another delicious step-by-step treat with a festive flair.
Step 5: Mix Dry and Wet Ingredients
Now pour your dry mixture into the butter-sugar-egg blend. Stir gently until everything is just combined. Be careful not to overmix—this can lead to tough brownies. Aim for a smooth, thick batter that’s still a little sticky.
Step by step tip: Use a spatula to scrape down the sides of the bowl so no flour gets left behind. This ensures even baking and flavor in every bite.
Step 6: Bake to Fudgy Perfection
Pour the batter into your prepared pan, smoothing out the top with a spatula. Pop it into the oven and bake for 45 to 50 minutes. Start checking around the 45-minute mark by inserting a toothpick in the center. You want a few moist crumbs—not raw batter—clinging to the toothpick.
When they’re done, place the pan on a wire rack and let the brownies cool completely in the pan. This part takes patience, but it’s worth it. Warm brownies will melt the icing into a messy puddle—trust me, wait it out.
Step 7: Make the Peppermint White Chocolate Frosting
In another microwave-safe bowl, melt 2 cups of white chocolate chips with 2 to 4 tablespoons of heavy cream. Microwave for about 1 minute, then stir until smooth and melted. Add in ¼ teaspoon of peppermint extract and a drop or two of green gel food coloring. Stir well until you get your ideal Grinchy hue.
If the frosting looks too runny, add a bit of icing sugar until it thickens to a spreadable consistency. Want it darker green? Add another drop of coloring and stir again. Try to match the color to the mint Oreos if you can—it’s a fun detail!
Need tips on working with food coloring? Our Shamrock Swirl Pie has more green dessert magic and ideas for playing with bold colors.
Step 8: Frost the Brownies
Once your brownies are fully cooled, pour the frosting over the top. Use a spatula or the back of a spoon to spread it out evenly. Don’t worry if it’s not perfect—the decorations will cover any imperfections.
Let the frosting set for a few minutes at room temperature before adding the toppings.
Step 9: Decorate Like a Holiday Pro
Grab your mint Oreos (about 20 of them) and slice them in halves or quarters on a cutting board using a sharp knife. Scatter them over the frosting, pressing them in gently so they stick.
Then sprinkle ¼ cup of red M&Ms across the top. The red and green contrast makes these brownies look like they came straight out of Whoville. Feel free to add extra candies if you’re feeling extra jolly.
Step 10: Chill, Slice, and Serve
For clean cuts, pop the pan into the fridge for 15–20 minutes to firm up the frosting. Then lift the brownies out of the pan using the parchment paper overhang and slice into squares.
Serve on a festive platter or wrap individually for holiday gifts or party favors. Want more sweet gift ideas? Check out these Mint Oreo Truffles—they’re a hit with mint lovers and super easy to make.
What to Serve with Best Grinch Brownies
These brownies are a whole vibe on their own, but if you want to go all out, pair them with a mug of hot cocoa loaded with whipped cream and crushed candy canes. They also make a sweet match with a scoop of vanilla bean ice cream if you’re serving dessert after a family meal. If you’re hosting a holiday dessert table, add in some Mint Oreo Truffles or Green Velvet Brownies with Cream Cheese Frosting for a full green-and-red theme. Hosting a grown-up gathering? They’re surprisingly good with a glass of Bailey’s or a peppermint mocha. Or hey, just sneak one after the kids are asleep—you’ve earned it.
Key Tips for Making Best Grinch Brownies
Cool those brownies completely before frosting, or you’ll end up with a gooey slide situation (not festive). Gel food coloring is your best friend—it gives you vibrant green without watering down your frosting. Want cleaner cuts? Pop your brownies in the fridge before slicing. If you’re planning ahead, freeze your Oreos before chopping—they’re way easier to cut and crumble less. Don’t overmix the batter. Stir just until combined to keep the texture rich and fudgy, not cakey. Oh, and line that pan—parchment paper makes it 10x easier to lift and slice your brownies without them sticking.
Storage and Reheating Tips Best Grinch Brownies
You can store these in an airtight container at room temp for about 3 days—but let’s be real, they probably won’t last that long. Want to make them ahead for a party? You can bake the brownie base a day or two in advance and frost just before serving. To freeze, wrap individual squares in plastic and store in a freezer-safe bag or container for up to 2 months. Thaw in the fridge overnight or zap one in the microwave for about 10–15 seconds if you’re feeling snacky. Just avoid freezing after you’ve decorated them—Oreos and M&Ms can get a little weird after a deep freeze.
FAQs
Can I use a boxed brownie mix? Sure, if you’re short on time. But making the base from scratch gives a way better flavor and texture.
Can I skip the peppermint? You can! The white chocolate base is still delicious without it. Or swap for vanilla or almond extract.
Do I need gel food coloring? It’s highly recommended. Liquid food coloring can water down your frosting.
Can I double the recipe? Yep! Use a 9×13 pan and keep an eye on the baking time—it may take a bit longer.
Final Thoughts
If you’re looking for a fun, easy, and seriously festive treat this holiday season, Best Grinch Brownies have got your back. They’re playful enough for the kids, indulgent enough for the adults, and guaranteed to spark some joy at the dessert table. Whether you’re channeling your inner Cindy Lou Who or just trying to win the holiday bake-off, this recipe will make your heart (and belly) grow three sizes. Want more minty magic? Check out these St. Paddy’s Day Mint Cheesecake Cups for another minty, creamy treat that’s perfect year-round.
Visit our Pinterest for regular slow cooker recipe updates, or join our Facebook discussions where cooking fans exchange their favorite hearty meal ideas.
Print
Grinch Brownies are sweet, decadent, minty, white chocolatey, “grinchy” brownies. Great for a themed holiday party or kids’ Christmas party. Rich, fudgy chocolate brownies are topped with white chocolate frosting and minty Oreos for a grinch inspired Christmas treat.
- Prep Time: 15 minutes
- Cook Time: 50 minutes
- Total Time: 1 hour 20 minutes
- Yield: 12 servings 1x
- Category: Dessert
- Method: Baking
- Cuisine: American
Ingredients
- ¾ cup butter
- 1 cup sugar
- ¾ cup brown sugar, packed
- 3 large eggs
- 3 teaspoon vanilla extract
- ¾ cup all-purpose flour
- ¾ cup cocoa powder
- ½ teaspoon salt
- ½ teaspoon baking powder
- Icing and Decorations:
- 2 cups (11 ounce bag) white chocolate chips (Ghirardelli recommended)
- 2 – 4 tablespoons heavy whipping cream
- ¼ teaspoon peppermint extract
- Icing sugar, to thicken
- Green food coloring (gel preferred)
- Decorations:
- 20 mint Oreos, some halved, some cut into fourths
- ¼ cup red M&M’s
Instructions
1. Preheat the oven to 350°, and position the oven rack on one of the top two rungs. Line the pan with parchment paper and spray with non-stick cooking spray.
2. Combine sugar and butter in a large microwave safe bowl. Heat for 30 seconds then stir, heat again for another 30 seconds and stir again.
3. Allow the mixture to cool and then add eggs and vanilla extract.
4. Combine the flour, salt, baking powder and cocoa in a separate bowl. Whisk until blended.
5. Mix the dry ingredients into the butter and sugar batter. Stir until incorporated.
6. Pour the batter into the pan and bake for 45-50 minutes. Check with a toothpick to make sure only a few crumbs are possibly attached. Cool brownie completely in pan, on wire rack, before icing.
7. In a large microwave safe bowl melt the white chocolate chips and cream in the microwave for 1 minute. Stir until all the chocolate is melted and smooth. Add the peppermint extract and a squeeze of green gel. Stir to combine.
8. Adjust the green coloring as needed until you reach the desired shade. Stir until uniform in color.
9. Add icing sugar and stir until blended. Pour the icing over the cooled brownies and smooth the top.
10. Cut the Oreos in halves and quarters using a sharp knife. Place on top of the icing until the surface is covered.
11. Sprinkle red M&Ms over the decorated brownies.
12. Slice into squares and serve.
Notes
Gel food coloring is best. It achieves a much more intense color and doesn’t change the texture of the icing.
Experiment with different shades of green to find your perfect Grinch color.
Cool the brownies completely before icing. If they’re warm, the icing may melt off.
Freeze your Oreos before chopping — it makes them easier to cut and minimizes crumbling.
Line your baking pan with parchment paper for easy removal and clean cuts.
Don’t overmix your batter. Mix until just combined for a fudgy texture and to avoid dense brownies.
Nutrition
- Serving Size: 1 square
- Calories: 214
- Sugar: 31g
- Sodium: 156mg
- Fat: 5g
- Saturated Fat: 3g
- Unsaturated Fat: 3g
- Trans Fat: 1g
- Carbohydrates: 40g
- Fiber: 2g
- Protein: 4g
- Cholesterol: 58mg


