
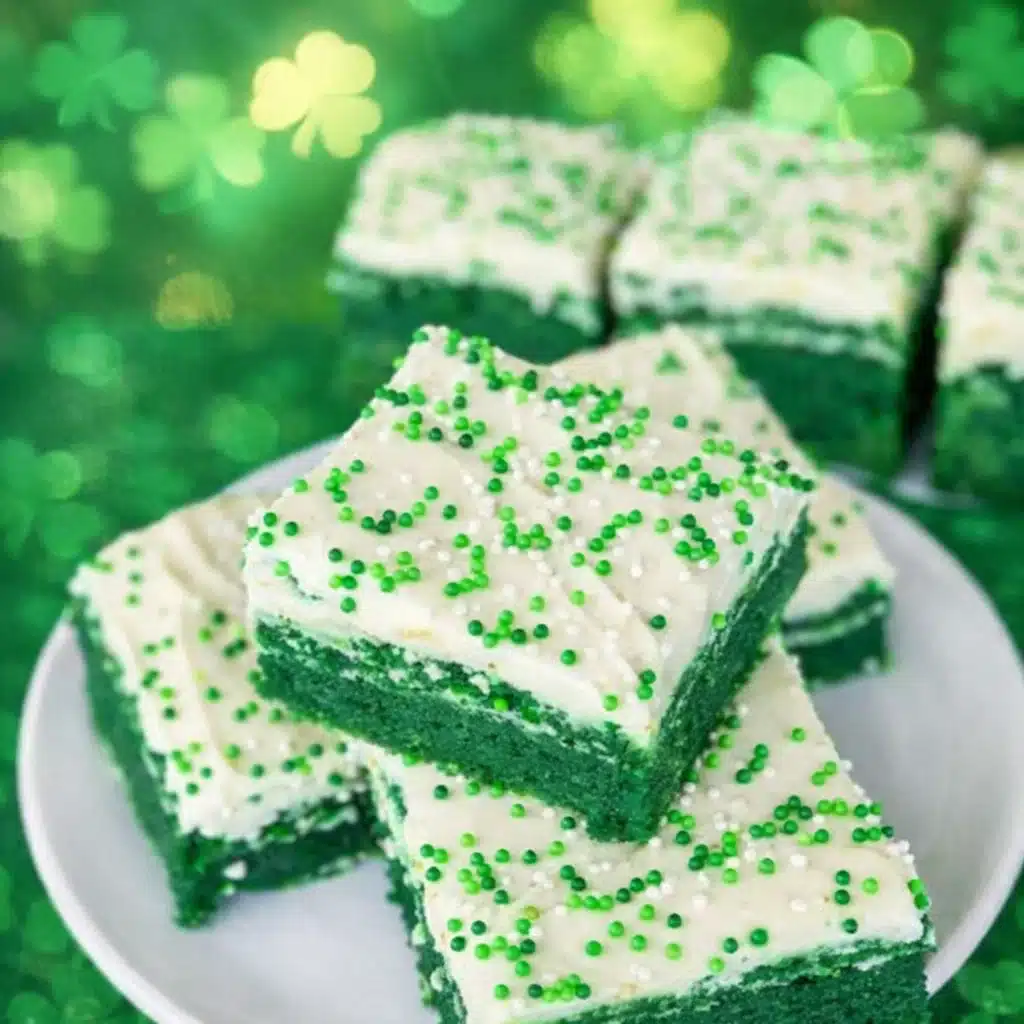
Green Velvet Brownies with Cream Cheese Frosting are the sweet little showstoppers you didn’t know your dessert table needed—until now. Imagine all the fudgy charm of a brownie, dressed up in green for a festive twist, topped with a rich, tangy cream cheese frosting that makes every bite feel like a celebration. Whether you’re baking up some luck for St. Patrick’s Day or just want a treat that’s a little extra, these brownies are about to become your new go-to. Oh, and did I mention how dangerously easy they are to make? Because once you whip these up, you might find yourself “taste testing” half the pan before anyone else gets a bite. Been there, no regrets.
Table of Contents
What are Green Velvet Brownies with Cream Cheese Frosting?
Green velvet brownies with cream cheese frosting are basically the fun cousin of your classic red velvet treats—same fudgy texture, same nostalgic vibe, but with a pop of green that makes them perfect for spring celebrations, themed birthdays, or yes, your favorite leprechaun-laden holiday. These brownies strike a delightful balance: they’re denser and richer than cake, but softer and more tender than traditional brownies. The “velvet” part hints at their luxurious crumb, made possible by melting chocolate chips right into butter for that extra smoothness. Then comes the cream cheese frosting, which is like the crown jewel—sweet but tangy, and oh-so-creamy.
Reasons to Try Green Velvet Brownies with Cream Cheese Frosting
If your dessert routine is feeling a little “meh,” these green velvet brownies with cream cheese frosting are your delicious escape hatch. First of all, they’re a total crowd-pleaser. That green hue grabs attention (and phone cameras), while the taste keeps everyone coming back for more. Second, the prep is almost laughably simple—no stand mixer required, just some melting, whisking, and a quick bake. These are the kind of treats that feel homemade but look bakery-level. They’re also incredibly versatile. Want to make them for Christmas? Go for it. Need a fun dessert for a birthday party? Add some sprinkles. Celebrating St.
Ingredients Needed to Make Green Velvet Brownies with Cream Cheese Frosting
For the Brownies:
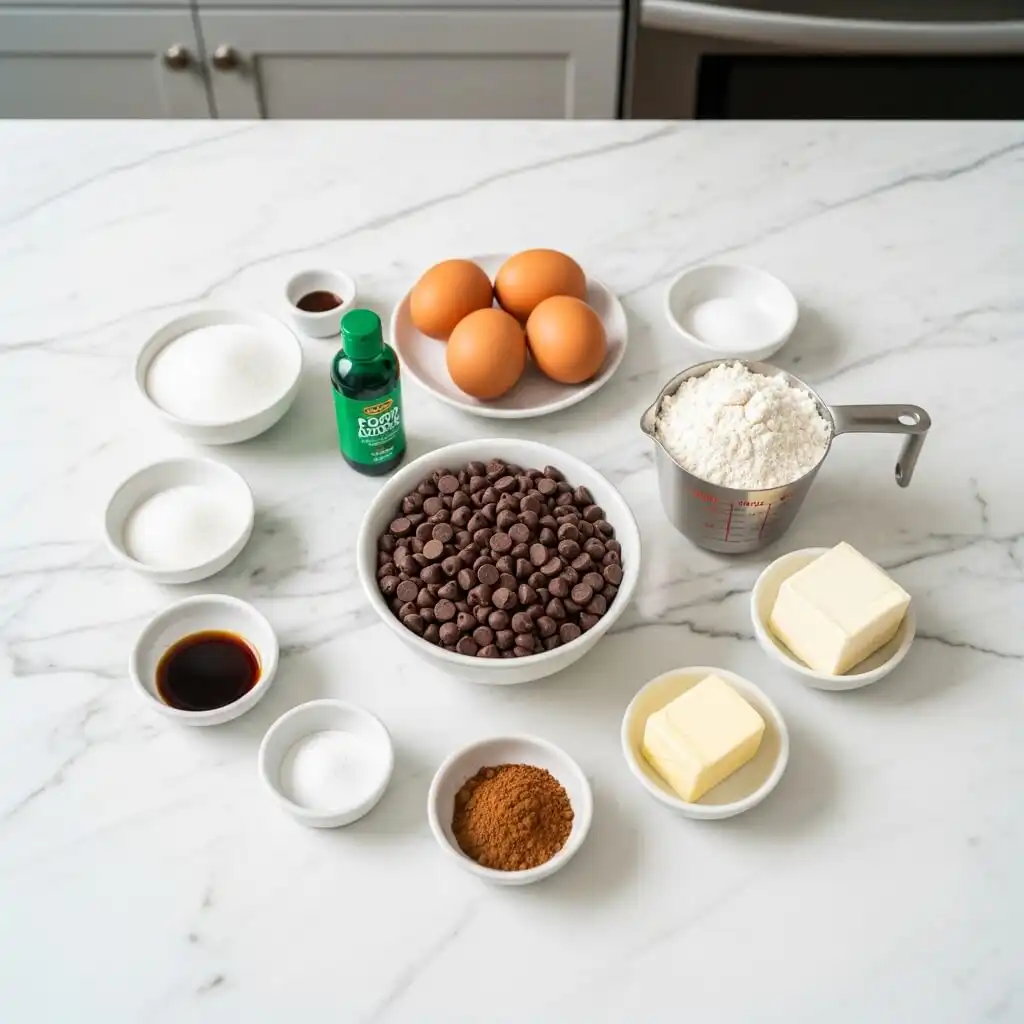
- ¾ cup semi-sweet chocolate chips
- ¾ cup butter
- 2 cups sugar
- 4 large eggs
- 1½ cups all-purpose flour
- 1 (1-oz) bottle green liquid food coloring (use it all!)
- 1½ tsp baking powder
- 1 tsp vanilla extract
- ⅛ tsp salt
For the Cream Cheese Frosting:
- 1 (8-oz) package cream cheese, softened
- 3 Tbsp butter, softened
- 1½ cups powdered sugar
- ⅛ tsp salt
- 1 tsp vanilla extract
Instructions to Make Green Velvet Brownies with Cream Cheese Frosting – Step by Step
Ready to bake your new favorite treat? Here’s your step-by-step guide to making Green Velvet Brownies with Cream Cheese Frosting from scratch. Whether you’re a seasoned baker or this is your first time whipping up homemade brownies, these steps will walk you through the entire process with helpful tips and tricks to make things foolproof (and fun).
Step 1: Preheat and Prep Like a Pro
Step by step, start by preheating your oven to 350°F. This gives the oven plenty of time to reach the right temperature so your brownies bake evenly. Now, line the bottom and sides of a 9-inch square metal baking pan with aluminum foil, leaving a 2 to 3-inch overhang on two opposite sides. Why foil? It makes removing the brownies clean and easy once they’ve cooled. Lightly grease the foil with nonstick spray or a bit of softened butter. Trust me—this step saves you from any sticking drama later. Using a metal pan helps with even heat distribution, unlike glass or ceramic which may require adjusting the bake time.
Need more pan prep tips? Check out this easy baked ranch chicken recipe that also relies on a well-prepped pan for perfect results.
Step 2: Melt the Chocolate and Butter
In a large, microwave-safe mixing bowl, combine ¾ cup of semi-sweet chocolate chips with ¾ cup of butter. Microwave on HIGH for 1½ to 2 minutes. Be sure to stop and stir every 30 seconds. You’re going for smooth and glossy here—not scorched chocolate. Once everything’s melted and beautifully combined, give it a good final stir. This chocolaty mixture forms the rich base for your brownies, giving them that luscious green velvet texture.
Curious about chocolate alternatives? You can substitute a 4-oz bar of bittersweet chocolate, like in these red velvet snowballs, for a deeper flavor.
Step 3: Add Sugar and Eggs – Gently Does It
Still working step by step, whisk 2 cups of sugar into your warm chocolate-butter mixture until it’s well blended. The sugar starts to dissolve into the warm base, helping create that soft, brownie-like crumb. Now, add 4 large eggs, one at a time. Whisk each egg just until it’s blended before adding the next—this helps avoid overmixing, which can make the brownies cakey instead of fudgy. If you’ve got tiny helpers in the kitchen, this is a great moment for them to crack and whisk (with supervision, of course).
Step 4: Bring on the Green
Time to stir in the magic! Add 1½ cups of all-purpose flour, the entire 1-ounce bottle of green liquid food coloring, 1½ teaspoons of baking powder, 1 teaspoon of vanilla, and ⅛ teaspoon of salt. Use a silicone spatula or wooden spoon and fold everything together gently. It’ll look a bit like a science experiment at first, but soon you’ll have a thick, vibrantly green batter that’s smooth and ready for action. The food coloring is what gives these brownies their festive charm—if you skip the full bottle, you’ll end up with more of a mossy muddle than a leprechaun dream.
Looking for all-natural dye options? Read more about green food coloring alternatives on this article about St. Patrick’s Day desserts.
Step 5: Pour and Smooth It Out
Pour the green velvet brownie batter into your prepared baking pan. Use a spatula to spread it evenly, making sure it reaches all corners and has a smooth top. Give the pan a gentle shake or tap it lightly on the counter to remove any air bubbles hiding beneath the surface. Smooth batter = even bake.
Pro tip: If your batter seems thick, don’t worry—that’s the rich chocolate and eggs doing their job. It’s supposed to be thick and fudgy.
Step 6: Bake and Test for Doneness
Slide your pan into the preheated oven and bake for 44 to 48 minutes. At the 44-minute mark, insert a wooden toothpick into the center of the brownies. You’re looking for a few moist crumbs—NOT a clean pick. That’s your sign they’re perfectly fudgy and not overbaked. Every oven runs differently, so don’t be afraid to check in those last few minutes.
Need help reading doneness cues? Check out tips from recipes like juicy baked chicken breast where timing and texture really matter.
Step 7: Cool Completely
This is the hardest part—waiting. Set the pan on a wire rack and let the brownies cool completely, about 2 hours. Rushing this step will cause the frosting to melt and slide right off, which is… not ideal. Patience here pays off big time. The cool-down also allows the texture to set, making slicing so much easier and cleaner.
Step 8: Make the Cream Cheese Frosting
While the brownies are cooling, let’s whip up that dreamy frosting. In a mixing bowl, beat 8 ounces of softened cream cheese with 3 tablespoons of softened butter using an electric hand mixer. Beat on medium speed until the mixture is smooth and creamy—about 2 minutes. Gradually add 1½ cups of powdered sugar and ⅛ teaspoon of salt, beating until fully combined. Finally, stir in 1 teaspoon of vanilla extract. Taste test optional—but highly recommended.
Need a cream cheese fix before these are ready? You might also love strawberry cheesecake truffle balls for a quick no-bake option.
Step 9: Frost, Slice, and Admire
Once your brownies are fully cool, gently lift them from the pan using the foil overhang. Carefully peel away the foil from the sides and bottom. Now spread that cream cheese frosting generously over the top—no skimping here. Use a spatula to create swirls if you’re feeling artsy, or just keep it smooth and simple.
Cut into 16 squares using a sharp knife. If you want extra clean edges, wipe your knife between cuts. And voila! You’ve now completed every step in this step-by-step green velvet brownie journey. Enjoy immediately or store them for later—if you can resist.
What to Serve with Green Velvet Brownies with Cream Cheese Frosting
These green velvet brownies with cream cheese frosting are the life of any dessert spread, but if you’re feeling extra, pair them with a cold glass of milk or a steamy cup of coffee. Hosting a St. Patrick’s Day bash? These brownies love sharing a table with festive treats like Shamrock Swirl Pie or Shamrock Shake Pudding Cups. For a cozy evening in, serve them alongside a scoop of vanilla ice cream or even a dollop of whipped cream and berries for contrast. Want a savory counterpoint before dessert? Try something like Beefy Melt Burrito or Cheeseburger Orzo Delight. These brownies play well with others but are 100% capable of stealing the show solo.
Key Tips for Making Green Velvet Brownies with Cream Cheese Frosting
Use a metal baking pan—it helps the brownies cook evenly and gives them a better texture. Don’t skip the foil lining! It makes removing and slicing so much easier (and cleaner). Be sure to use the full 1-ounce bottle of green food coloring; it’s what gives them that bold, eye-catching color. Let the brownies cool completely before frosting or you’ll have a gooey mess instead of a pretty finish. Want thicker frosting? Chill it for 15–20 minutes before spreading. Use room temperature cream cheese and butter to avoid lumps. If you’re in a pinch, you can swap chocolate chips for a chopped bittersweet chocolate bar. These little tweaks make a big difference!
Storage and Reheating Tips for Green Velvet Brownies with Cream Cheese Frosting
Frosted brownies should be stored in an airtight container in the fridge, where they’ll stay fresh for up to 3 days. Want to keep them longer? You can freeze the unfrosted brownies for up to 3 months—just wrap tightly in plastic wrap and foil. When you’re ready, thaw them overnight in the fridge, then frost and slice. If you’re storing them frosted, a little parchment paper between layers helps prevent sticking. No need to reheat, but if you’re a warm-brownie fan, microwave an unfrosted square for 10–15 seconds before adding frosting for that just-baked vibe.
FAQs
Can I use gel food coloring instead of liquid?
Yes, but make sure you use enough to get that deep green color—gel is more concentrated, so you’ll need less.
Can I make these without frosting?
Sure! They’re still delicious on their own, but honestly, that cream cheese frosting is kind of the main character.
Do these taste like traditional brownies?
Not quite—think red velvet meets brownie. They’re a little cakier and have a smoother crumb.
Can I double the recipe?
Absolutely! Just bake in a 9×13-inch pan and increase bake time slightly (start checking at 50 minutes).
Are these safe for kids with food dye sensitivity?
If you’re concerned, try a natural food coloring or skip the dye altogether—they’ll be more “chocolate velvet” than green, but still tasty!
Final Thoughts
If you’re looking to shake up your dessert routine with something playful, rich, and drool-worthy, green velvet brownies with cream cheese frosting are your ticket. They’re festive enough for a party, simple enough for a weeknight treat, and decadent enough to turn a plain Tuesday into a mini celebration. These brownies are like joy in square form—easy to make, impossible to resist. Make them once and don’t be surprised if they become your new holiday (or random Tuesday) tradition. And hey, while you’re at it, check out Irish Cream Oreos or Red Velvet Snowballs for more sweet inspiration.
Visit our Pinterest for regular slow cooker recipe updates, or join our Facebook discussions where cooking fans exchange their favorite hearty meal ideas.
PrintGreen Velvet Brownies with Cream Cheese Frosting
Green Velvet Brownies with Cream Cheese Frosting – perfect for St. Patrick’s Day! Delicious homemade brownies topped with cream cheese frosting. Super easy to make and even easier to eat!
- Prep Time: 10 minutes
- Cook Time: 35 minutes
- Total Time: 45 minutes
- Yield: 16 brownies 1x
- Category: Dessert
- Method: Baking
- Cuisine: American
- Diet: Vegetarian
Ingredients
- ¾ cup semi-sweet chocolate chips
- ¾ cup butter
- 2 cups sugar
- 4 large eggs
- 1½ cups all-purpose flour
- 1 (1-oz) bottle green liquid food coloring
- 1½ tsp baking powder
- 1 tsp vanilla
- ⅛ tsp salt
- 1 (8-oz) package cream cheese, softened
- 3 Tbsp butter, softened
- 1½ cups powdered sugar
- ⅛ tsp salt
- 1 tsp vanilla extract
Instructions
1. Preheat oven to 350°F. Line bottom and sides of a 9-inch square pan with aluminum foil, allowing 2 to 3 inches to extend over sides; lightly grease foil.
2. Microwave chocolate chips and butter in a large microwave-safe bowl at HIGH 1-1/2 to 2 minutes or until melted and smooth, stirring at 30-second intervals.
3. Whisk in sugar. Add eggs, one at a time, whisking just until blended after each addition. Gently stir in flour, green food coloring, baking powder, vanilla, and salt. Pour mixture into prepared pan.
4. Bake for 44 to 48 minutes or until a wooden pick inserted in the center comes out with a few moist crumbs. Cool completely on a wire rack (about 2 hours).
5. For the frosting: Beat cream cheese and butter at medium speed with an electric mixer until creamy. Gradually add powdered sugar and salt, beating until blended. Stir in vanilla.
6. Lift brownies from pan, using foil sides as handles; gently remove foil. Spread Cream Cheese Frosting on top of brownies, and cut into 16 squares. Garnish, if desired.
Notes
For best results, use a metal cake pan.
Use a full 1-oz bottle of green food coloring for a vibrant color.
You can substitute a 4-oz bittersweet chocolate bar for the chocolate chips.
Cut brownies keep for 1 to 2 days in an airtight container. Uncut brownies last up to 4 days wrapped tightly.
To freeze, cool brownies completely, wrap unfrosted in plastic wrap and foil, and store up to 3 months. Thaw, frost, and cut before serving.
Nutrition
- Serving Size: 1 brownie
- Calories: 280
- Sugar: 24g
- Sodium: 110mg
- Fat: 15g
- Saturated Fat: 9g
- Unsaturated Fat: 5g
- Trans Fat: 0g
- Carbohydrates: 34g
- Fiber: 1g
- Protein: 3g
- Cholesterol: 60mg


