
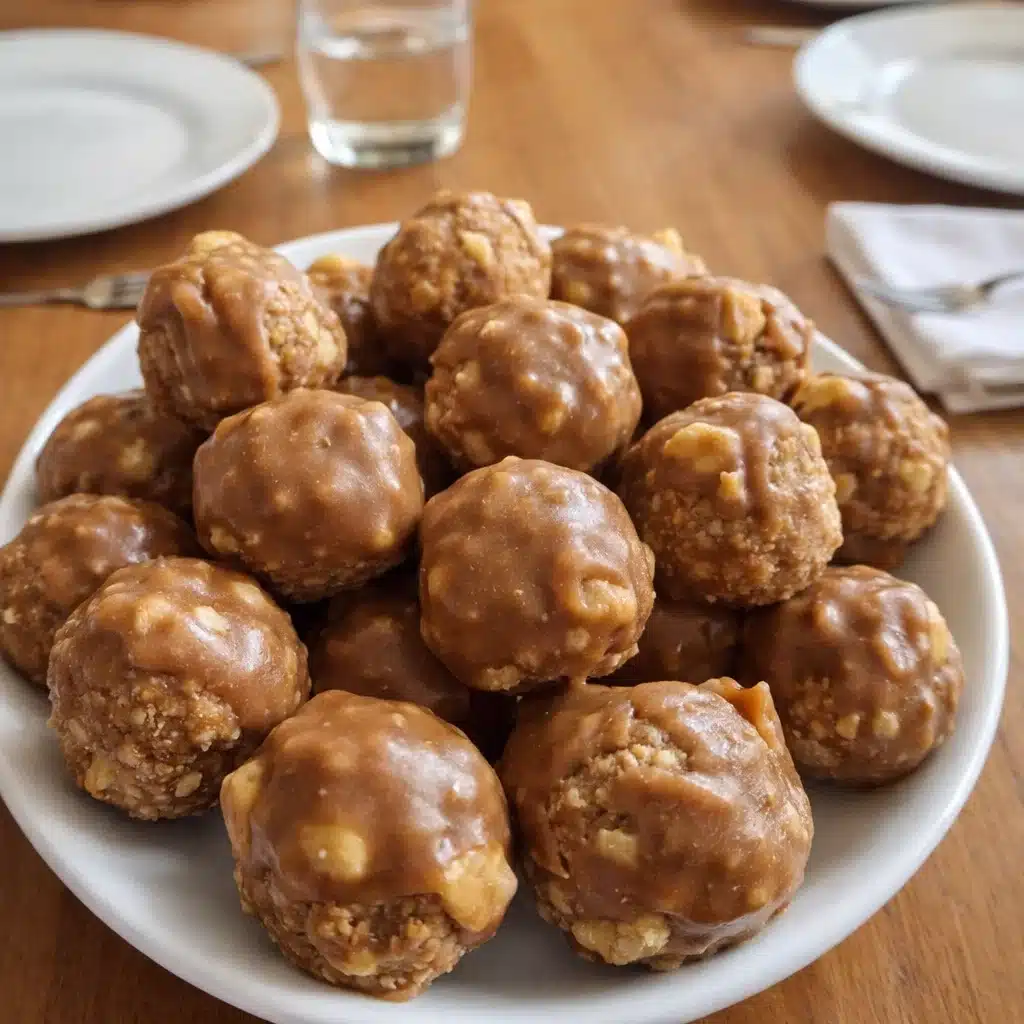
Butterfinger Balls are one of those irresistible treats that somehow make you the star of every gathering. There’s just something magical about the combination of creamy peanut butter, buttery graham cracker crumbs, and those crushed Butterfinger bits that make every bite a perfect mix of crunch and creaminess.
The best part? These little chocolate-coated gems look like you spent hours in the kitchen when, really, they come together faster than your favorite show’s intro credits. Whether you’re prepping for a family get-together, a holiday cookie swap, or just need a little something sweet after a long day, Butterfinger Balls deliver big flavor in a tiny package. And because they’re no-bake, they’re practically foolproof—even if baking isn’t your strong suit. With Butterfinger Balls at the center of your dessert table, you can bet they’ll disappear faster than you can say “save me one.”
Table of Contents
What is Butterfinger Balls?
Butterfinger Balls are bite-sized dessert truffles made from a heavenly mixture of peanut butter, graham cracker crumbs, powdered sugar, and crushed Butterfinger candy bars, all rolled into balls and dipped in silky melted chocolate. Think of them as a cross between Reese’s cups and your favorite candy bar—sweet, salty, and loaded with texture. They don’t require an oven, which makes them perfect for busy cooks or anyone who loves easy, no-fuss desserts. They’re great for gifting, storing, or snacking straight out of the fridge when that late-night sweet craving hits.
Reasons to Try Butterfinger Balls
If you’re looking for a dessert that’s crowd-pleasing, portable, and perfectly balanced, Butterfinger Balls are your new best friend. First, they’re no-bake, which means you skip the oven drama entirely—ideal for hot days or small kitchens. Second, the flavor combination is unbeatable. The peanut butter adds richness, the graham crackers bring a little crunch, and those Butterfinger pieces? They make every bite sing.
Third, they store beautifully, so you can make them ahead of time and still impress guests days later. They’re also endlessly customizable—add festive sprinkles for holidays, crushed peanuts for extra crunch, or a drizzle of white chocolate if you’re feeling fancy. For a fun twist, try pairing them with my Strawberry Earthquake Cake or my Peach Coffee Cake for a dessert spread that’ll make your guests swoon.
Ingredients Needed to Make Butterfinger Balls
- 4 tablespoons softened butter (½ stick)
- 1 teaspoon vanilla extract
- 8 ounces chocolate bark or chocolate chips (for coating)
- ½ cup crushed Butterfinger bars
- 1 cup powdered sugar
- 1 cup creamy peanut butter (avoid all-natural types)
- ¾ cup graham cracker crumbs
- Optional garnishes: additional crushed Butterfinger bars, festive sprinkles, or coarse sea salt
Instructions to Make Butterfinger Balls – Step by Step
Step 1: Prepare the Dough
In a large mixing bowl, combine the softened butter and peanut butter. Using an electric or stand mixer set to medium speed, blend until the mixture is completely smooth and creamy. This base is what gives your Butterfinger Balls that signature melt-in-your-mouth texture, so take a minute here to get it silky. If you want to get fancy, use a rubber spatula to scrape down the sides as you mix—no peanut butter left behind!
Step 2: Add Aromatic Notes
Next, pour in the vanilla extract and mix until it’s fully incorporated. Vanilla might seem like a small addition, but it adds a subtle warmth and depth that ties the sweetness together. Think of it as the secret ingredient that makes people ask, “What’s in these?”
Step 3: Sweeten the Deal
Gradually add the powdered sugar in batches, blending on low speed to avoid a sugar cloud explosion (we’ve all been there). Scrape the bowl occasionally to make sure every bit of sugar is mixed in. The dough will start to thicken into a soft, fudge-like consistency—that’s when you know you’re on the right track.
Step 4: Crunch Time
Now for the fun part. Gently fold in your graham cracker crumbs and crushed Butterfinger bars using a spatula or wooden spoon. The graham crackers give a toasty, slightly sandy texture that contrasts perfectly with the candy crunch. You’ll notice the dough firming up a bit—that’s exactly what you want before shaping.
Step 5: Shape ‘em Up
Line a large cookie sheet with parchment paper to make cleanup easy. Scoop out roughly 1 to 1½ tablespoons of dough at a time and roll between your palms until smooth. Place each ball on the parchment paper with a little space in between. This is a great step to recruit little helpers if you’ve got kids—they love rolling dough into bite-sized treasures.
Step 6: Chilling Phase
Pop your tray of peanut butter balls into the freezer for about 30 minutes. This helps them firm up so they won’t fall apart when dipped in chocolate. If you’re in a hurry, you can get away with 20 minutes, but the longer chill time gives you that perfect, sturdy center.
Step 7: Melting the Chocolate – Chocolate Symphony
While the balls are chilling, melt your chocolate bark or chocolate chips. Place them in a microwave-safe bowl and heat in 30-second intervals at 50% power, stirring in between each round. Be patient—rushed chocolate can seize up and ruin your coating. If you prefer a slower, more controlled method, you can also melt your chocolate in a double boiler over low heat. A few lumps left? Just keep stirring; the residual heat will smooth them out.
Step 8: Coat and Decorate
Once the dough balls are firm, dip them one by one into the melted chocolate using a fork or dipping tool. Let the excess drip off and place them back onto the parchment-lined tray. You can fully coat them or leave a little peanut butter exposed at the top for a rustic look. Before the chocolate hardens, sprinkle a bit of crushed Butterfinger, colorful sprinkles, or even a touch of sea salt on top. That tiny bit of garnish makes them look bakery-level fancy.
Step 9: The Grand Finale
Allow the chocolate to set completely. You can leave them at room temperature for about 15–20 minutes or pop them back in the fridge to speed things up. Once the chocolate is firm, your Butterfinger Balls are ready to devour. Arrange them on a pretty plate or package them in small boxes for gifts—they’re irresistible either way.
Step 10: Step-by-Step Cleanup Tip
If you’ve ever finished a dessert project and found your kitchen looks like a cocoa crime scene, here’s your saving grace: soak your chocolate bowl and utensils in warm water immediately after dipping. It’ll make cleanup ten times easier and leave you with more time to enjoy your handiwork.
What to Serve with Butterfinger Balls
Butterfinger Balls shine on their own, but they also play well with others. Pair them with a scoop of vanilla ice cream or alongside a hot cup of coffee for a cozy afternoon treat. If you’re hosting a dessert buffet, try serving them next to something fruity like my Strawberry Lemonade Bars for a nice contrast of flavors. They also make a fantastic addition to holiday cookie platters or family dessert boards.
Key Tips for Making Butterfinger Balls
- Stick to regular peanut butter brands like Jif or Skippy. All-natural types are too oily and can make your dough fall apart.
- Don’t skip the chill time! It’s what keeps your balls from melting when dipped in chocolate.
- For a professional finish, use chocolate bark instead of chips—it melts smoother and sets with a beautiful sheen.
- Add toppings right after dipping so they adhere perfectly.
- For a twist, try mixing in mini chocolate chips, toffee bits, or even pretzel crumbs for an unexpected crunch.
Storage and Reheating Tips for Butterfinger Balls
Store your Butterfinger Balls in an airtight container in the refrigerator for up to a week. They can also be frozen for up to a month—just thaw in the fridge before serving. Avoid reheating them; they’re meant to be enjoyed chilled or at room temperature. If you live somewhere warm, keep them stored in the fridge to prevent the chocolate from softening.
FAQs
Q: Can I use white chocolate instead of milk or dark?
Absolutely! White chocolate makes a deliciously sweet alternative, especially when topped with extra Butterfinger crumbs.
Q: Can I make these ahead of time?
Yes! They’re ideal for meal prep. Make them up to three days in advance, and they’ll still taste fresh.
Q: Can I make them nut-free?
You can swap peanut butter for sunflower seed butter or cookie butter for a different twist.
Q: Why are my Butterfinger Balls too soft?
It usually means you need more powdered sugar or graham cracker crumbs. Chill longer to firm them up before coating.
Q: Can I double the batch?
Definitely! This recipe scales beautifully—just make sure to chill in batches so they all stay firm.
Final Thoughts
Butterfinger Balls are the kind of dessert that never fails to impress. They’re easy, fun, and absolutely delicious, with that perfect mix of nostalgia and indulgence. Whether you’re making them for a bake sale, a holiday tray, or just because you deserve a treat (you do!), these little gems deliver every time. If you loved this recipe, you might also enjoy my Strawberry Shortcake Oreo Balls for another no-bake crowd-pleaser. Now grab your spatula, crush those candy bars, and let’s make something worth savoring.
Visit our Pinterest for regular slow cooker recipe updates, or join our Facebook discussions where cooking fans exchange their favorite hearty meal ideas.
PrintButterfinger Balls Recipe: Easy Chocolate Peanut Butter Bliss

Indulge your taste buds with these irresistible Butterfinger Bliss Balls, where creamy peanut butter harmoniously melds with the crunch of graham crackers and Butterfinger candy bars, all cloaked in sumptuous melted chocolate.
- Prep Time: 15 minutes
- Cook Time: 0 minutes
- Total Time: 45 minutes
- Yield: 20 balls 1x
- Category: Desserts
- Method: No-Bake
- Cuisine: American
- Diet: Vegetarian
Ingredients
- 4 tablespoons softened butter (½ stick)
- 1 teaspoon vanilla extract
- 8 ounces chocolate bark or chocolate chips
- ½ cup Butterfinger bars, crushed
- 1 cup powdered sugar
- 1 cup peanut butter (avoid all-natural varieties)
- ¾ cup crumbs from graham crackers
- Optional garnishes: additional crushed Butterfinger bars, festive sprinkles, or coarse sea salt
Instructions
1. In a mixing bowl, combine the peanut butter and softened butter. Use an electric or stand mixer set to medium speed and blend until the mixture is creamy and uniform.
2. Incorporate the vanilla extract and blend thoroughly.
3. Gradually add the powdered sugar in increments, blending at a low speed. Scrape down the sides of the bowl to ensure even mixing.
4. Gently fold in the graham cracker crumbs and crushed Butterfinger bars.
5. Align a large cookie sheet with parchment paper. Scoop out approximately 1 to 1½ tablespoons of the dough, roll into neat balls, and place on the cookie sheet.
6. Freeze the dough balls on the sheet for roughly 30 minutes until they are completely firm.
7. Once the dough balls are chilled, melt the chocolate using a microwave-safe bowl. Heat in 30-second spurts at 50% power, stirring between each interval. Do not overheat.
8. Submerge each chilled ball into the melted chocolate. Fully coat or partially dip as desired.
9. Add crushed Butterfinger bars, sprinkles, or flaky sea salt as decoration.
10. Allow the chocolate to solidify completely before serving.
Notes
Store these delights in an airtight container and refrigerate for up to a week.
Stick to conventional peanut butter brands like Jif or Skippy, as all-natural varieties can be too oily.
For a smoother texture, chocolate bark is recommended. Alternatively, you can use a mix of chocolate bark and chocolate chips or opt for tempered chocolate chips.
A double boiler can be used for melting chocolate at a low or medium-low heat setting if you prefer that method.
Nutrition
- Serving Size: 1 ball
- Calories: 180
- Sugar: 15g
- Sodium: 85mg
- Fat: 11g
- Saturated Fat: 4g
- Unsaturated Fat: 6g
- Trans Fat: 0g
- Carbohydrates: 18g
- Fiber: 1g
- Protein: 3g
- Cholesterol: 5mg


