
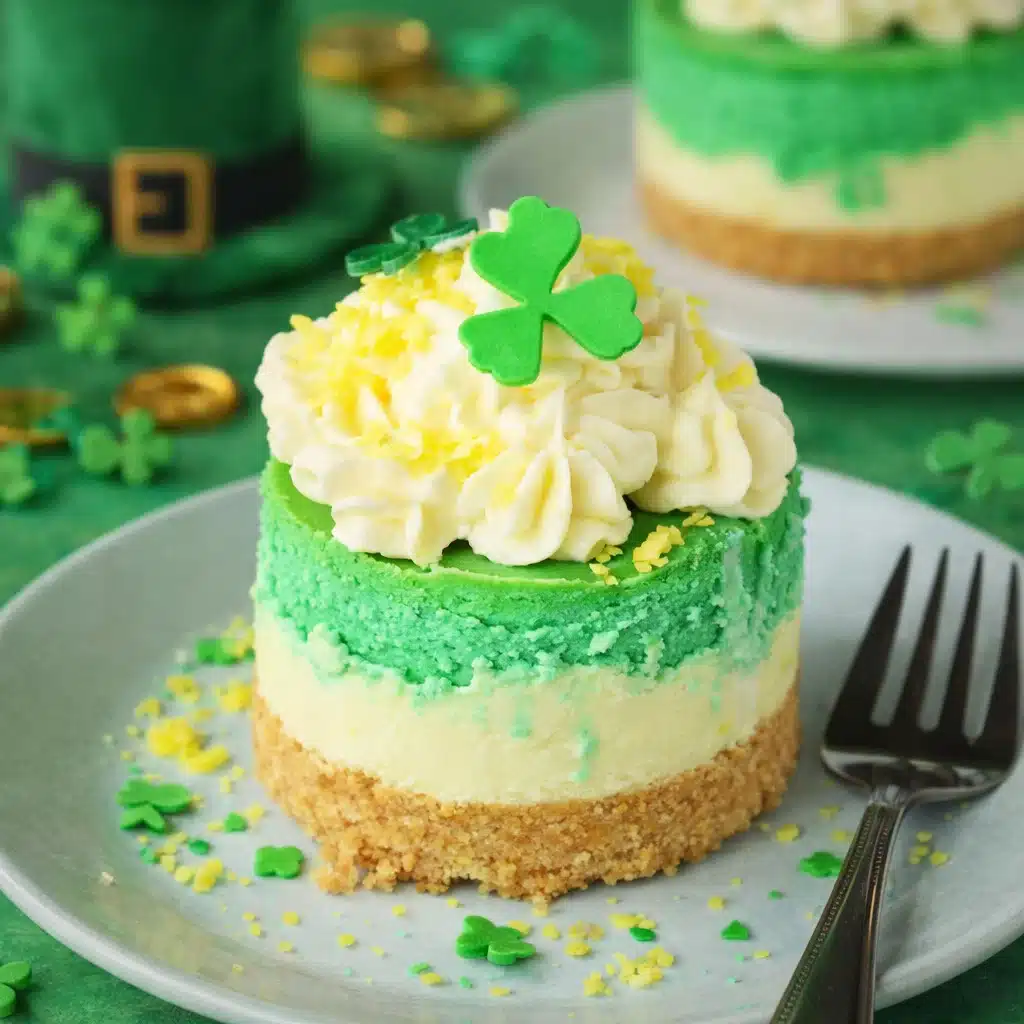
Mini St. Patrick’s Day Cheesecakes are the kind of dessert that practically throw their own party. They’re bright, playful, and layered with creamy goodness—and yes, they’re absolutely no-bake, which is music to the ears of anyone juggling work, kids, or let’s be honest—just life. These little gems are built on a buttery graham cracker crust and dressed to impress with green and white cheesecake layers that taste as fun as they look. Topped with swirls of buttercream and a sprinkle of St. Paddy’s charm, these cheesecakes are perfect for when you want to make something special without turning your kitchen upside down.
Table of Contents
What is Mini St. Patrick’s Day Cheesecakes?
Mini St. Patrick’s Day Cheesecakes are the dessert equivalent of a cheeky leprechaun—charming, colorful, and just a little bit magical. These are individual-sized no-bake cheesecakes layered in three fun tiers: classic creamy white, aqua green, and a vibrant lime green swirl. Sitting pretty on a buttery graham cracker crust, they’re topped with a swirl of buttercream frosting and festive sprinkles. Think of them as a sweet little celebration in every bite. Unlike traditional baked cheesecakes, these babies skip the oven entirely, making them super beginner-friendly and ideal for busy folks who still want to serve something eye-catching. They’re perfect for potlucks, office parties, or a cozy celebration at home with the kids.
Reasons to Try Mini St. Patrick’s Day Cheesecakes
Let’s be real—most of us don’t have hours to fuss with water baths and cracked cheesecake tops. That’s why Mini St. Patrick’s Day Cheesecakes are a total lifesaver. First off, they’re no-bake. No oven, no stress, no “did I overcook it?” panic. Second, they’re portioned out into perfect little servings. No slicing, no mess—just grab and go. These are also a big win for anyone looking to get creative without being a pastry chef. The layers are easy to color and assemble, and the decorating is totally customizable. Want to add gold flakes? Go for it. Prefer chocolate shamrocks? Heck yes.
Ingredients Needed to Make Mini St. Patrick’s Day Cheesecakes
Graham Cracker Crust:
- 1 ½ cups graham cracker crumbs
- ¼ cup granulated sugar
- ½ cup unsalted butter, melted
No-Bake Cheesecake Filling:
- 16 oz cream cheese, softened
- ½ cup powdered sugar
- 1 teaspoon vanilla extract
- 1 tablespoon lemon juice
- 1 package (3.4 oz) cheesecake-flavored instant pudding mix
- 1 cup half-and-half
- Green food coloring (neon lime & aqua green for layered effect)
Festive Toppings:
- ½ cup buttercream frosting (homemade or store-bought)
- Green sprinkles
- Optional: edible gold flakes, chocolate shamrocks
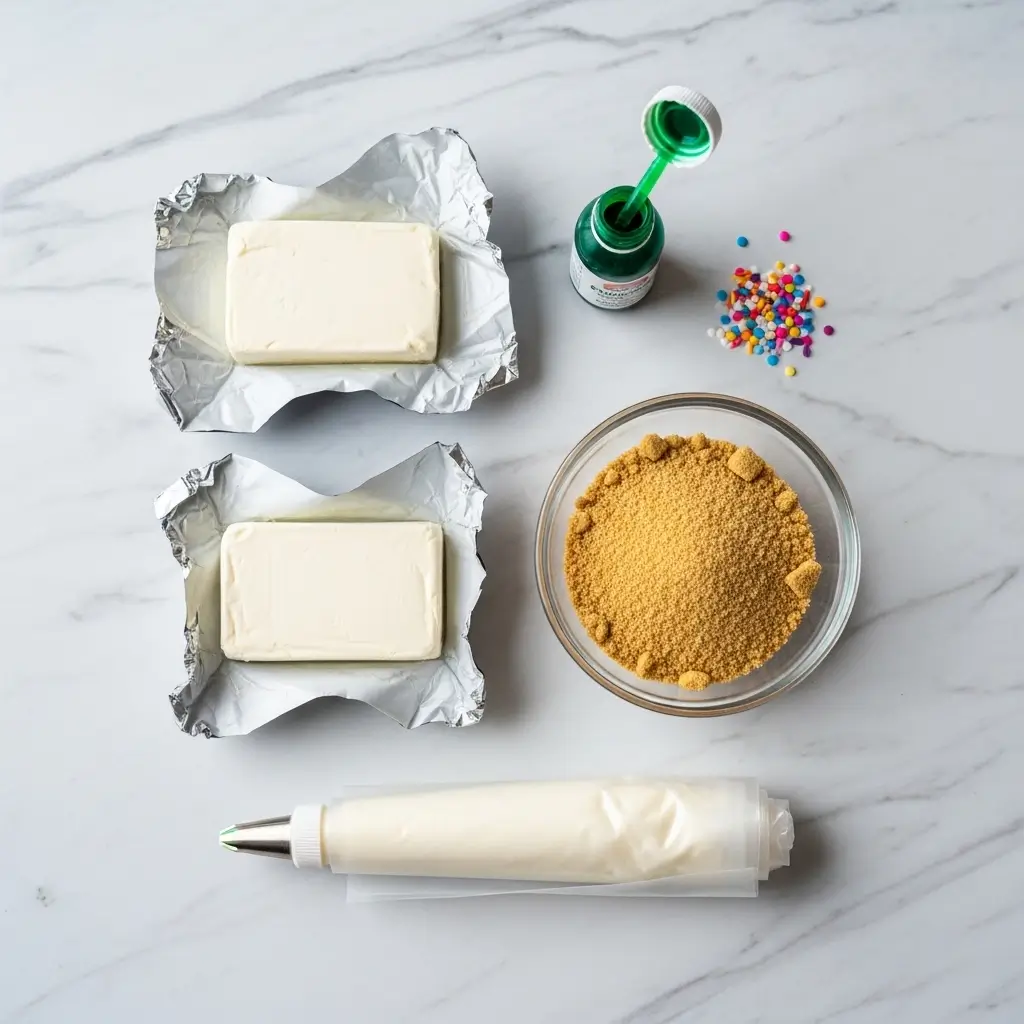
Instructions to Make Mini St. Patrick’s Day Cheesecakes: A Step-by-Step Guide
Making Mini St. Patrick’s Day Cheesecakes is as fun as eating them—and trust me, that’s saying something. This step-by-step guide walks you through each part of the process so you feel confident, even if it’s your first time whipping up a no-bake dessert. So roll up those sleeves (or at least push them back) and let’s get layering.
Step 1: Build the Buttery Graham Cracker Crust
Start your step-by-step journey with the base—because let’s be honest, a good cheesecake is only as strong as its crust. In a medium bowl, stir together 1 ½ cups of graham cracker crumbs, ¼ cup granulated sugar, and ½ cup melted unsalted butter. It should look like damp sand—crumbly but able to hold its shape when pressed. Spoon this mixture evenly into 12 lined muffin tins or silicone mini cheesecake molds. Press it down firmly using the back of a spoon or a small glass (a flat-bottom shot glass works wonders!). This helps the crust set and stay together. Pop the pan in the freezer for 10 minutes to firm up while you tackle the filling.
Step 2: Whip Up the Creamy Cheesecake Filling
Next in this step-by-step recipe: the dreamy, creamy filling. In a large bowl, beat 16 ounces of softened cream cheese with 1 teaspoon of vanilla extract and 1 tablespoon of lemon juice. You’re aiming for a smooth, silky texture with zero lumps—so make sure your cream cheese is at room temp. In a second bowl, whisk together one 3.4-ounce package of cheesecake-flavored instant pudding mix with 1 cup of half-and-half until it thickens. This takes about 1–2 minutes. Now, add the thickened pudding to your cream cheese mixture and mix until combined.
Step 3: Divide and Tint the Batter with Festive Colors
For that iconic look, divide your filling evenly into three bowls. Leave one bowl plain (classic creamy white). Tint the second with aqua green food coloring, and the third with neon lime green—adding a tiny swirl of aqua green for a marbled effect. Use gel-based food coloring for bold color without thinning the batter. If you’re curious about food dye swaps or baking-safe alternatives, check out our Shamrock Swirl Pie where we talk about natural coloring options.
Step 4: Layer the Cheesecake Filling Like a Pro
Here’s where the step-by-step fun really begins. Grab your muffin tin with chilled crusts and start layering. Begin with a heaping spoonful of the plain white filling, smoothing it gently with the back of the spoon. Place the pan in the freezer for 5–10 minutes before adding the next color—this little trick keeps the layers from blending into one another. Next, add a layer of aqua green, freeze again, then top with the lime green swirl. Smooth each layer carefully but don’t stress about perfection—this dessert is meant to be fun and festive! When all layers are done, refrigerate the cheesecakes for at least 4 hours, or overnight for best results. These colors really pop when chilled!
Step 5: Frost and Decorate with a Festive Touch
Once your mini cheesecakes are fully chilled and set, it’s time for the fun part—decorating. Pipe a swirl of buttercream frosting on top of each mini cheesecake. You can use store-bought frosting if you’re short on time, or whip up a homemade batch like we do in our Strawberry Kiss Cookies. Add a generous sprinkle of green sanding sugar or St. Paddy’s-themed sprinkles. Want to go over the top (and who doesn’t)? Garnish with edible gold flakes or pop a chocolate shamrock on top for a festive finish that looks straight off a bakery shelf.
Step 6: Chill, Serve, and Soak Up the Compliments
You’re almost at the end of this step-by-step guide—just one more chill! Let the decorated cheesecakes sit in the fridge for another 10–15 minutes to help the frosting firm up a bit before serving. Carefully lift them out of the muffin tin or mold (a butter knife around the edge helps if they’re a little stubborn). Arrange on a tray or cake stand, and get ready for lots of oohs and aahs. Bonus idea: serve these next to our Andes Mint Mini Cheesecakes for a minty duo that screams celebration.
What to Serve with Mini St. Patrick’s Day Cheesecakes
These cheesecakes are festive stars on their own, but if you’re hosting a full-on St. Patrick’s Day spread, they pair perfectly with light, refreshing sips like mint lemonade or Irish cream coffee. For a full dessert table, consider adding Mint Oreo Truffles or Shamrock Swirl Pie for even more green goodness. They also play well with salty snacks—think pretzel bites or pistachio nuts—to balance all that creamy sweetness. Hosting brunch? These minis look adorable next to a fruit tray or a batch of Pistachio Pudding Cookies.
Key Tips for Making Mini St. Patrick’s Day Cheesecakes
Don’t skip freezing between layers—it helps keep the colors clean and defined. Softened cream cheese is key for a smooth texture, so let it come to room temp before you mix. For a sturdier crust, bake it for 5–7 minutes at 325°F, then cool before layering. Use gel food coloring for bolder hues without watering down the batter. Want a minty twist? Add a splash of peppermint extract to the filling. And don’t overbeat the batter—gentle folding helps keep it light. For extra flair, top with Irish Cream Oreos or drizzle with caramel.
Storage and Reheating Tips Mini St. Patrick’s Day Cheesecakes
Store these cuties in an airtight container in the fridge for up to 5 days. They’re best served chilled straight from the fridge. Planning ahead? Freeze them individually (wrapped tightly in plastic wrap or stored in a freezer-safe container) for up to 2 months. Thaw overnight in the refrigerator—don’t microwave, or you’ll lose that lovely texture. If the frosting softens too much after thawing, a quick chill in the fridge will firm things right back up.
FAQs
Can I make these ahead of time?
Yes! These cheesecakes are even better the next day, so go ahead and make them a day early.
Do I need a mixer?
A hand mixer helps with fluffiness, but a whisk and strong arms work too!
Can I use another crust?
Absolutely—chocolate cookie crust would be dreamy.
Can I make these in a mini muffin tin?
Yep! Just scale down the layers and keep an eye on chill time.
Can I skip the food coloring?
Of course—they’ll still taste delicious with a classic creamy look.
Final Thoughts
Mini St. Patrick’s Day Cheesecakes are a fun and fuss-free way to bring a little luck—and a whole lot of joy—to your dessert table. They’re easy to make, a dream to decorate, and almost too cute to eat (almost). Whether you’re planning a themed dinner, surprising the kids, or just in the mood for a festive treat, this recipe checks every box. For more St. Paddy’s inspiration, don’t miss our Shamrock Shake Pudding Cups or Andes Mint Mini Cheesecakes. Happy baking—and may the cheesecake always be in your favor!
Visit our Pinterest for regular slow cooker recipe updates, or join our Facebook discussions where cooking fans exchange their favorite hearty meal ideas.
PrintMini St. Patrick’s Day Cheesecakes (Mini St. Patrick’s Day Cheesecakes)
These Mini St. Patrick’s Day Cheesecakes are a fun, festive, and no-bake dessert that brings a pop of color and a burst of creamy flavor to any celebration! With a buttery graham cracker crust, vibrant green and white cheesecake layers, and a swirl of buttercream frosting topped with festive sprinkles, these cheesecakes are the perfect St. Paddy’s treat.
- Prep Time: 20 minutes
- Cook Time: 4 hours
- Total Time: 4 hours 20 minutes
- Yield: 12 mini cheesecakes 1x
- Category: Dessert
- Method: No-Bake
- Cuisine: American
Ingredients
- Graham Cracker Crust
- 1 ½ cups graham cracker crumbs
- ¼ cup granulated sugar
- ½ cup unsalted butter (melted)
- No-Bake Cheesecake Filling
- 16 ounces cream cheese (softened)
- ½ cup powdered sugar
- 1 teaspoon vanilla extract
- 1 tablespoon lemon juice
- 1 package (3.4 ounces) cheesecake-flavored instant pudding mix
- 1 cup half-and-half
- Green food coloring (neon lime & aqua green for swirled layers)
- Festive Toppings
- ½ cup buttercream frosting (store-bought or homemade)
- Green sprinkles
- Optional: Edible gold flakes or chocolate shamrocks
Instructions
1. In a bowl, mix graham cracker crumbs, sugar, and melted butter until combined.
2. Press the mixture into the bottoms of 12 lined muffin cups or mini cheesecake molds.
3. Freeze for 10 minutes while preparing the filling.
4. In a large bowl, beat cream cheese, vanilla extract, and lemon juice until smooth.
5. In a separate bowl, whisk together the pudding mix and half-and-half until thick.
6. Add the pudding mixture to the cream cheese mixture and beat until well combined.
7. Gradually mix in powdered sugar until light and fluffy.
8. Divide the cheesecake batter into three bowls:
9. Leave one bowl plain.
10. Tint one with aqua green food coloring.
11. Tint the last with neon lime and swirl with a drop of aqua green.
12. Layer the batter in the prepared crusts:
13. Start with a spoonful of white, followed by aqua green, then lime green.
14. Smooth each layer gently and freeze for 5-10 minutes before adding the next layer to keep colors separate.
15. Once all layers are added, refrigerate for at least 4 hours (or overnight) to set.
16. Pipe buttercream frosting on top of the chilled cheesecakes.
17. Sprinkle with green sprinkles or edible gold flakes for a festive touch.
18. Carefully remove the cheesecakes from their molds.
19. Garnish with chocolate shamrocks or a drizzle of caramel sauce if desired.
Notes
For a firmer crust: Bake the crust at 325°F (163°C) for 5-7 minutes, then cool before adding the filling.
Storage: Store in an airtight container in the refrigerator for up to 5 days.
Freezing: Wrap cheesecakes individually and freeze for up to 2 months. Thaw in the fridge before serving.
For a minty version: Add ¼ teaspoon peppermint extract to the cheesecake batter.
Nutrition
- Serving Size: 1 mini cheesecake
- Calories: 280
- Sugar: 18g
- Sodium: 160mg
- Fat: 18g
- Saturated Fat: 11g
- Unsaturated Fat: 6g
- Trans Fat: 0g
- Carbohydrates: 24g
- Fiber: 0g
- Protein: 4g
- Cholesterol: 45mg


