
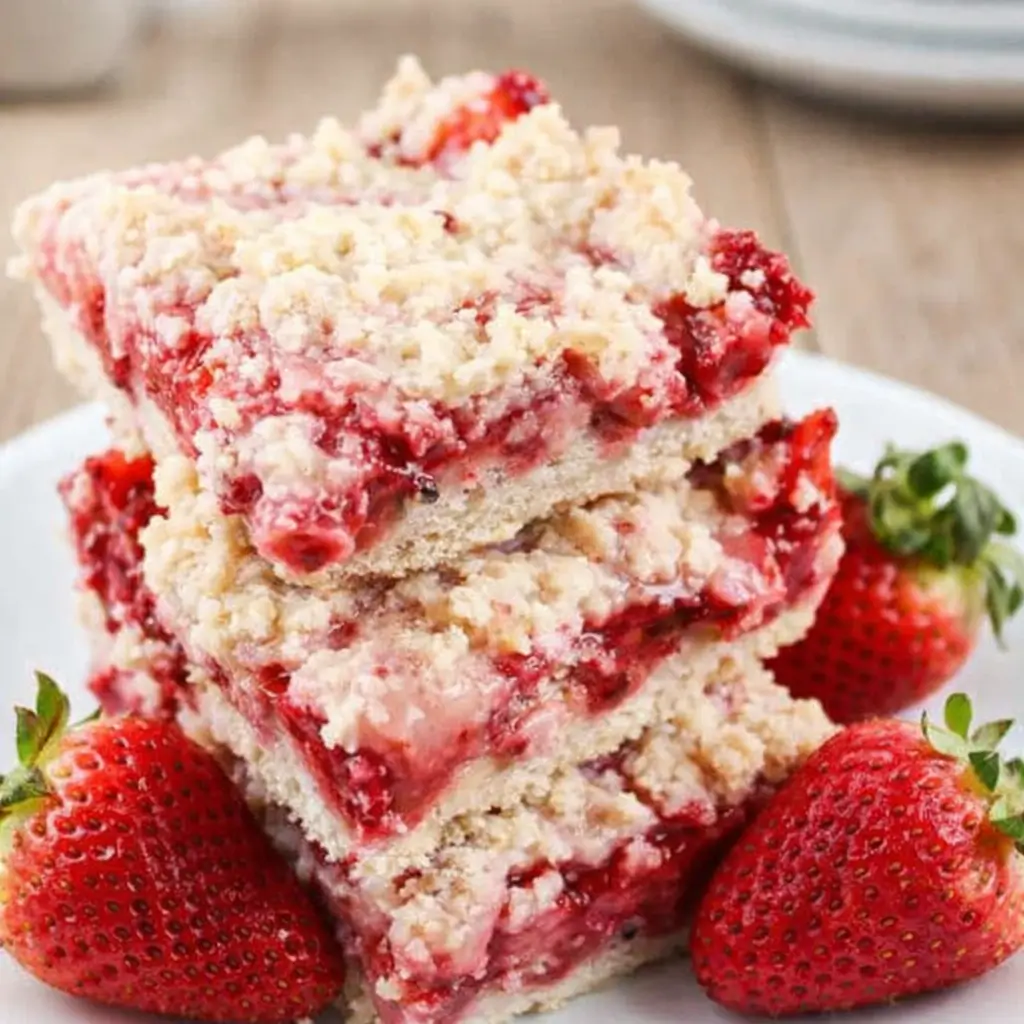
Strawberry Crumb Bars are one of those desserts that somehow manage to taste like summer even in the middle of January. They’re buttery, fruity, crumbly in all the right ways, and—best of all—super easy to make. If you’ve ever wanted a dessert that feels like a cross between a pie and a cookie but without all the fuss, this is it. Whether you’re heading to a picnic, a church potluck, or just craving something sweet while watching your favorite show, these bars hit that perfect balance of comfort and convenience. What makes Strawberry Crumb Bars even better is how flexible they are: you can double the batch for a crowd, use frozen strawberries when they’re not in season, or swap in your favorite fruit filling (blueberries, raspberries, you name it). But let’s be honest—the strawberry version is a classic for a reason.
Table of Contents
What is Strawberry Crumb Bars?
Strawberry Crumb Bars are delightful dessert squares that layer a buttery shortbread-like crust, a juicy strawberry filling, and a golden crumb topping. Think of them as the easy-going cousin of a strawberry pie—less work, no rolling pins, and way less cleanup. The base doubles as the crust and the crumb topping, thanks to a simple dough that’s part flour, sugar, butter, and just enough egg to hold it together. The middle layer? Sweet, jammy strawberries thickened just slightly with cornstarch so you get that gooey, fruit-packed center. Once baked, the bars develop a heavenly aroma and a texture that’s part crisp, part tender. Serve them warm with a scoop of vanilla ice cream or chilled straight from the fridge—they’re irresistible either way.
Reasons to Try Strawberry Crumb Bars
Let’s face it: there are a million dessert recipes out there. But Strawberry Crumb Bars deserve a permanent spot in your rotation for a few key reasons. First, they’re ridiculously easy. No electric mixer needed, no fancy ingredients—just good old-fashioned pantry staples. Second, they’re portable. Pack them up for a picnic or bake sale, and you’ve got a guaranteed crowd-pleaser that travels beautifully. Third, they’re adaptable. You can use any berry or even peaches if you’re feeling adventurous. Finally, they’re nostalgic. There’s something about biting into that buttery crumble and tasting the sweetness of strawberries that takes you straight back to childhood summers. For an extra fun twist, pair them with a scoop of easy strawberry crunch poke cake at your next get-together—you’ll be the dessert hero everyone talks about.
Ingredients Needed to Make Strawberry Crumb Bars
Here’s what you’ll need to whip up your own Strawberry Crumb Bars:
- ½ cup white sugar
- ½ teaspoon baking powder
- 1½ cups all-purpose flour
- ¼ teaspoon salt
- ½ cup very cold butter (1 stick)
- 1 egg, beaten
- 1 teaspoon vanilla extract
- 2 cups fresh strawberries, chopped
- ⅓ cup white sugar
- 2 teaspoons cornstarch
That’s it—nine simple ingredients for pure strawberry bliss.
Instructions to Make Strawberry Crumb Bars – Step by Step
Let’s dive into how to make these Strawberry Crumb Bars step by step. We’ll take it slow, like we’re baking together in the same kitchen—aprons on, coffee nearby.
Step 1: Preheat and Prepare Your Pan
Start by preheating your oven to 375°F (190°C). Line an 8×8-inch baking pan with parchment paper, leaving a bit of overhang on the sides so you can lift the bars out easily later. This step might sound optional, but trust me—it’s the difference between perfectly cut bars and a crumbly mess stuck to the pan. Think of it as your insurance policy for dessert success.
Step 2: Make the Crumb Base
In a medium bowl, stir together ½ cup sugar, flour, baking powder, and salt. Now comes the fun (and slightly therapeutic) part—cutting in the butter. Use a pastry cutter or a fork to work the very cold butter into the flour mixture. You want the pieces to be pea-sized. The colder your butter, the flakier your crust will be. If your kitchen’s warm, pop the bowl in the fridge for five minutes before continuing. The dough will look crumbly, and that’s exactly what you want.
Step 3: Add the Egg and Vanilla
In a small bowl, lightly beat the egg and stir in the vanilla extract. Pour this mixture into your flour and butter crumbs. Gently combine until everything looks like coarse crumbs that can be pressed together but aren’t sticky. Don’t overmix—it’s a crumb bar, not a sugar cookie dough. Half of this mixture will become your bottom crust, and the other half your golden topping.
Step 4: Form the Crust Layer
Press half the crumb mixture firmly and evenly into the bottom of your prepared pan. It’s okay if it looks a bit rustic—perfection isn’t the goal here. You can use the back of a spoon or your fingers to flatten it out. This layer forms the sturdy, buttery base that’ll hold all that delicious strawberry filling.
Step 5: Make the Strawberry Filling
In another bowl, combine ⅓ cup sugar and cornstarch. Stir in the chopped strawberries until they’re well coated. As the bars bake, the sugar will draw out the natural juices from the berries while the cornstarch thickens them into a glossy, jammy layer. If your strawberries aren’t super sweet, you can bump up the sugar to ½ cup. For a tangy twist, add a squeeze of lemon juice—it brightens the whole flavor.
Step 6: Assemble the Layers
Spoon the strawberry mixture evenly over your crust. Then take the remaining crumb mixture and sprinkle it over the top. Don’t worry about covering every inch—the little gaps let that gorgeous red filling peek through. It’s rustic charm at its best.
Step 7: Bake to Golden Perfection
Bake in your preheated oven for 40–45 minutes, or until the top is lightly golden and the strawberries are bubbling around the edges. Keep an eye on it around the 35-minute mark—every oven has its own personality, and some run a bit hotter. Your kitchen will start to smell like butter and sunshine, and that’s your cue that dessert’s almost ready.
Step 8: Cool and Cut
This is the hardest part—waiting. Let the bars cool completely in the pan. If you try to cut them too soon, they’ll fall apart. For the cleanest cuts, pop them into the fridge for about 30 minutes before slicing. Use the parchment overhang to lift the whole batch out of the pan, then cut into nine squares. Each bar should have that perfect trifecta of buttery bottom, sweet center, and crumbly top.
Step 9: Serve and Enjoy
Serve your Strawberry Crumb Bars just as they are, or make them extra special with a scoop of vanilla ice cream or a dollop of whipped cream. They’re just as good cold from the fridge as they are slightly warm from the oven. For a fun dessert spread, pair them with 6-ingredient gluten-free strawberry shortcake or strawberry vanilla cake.
What to Serve with Strawberry Crumb Bars
These bars shine all on their own, but if you’re putting together a full dessert table, they play nicely with a few friends. Serve them with a side of fresh berries, a drizzle of warm chocolate sauce, or a scoop of creamy strawberry truffles. They’re also lovely with a simple cup of coffee or tea for an afternoon treat.
Key Tips for Making Strawberry Crumb Bars
- Keep your butter cold. This is crucial for that flaky, crumbly texture.
- Don’t skip the parchment. You’ll thank yourself when lifting the bars out later.
- Sweetness check. Taste your strawberries—if they’re tart, add a bit more sugar.
- Cool completely. Cutting too early will give you a gooey mess instead of clean bars.
- Double it up. Want more? Just double the ingredients and bake in a 9×13-inch pan.
Storage and Reheating Tips for Strawberry Crumb Bars
Store your Strawberry Crumb Bars in an airtight container in the refrigerator for up to 5 days. They taste even better the next day after the flavors have mingled. If you prefer them warm, just pop a square in the microwave for about 10 seconds. You can also freeze them—wrap each bar in plastic wrap and store in a freezer bag for up to 2 months. Thaw overnight in the fridge and they’ll taste as fresh as the day you baked them.
FAQs
Can I use frozen strawberries?
Yes! Just thaw them first and drain off any excess liquid before using.
Can I make these gluten-free?
Absolutely—swap the all-purpose flour for a 1:1 gluten-free baking blend.
Can I use other fruits?
Yes, blueberries, raspberries, or even peaches work beautifully.
How do I keep the crust from getting soggy?
Make sure your filling isn’t too wet—if your strawberries are extra juicy, sprinkle in an extra teaspoon of cornstarch.
Final Thoughts
If you’ve been looking for a simple, satisfying dessert that doesn’t require fancy tools or tons of time, Strawberry Crumb Bars are it. They’re nostalgic, sweet, and versatile—everything a homemade treat should be. Make them for a bake sale, a brunch, or just a cozy weekend at home. Once you taste that buttery crust and juicy strawberry filling, you’ll find yourself coming back to this recipe again and again.
Visit our Pinterest for regular slow cooker recipe updates, or join our Facebook discussions where cooking fans exchange their favorite hearty meal ideas.
PrintStrawberry Crumb Bars: The Perfect Sweet & Buttery Treat
These easy Strawberry Crumb Bars, with a buttery crust, sweet fresh strawberry filling, and crunchy butter crumb topping make wonderful dessert bars to take to a summer party, picnic, or potluck.
- Prep Time: 15 minutes
- Cook Time: 45 minutes
- Total Time: 1 hour
- Yield: 9 bars 1x
- Category: Dessert
- Method: Baking
- Cuisine: American
Ingredients
- 1/2 cup white sugar
- 1/2 teaspoon baking powder
- 1 1/2 cups all-purpose flour
- 1/4 teaspoon salt
- 1/2 cup very cold butter (8 tablespoons or 1 stick)
- 1 egg, beaten
- 1 teaspoon vanilla
- 2 cups fresh strawberries, chopped
- 1/3 cup white sugar
- 2 teaspoons cornstarch
Instructions
1. Preheat the oven to 375 degrees F.
2. Place parchment paper on the bottom of an 8×8 pan, letting it hang over the sides to make it easier to remove the bars after baking.
3. In a medium bowl, stir together 1/2 cup white sugar, flour, baking powder, and salt.
4. Using a fork or pastry cutter, cut the very cold butter into the flour mixture until the pieces are very small and crumbly. You can also pulse in a food processor until you get pea-sized crumbs.
5. In a separate bowl, beat the egg with a fork. Add the egg and vanilla to the flour mixture and mix until a crumbly dough forms.
6. Pat half of the dough evenly into the bottom of the prepared pan.
7. In another bowl, stir together 1/3 cup sugar and cornstarch. Stir in the chopped strawberries.
8. Spoon the strawberry mixture evenly over the bottom crust.
9. Crumble the remaining dough evenly over the strawberry layer.
10. Bake in the preheated oven for 45 minutes or until the top is lightly golden brown. (Check early if your oven runs hot.)
11. Cool completely before cutting into squares. Refrigerate until ready to serve.
Notes
It is very important that your butter be very cold. This helps create the perfect crumbly texture.
Avoid overworking the crumb mixture with your hands, as the warmth can soften the butter too much.
If your strawberries are not very sweet, you may want to increase the sugar in the filling to 1/2 cup.
This recipe can easily be doubled for a 9×13 pan. Just double the ingredients and adjust the servings.
Nutrition
- Serving Size: 1 bar
- Calories: 207
- Sugar: 20g
- Sodium: 162mg
- Fat: 10g
- Saturated Fat: 6g
- Carbohydrates: 26g
- Protein: 1g
- Cholesterol: 45mg


