
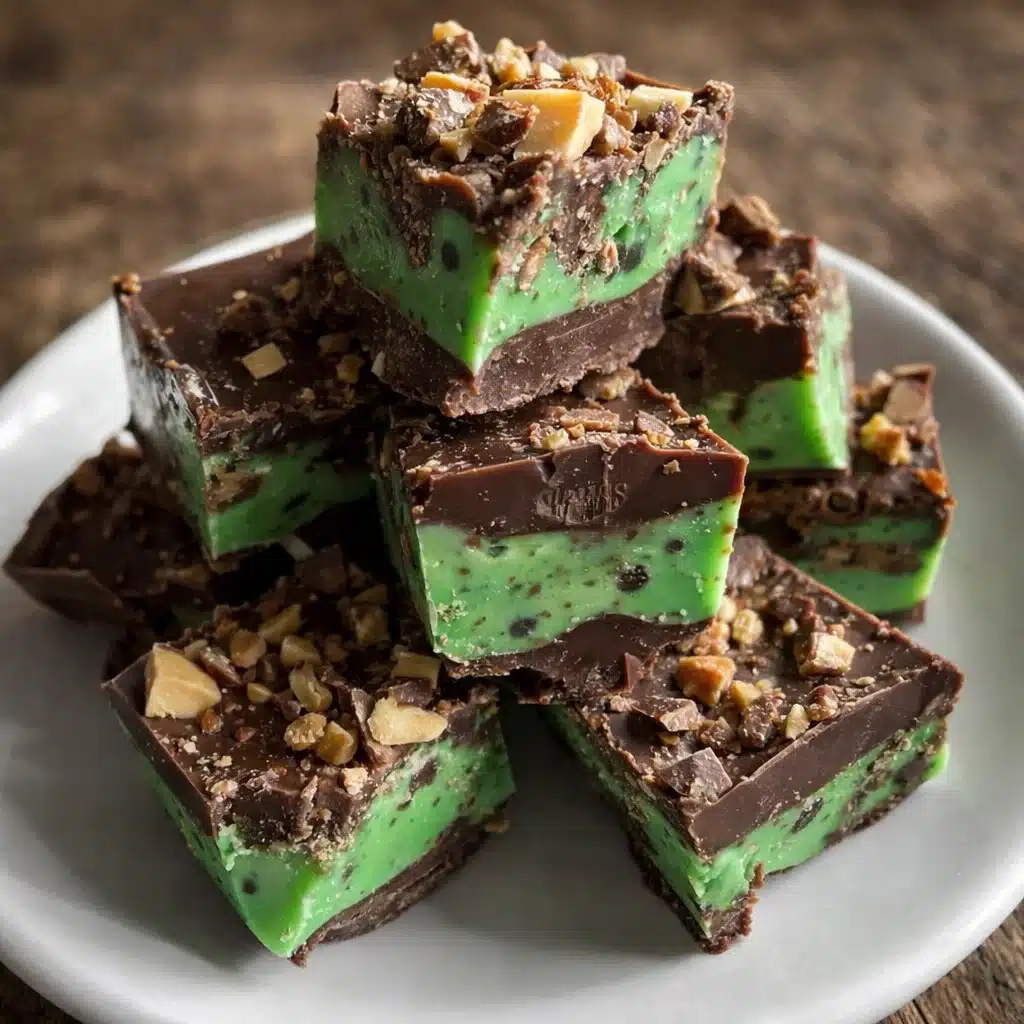
Shamrock Fudge is the kind of treat that sneaks up on you—rich, creamy, minty, and just cheeky enough to make you feel like you’re celebrating something, even if it’s just Tuesday. But if you’re here for St. Patrick’s Day sweets, this green-speckled chocolate delight is your new go-to. It’s got all the charm of leprechaun mischief with none of the cleanup. Packed with chocolate chips, sweetened condensed milk, a kiss of peppermint, and that signature green color, this fudge is a delicious mashup of festive and foolproof. Bonus? It takes less than 15 minutes to prep. And for moms juggling kids, work, and a Pinterest board full of good intentions, that’s the kind of magic we need.
Table of Contents
What is Shamrock Fudge?
Shamrock Fudge is a mint chocolate fudge with a green twist—literally. Think of it as the cooler, party-ready cousin of classic chocolate fudge. It’s made on the stovetop, then chilled in the fridge until firm enough to cut into perfect little squares. What makes this version different (and frankly more fun) is the peppermint extract and green food coloring. The result is a smooth, melt-in-your-mouth treat that looks like it came straight out of a leprechaun’s dessert tray. Kids love it because it’s colorful and sweet. Adults love it because, well, it tastes like a Thin Mint met a truffle and had a baby. It’s vegetarian-friendly and a great make-ahead option.
Reasons to Try Shamrock Fudge
If you’ve ever felt personally attacked by complicated holiday recipes, Shamrock Fudge is your truce. For starters, it uses pantry staples—chocolate chips, butter, sweetened condensed milk, and a splash of extract. No candy thermometers or pastry degrees required. It’s fast. We’re talking 15 minutes on the stove, then into the fridge for a chill session while you handle everything else life throws your way. Plus, it’s flexible. Add nuts if you want a crunch. Skip them if your crew prefers it smooth. Want to level it up? A sprinkle of crushed candy canes adds texture and sparkle. And let’s not forget the green. It’s festive, fun, and looks great on any dessert table.
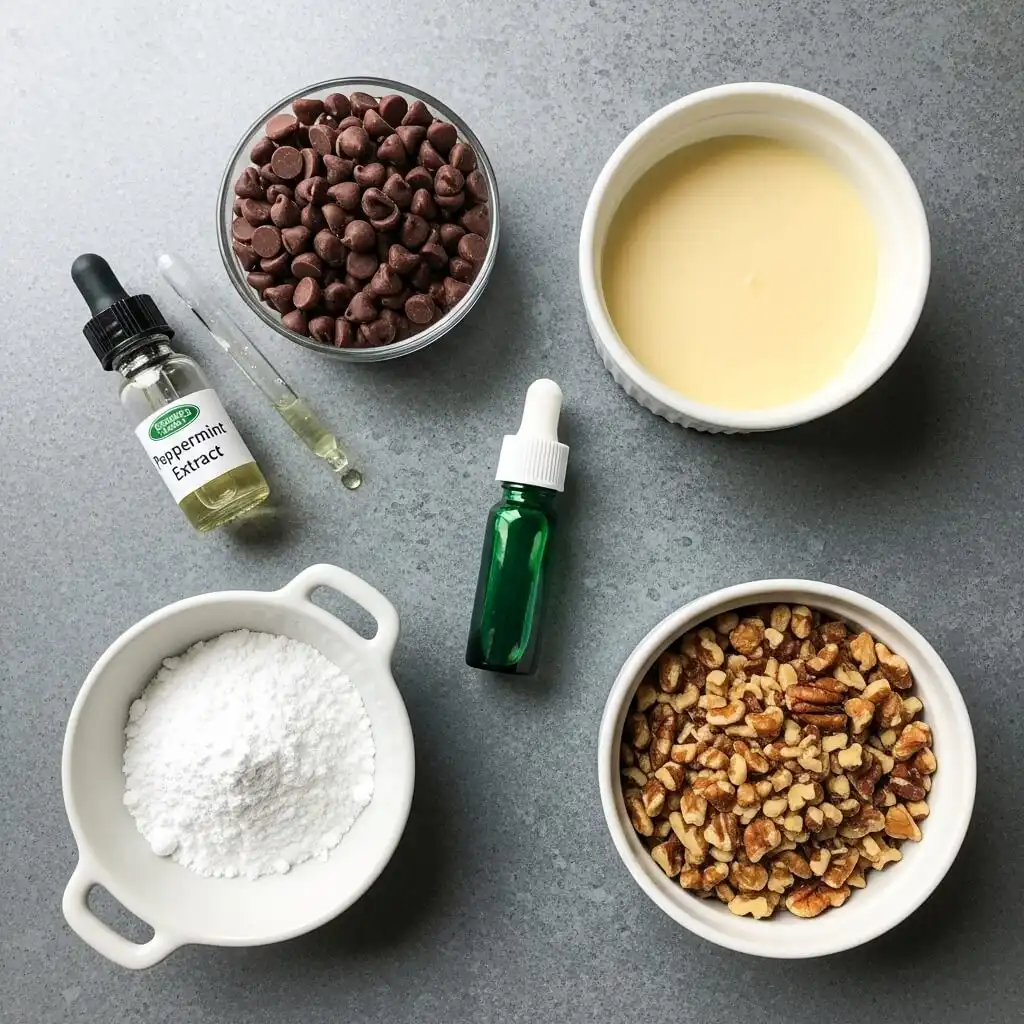
Ingredients Needed to Make Shamrock Fudge
- 2 cups semi-sweet chocolate chips
- 1 cup sweetened condensed milk
- 1/4 cup unsalted butter
- 1 teaspoon peppermint extract
- Green food coloring (a few drops go a long way)
- 1 cup powdered sugar
- 1/2 cup chopped nuts (optional, but a nice crunch if you’re into that)
Instructions to Make Shamrock Fudge (Step by Step Guide)
Making Shamrock Fudge is as easy as sneaking the last piece of dessert before the kids notice—but this step by step guide will walk you through it like a friend in the kitchen. Whether you’re a confident cook or still learning your way around the stovetop, each phase is broken down with tips, visuals, and handy links to help you feel totally in control. Let’s dive in—green food coloring and all.
Step 1: Line Your Pan and Gather Ingredients
Before you even turn on the stove, set yourself up for success. Line an 8×8-inch square baking pan with parchment paper, leaving a little overhang on the sides. This step is super helpful when it’s time to lift the fudge out and slice it cleanly. If parchment always curls on you, check out this quick tip for keeping parchment paper in place—it works like a charm. Gather all your ingredients and measure them out ahead of time (also known as mise en place). That way, you’re not scrambling with sticky fingers halfway through.
Step 2: Melt the Chocolate, Milk, and Butter Together
In a medium-sized saucepan, combine your 2 cups of semi-sweet chocolate chips, 1 cup of sweetened condensed milk, and 1/4 cup of unsalted butter. Set the heat to low—not medium, not medium-low, but low. Chocolate is sensitive and can burn faster than a forgotten batch of cookies. Stir continuously with a rubber spatula or wooden spoon. Within a few minutes, you’ll have a smooth, glossy mixture. If your chocolate ever seizes up or looks grainy, read our ingredient substitution tips—you may need to adjust your chocolate or use a double boiler next time.
Step 3: Add the Mint and That Signature Green Color
Once the chocolate mixture is melted and smooth, take it off the heat. Now’s the fun part! Stir in 1 teaspoon of peppermint extract. This gives the fudge that refreshing, cool mint flavor. Want it even more minty? Add a few extra drops—but do a taste test first. Then, add a few drops of green food coloring. Start small! A little goes a long way, and you want a pretty shamrock shade, not neon slime. Mix until the color is even. If you’re looking for more green-themed dessert inspiration, peek at our Shamrock Shake Pudding Cups and Shamrock Swirl Pie for more holiday magic.
Step 4: Fold in Powdered Sugar (and Optional Crunch)
Next up in our step by step fudge-making journey is the thickening phase. Stir in 1 cup of powdered sugar, little by little. This helps the fudge firm up and adds just the right sweetness. The mixture will get thicker, almost like brownie batter. If you’re using nuts (1/2 cup of chopped walnuts, pecans, or even pistachios work great), fold them in now for a delightful crunch. Want a nut-free version? You can skip this completely or try crushed pretzels or even crushed candy canes for a little texture.
Step 5: Press the Fudge into the Pan
Using a spatula, spread the fudge evenly into your lined pan. Smooth out the top—it doesn’t have to be perfect, but try to press out any large air bubbles or uneven clumps. If you’re feeling fancy, sprinkle a few crushed toppings over the top. Refrigerated Andes mints? Go for it. Crushed cookies? Absolutely. This step isn’t required, but it adds a little personal flair (and makes it look like you bought it from a bakery).
Step 6: Chill Until Firm
Pop the pan into the fridge and chill the fudge for at least 2 hours. If you’re working ahead, this can sit overnight without any issues. Don’t rush this step—it’s where the fudge sets and becomes sliceable. If you’re in a rush (like prepping for a school party an hour before it starts), stick it in the freezer for about 30–45 minutes. Still firm, still fabulous.
Step 7: Slice and Serve
When the fudge is firm, lift it out using the parchment overhang. Place it on a cutting board and use a sharp knife to cut it into even squares. Wipe your knife clean between cuts for neat edges. This step by step moment is where the magic happens—you’ll see that shiny top, that creamy texture, and that perfect green hue. Store leftovers in an airtight container in the fridge or wrap them up as edible gifts for neighbors, coworkers, or your favorite teacher.
What to Serve with Shamrock Fudge
Shamrock Fudge is a scene-stealer on any dessert table, but it shines even brighter when paired with other minty or chocolatey treats. Want to keep the green theme going? Serve it alongside Green Velvet Brownies with Cream Cheese Frosting for a St. Patrick’s Day dessert spread that’s both pretty and delicious. Hosting a casual gathering? Pair it with coffee or Irish cream liqueur for the grownups. You could also set it next to a tray of Mint Oreo Truffles or Shamrock Shake Pudding Cups for a mint-lover’s dream. Honestly, it even makes a cute gift. Wrap up a few squares in parchment, tie with ribbon, and boom—instant party favor.
Key Tips for Making Shamrock Fudge
Use low heat and stir often—chocolate burns faster than your morning toast. Don’t go overboard with the food coloring. A few drops will give you that lucky green hue without turning your fudge into Hulk squares. Chill time matters. Let it firm up completely in the fridge so you can slice clean squares without a sticky mess. If you’re in a rush, stick it in the freezer for about 30 minutes instead. Add-ins like crushed candy canes or chocolate chunks are fair game—just mix them in after the fudge is off the heat. Want to keep it nut-free? Skip ’em. Want it crunchier? Go wild with pistachios or pecans.
Storage and Reheating Tips Shamrock Fudge
Store Shamrock Fudge in an airtight container in the fridge for up to a week—it’s great for snacking straight from the cold, like a hidden mom-treat between Zoom calls. Want to make it last longer? Freeze it! Just cut it into squares first, place wax paper between layers, and freeze in a zip-top bag for up to 3 months. Thaw in the fridge overnight when you’re ready to serve. And while technically you can microwave it, we recommend enjoying it cold or at room temp. Reheating can mess with the texture, and honestly, it’s pretty fabulous as-is.
FAQs
Can I use white chocolate instead of semi-sweet?
Sure, but it’ll be sweeter and you might need less powdered sugar. Also, the green color will pop more.
Do I have to use food coloring?
Nope! It’s just for the festive look. Skip it if you’re aiming for a more natural dessert.
Can I make this dairy-free?
You can try dairy-free chocolate chips and sweetened condensed coconut milk, but the texture may vary slightly.
Does it travel well?
Yes! Just keep it cool. It makes a great gift or potluck treat.
Final Thoughts
If you’re looking for a fun, festive treat that’s easy to make, kid-approved, and adult-justified, Shamrock Fudge is it. It’s got that chocolate-mint combo we all secretly crave, takes minimal effort, and looks like you put way more time into it than you actually did. From St. Paddy’s parties to everyday indulgence, this little green square is pure dessert joy. And if mint chocolate is your love language, check out our Andes Mint Mini Cheesecakes for another easy no-bake dessert worth bookmarking.
Visit our Pinterest for regular slow cooker recipe updates, or join our Facebook discussions where cooking fans exchange their favorite hearty meal ideas.
PrintShamrock Fudge (Shamrock Fudge Recipe)

A rich and creamy chocolate fudge infused with mint flavor, perfect for St. Patrick’s Day.
- Prep Time: 15 minutes
- Cook Time: 10 minutes
- Total Time: 2 hours 25 minutes
- Yield: 16 pieces 1x
- Category: Dessert
- Method: Stovetop
- Cuisine: Irish
- Diet: Vegetarian
Ingredients
- 2 cups semi-sweet chocolate chips
- 1 cup sweetened condensed milk
- 1/4 cup unsalted butter
- 1 teaspoon peppermint extract
- Green food coloring
- 1 cup powdered sugar
- 1/2 cup chopped nuts (optional)
Instructions
1. Line an 8×8 inch pan with parchment paper.
2. In a saucepan, combine chocolate chips, sweetened condensed milk, and butter.
3. Heat over low heat, stirring until smooth.
4. Remove from heat and stir in peppermint extract and a few drops of green food coloring.
5. Mix in powdered sugar and nuts (if using).
6. Spread mixture evenly into the prepared pan.
7. Chill in the refrigerator for 2 hours or until firm.
8. Cut into squares and serve.
Notes
Store leftover fudge in an airtight container.
Try adding crushed candy canes for extra flavor.
This fudge can be made ahead of time.
Nutrition
- Serving Size: 1 piece
- Calories: 150
- Sugar: 18g
- Sodium: 30mg
- Fat: 7g
- Saturated Fat: 4g
- Unsaturated Fat: 2g
- Trans Fat: 0g
- Carbohydrates: 22g
- Fiber: 1g
- Protein: 2g
- Cholesterol: 10mg


