
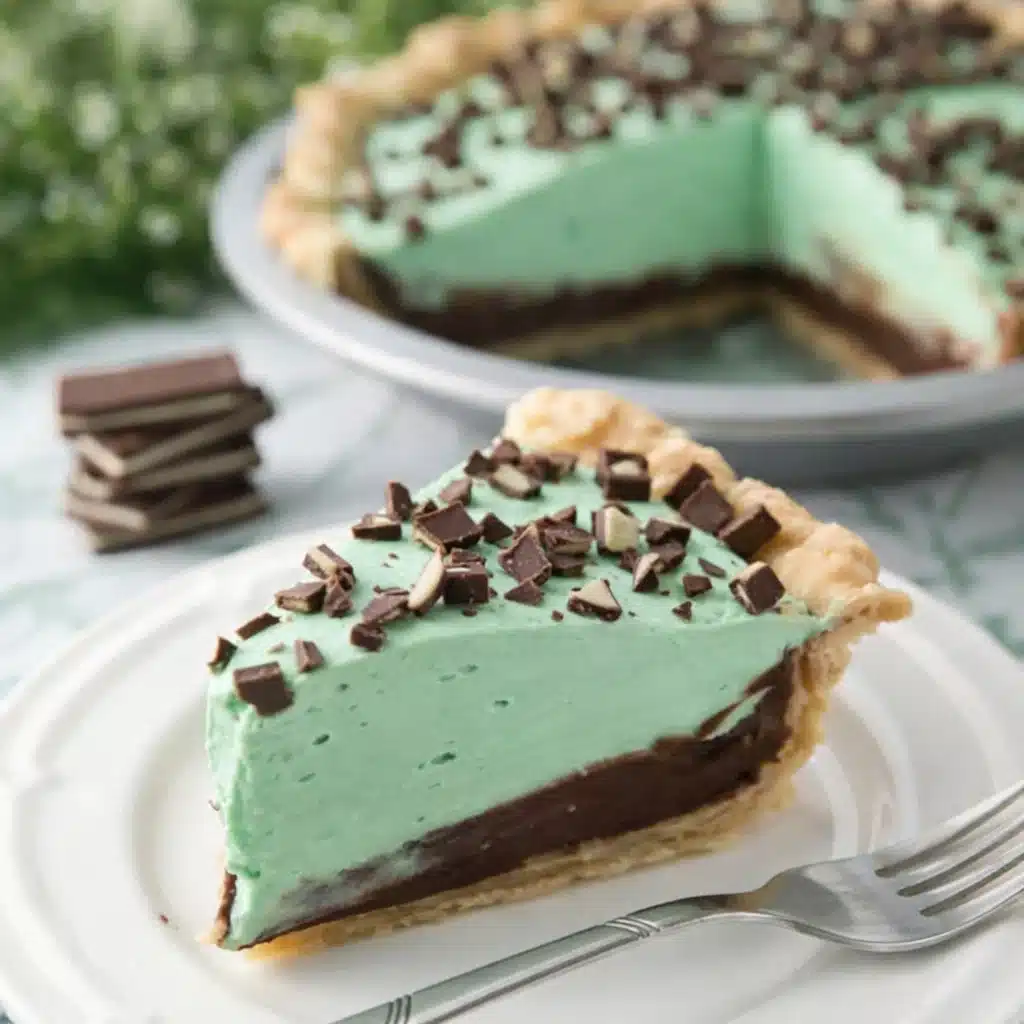
Chocolate Mint Pie is the holiday dessert that shows up to the party dressed to impress—and then makes everyone forget about Aunt Carol’s dry fruitcake. It’s creamy, cool, chocolaty, and perfectly minty, and the best part? You don’t need to be a pastry chef to pull this one off. With a flaky baked crust, a silky layer of chocolate ganache, and a fluffy mint cheesecake filling (yes, there’s no baking for that part), this dessert checks all the boxes: rich, refreshing, and easy. Oh, and there’s chopped Andes mints on top because obviously.
Table of Contents
What is Chocolate Mint Pie?
Chocolate Mint Pie is that magical dessert where chocolate and mint fall in love and decide to live together inside a buttery pie crust. The base starts with a classic 9-inch crust that’s blind-baked until golden and crisp. Then comes a dreamy, silky chocolate ganache that coats the bottom like a rich little secret waiting to be discovered. The star of the show? A no-bake mint cheesecake filling that’s cool, creamy, and just the right shade of pale green—like a minty cloud you can slice. Topped with chopped Andes mints (because why not end on a high note?), this pie feels both nostalgic and fresh.
Reasons to Try Chocolate Mint Pie
Let’s be honest—baking during the holidays can sometimes feel like a marathon sprint through flour and frosting. That’s where Chocolate Mint Pie swoops in like a dessert superhero. First off, it’s semi no-bake. You blind-bake the crust (easy), but the rest? Chill city. The creamy mint filling is no-bake, which means less oven time and more couch time. Second, it’s a crowd-pleaser. Even picky eaters who “don’t like mint” somehow end up with a second slice. It’s festive, fresh, and not overly sweet, thanks to the balance between the rich ganache and airy filling. Third, it’s a great make-ahead dessert—this baby loves a good overnight chill, making it perfect for hosts who like to prep in advance.
Ingredients Needed to Make Chocolate Mint Pie
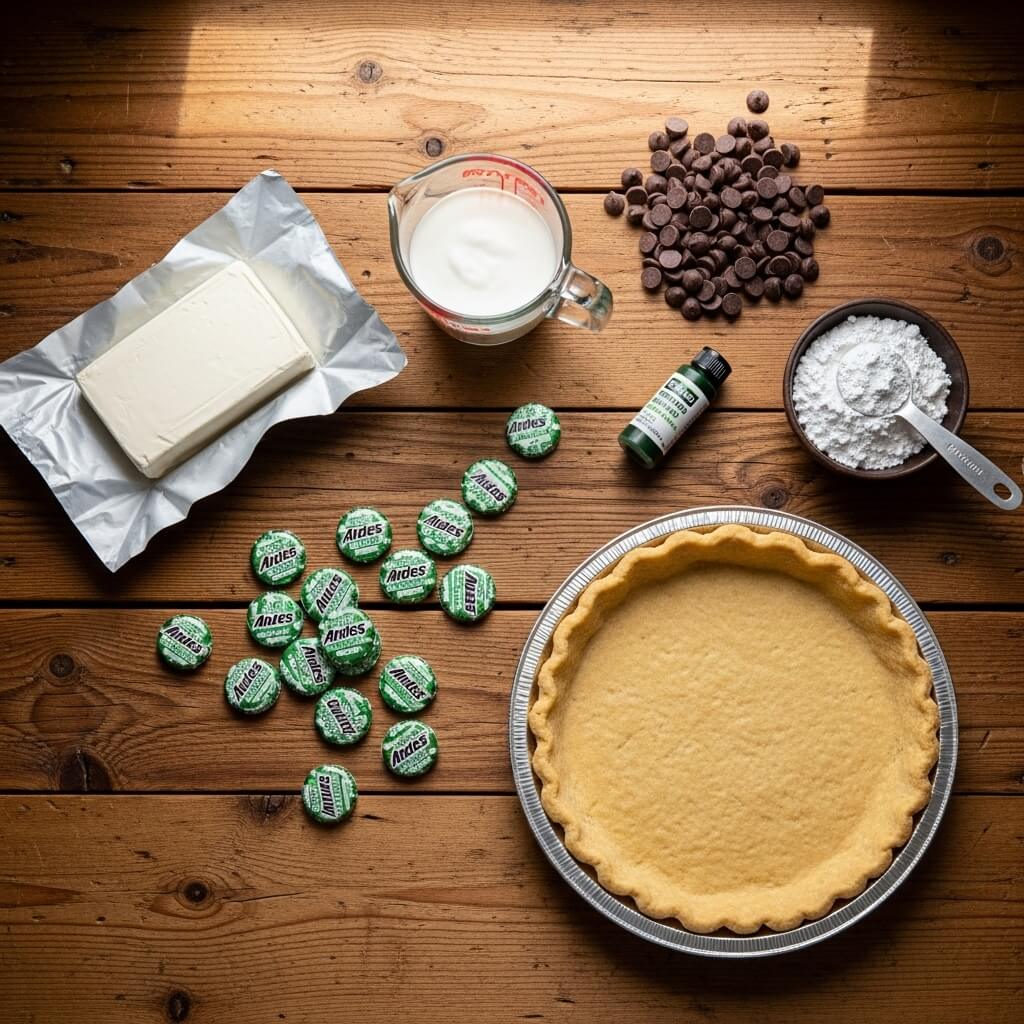
- 1 9-inch pie crust (store-bought or homemade)
For the Chocolate Ganache:
- ⅔ cup heavy cream
- 1 cup semi-sweet chocolate chips
For the Mint No-Bake Cheesecake Filling:
- 12 oz cream cheese (block style, softened)
- 1½ cups powdered sugar, divided
- 1 to 2 tsp pure mint extract (not peppermint)
- 3 drops green food coloring
- 1 cup heavy cream
- 8 Andes Creme de Menthe chocolates, chopped (optional garnish)
Instructions to Make Chocolate Mint Pie: A Step-by-Step Guide
Let’s break this down together, one cozy step at a time. This step-by-step guide will walk you through exactly how to make Chocolate Mint Pie without stress (and with maybe a little chocolate smudge on your cheek by the end). Whether you’re a seasoned baker or still learning your way around the kitchen, these detailed directions will help you nail each layer of this dreamy dessert. Spoiler: it’s way easier than it looks.
Step 1: Blind Bake Your Pie Crust
Start by rolling out your 9-inch pie crust—whether it’s your grandma’s treasured homemade recipe or a trusty store-bought version (no shame in the pre-made game). Carefully fit it into your pie pan, pressing it gently against the edges and trimming off the extra dough.
Now here comes the blind bake. You’ll want to line the crust with parchment paper and fill it with pie weights (or dry beans/rice if you’re improvising) to stop it from puffing up. Bake it at 375°F for about 15–20 minutes, or until the edges are golden and the bottom no longer looks raw.
Once baked, remove the weights and parchment, then bake for an extra 5 minutes to dry the bottom. Let the crust cool completely. If you’re short on time (who isn’t?), pop it in the freezer to speed things up. Need a refresher on how to blind bake properly? Check out this easy pie crust guide for tips.
Step 2: Whip Up the Chocolate Ganache
While the crust cools, let’s talk ganache—the luscious, chocolatey base layer of your Chocolate Mint Pie. In a microwave-safe bowl, combine ⅔ cup heavy cream with 1 cup semi-sweet chocolate chips. Microwave on half power in 30-second bursts, stirring each time until it’s melted and silky smooth.
As soon as it’s ready, pour the ganache into the cooled crust. Use a spatula to gently spread it into an even layer. It should coat the bottom like a rich, chocolate blanket. Now place the pie in the fridge or freezer to let the ganache firm up completely—this makes it easier to spread the next layer without mixing things up (literally).
Step 3: Prepare the Mint Cheesecake Filling
In a large mixing bowl, beat 12 oz softened cream cheese with 1 cup powdered sugar using a hand mixer. You’re aiming for a super creamy, lump-free base. Add in 1 to 2 teaspoons of pure mint extract—start with 1 tsp, then taste and add more if you want a stronger minty vibe. Drop in 3 drops of green food coloring for that fun minty tint.
Want to experiment with flavor? If you can’t find mint extract, check out our mint Oreo truffles for an alternative take using cookies for flavor instead.
Step 4: Whip the Cream and Fold it In
In a separate bowl (or your stand mixer if you have one), whip 1 cup heavy cream with ½ cup powdered sugar until you see stiff peaks. That means when you lift your whisk, the cream stands tall without drooping—kind of like the way your kid tries to avoid veggies at dinner.
Now fold this fluffy whipped cream into your mint cheesecake mixture. Go gently here—you’re not stirring, you’re folding, like a delicate pie hug. Use a spatula or hand mixer on low speed until the filling is thick and uniform. This part gives your pie that light, airy texture that contrasts beautifully with the dense ganache.
Step 5: Assemble and Top the Pie
Once your ganache is firm and your mint filling is ready, it’s time to build the final layer. Spoon the filling over the ganache and use an offset spatula or butter knife to smooth the top evenly.
Now for the fun part—toppings. Chop up 8 pieces of Andes mints (or more, you do you) and sprinkle them all over the top of the pie. They add the perfect minty crunch and make the pie look like it came from a bakery window.
For other minty topping ideas, don’t miss our festive Shamrock Swirl Pie—a green dessert that doubles down on charm.
Step 6: Chill and Set
Cover the pie loosely with plastic wrap and place it in the fridge to chill for at least 2 hours. Want it faster? Toss it in the freezer for 30–60 minutes instead. You’ll know it’s ready when the top feels set and firm to the touch.
This step isn’t just about texture—it’s about flavor. Letting the pie chill gives the mint filling time to firm up and the ganache to settle into its rich glory.
Step 7: Slice Like a Pro and Serve
When you’re ready to serve, grab a sharp knife and run it under hot water, then dry it with a towel before each cut. This little trick helps you get those clean, bakery-style slices without dragging the layers into each other.
This pie serves 8–12 slices, depending on how big you go. It’s rich, so smaller pieces are perfect (and leave room for seconds… or thirds).
Want to serve this up with another minty treat? Pair it with Mini St. Patrick’s Day Cheesecakes or Green Velvet Brownies for a festive mint dessert bar.
What to Serve with Chocolate Mint Pie
Chocolate Mint Pie is pretty much the Beyoncé of the dessert table—it doesn’t need backup dancers. But if you’re going for a full holiday spread, consider adding a warm, cozy contrast like a mug of Homemade Hot Chocolate. Want to go extra festive? Pair it with Shamrock Fudge or Green Velvet Cupcakes for a mint-themed dessert bar. And for something savory, serve it after a big cozy dinner like Parmesan Chicken Meatloaf or Crockpot Lemon Garlic Butter Chicken Thighs. You’ll have sweet, savory, and all the happy bellies.
Key Tips for Making Chocolate Mint Pie
- Chill is key. Don’t rush the cooling steps. The ganache needs to firm up before the mint layer goes on, or you’ll end up with a gooey swirl situation (not the good kind).
- Use mint extract, not peppermint. Peppermint is sharper, almost toothpaste-like. Mint gives that mellow, creamy flavor we’re going for.
- Taste and adjust. Start with 1 tsp of extract—add more if needed. Mint can go from refreshing to overpowering real fast.
- Whipped cream matters. Don’t skip the stiff peaks. A good whip gives the filling structure, so it slices neatly.
- Decorate simply. Chopped Andes mints look cute, taste amazing, and require zero effort. You can also drizzle extra ganache on top if you’re feeling fancy.
Storage and Reheating Tips for Chocolate Mint Pie
Store leftover pie in the fridge, covered with plastic wrap or foil, for up to 5–7 days. That said, it’s best eaten within 3 days for peak texture.
Freeze it if you’re planning ahead—wrap tightly in plastic, then foil, and freeze for up to 3 months. Thaw in the fridge overnight before serving.
Reheating? Nope. This is a no-bake chilled pie, so keep it cool. If you accidentally left it out too long and it softened, just pop it back in the fridge or freezer to re-set.
FAQs
Can I use peppermint instead of mint extract?
You can, but it’ll have a much sharper, almost candy cane flavor. If you’re after that creamy thin mint vibe, stick with plain mint extract.
What if I don’t have Andes mints?
You can skip them or use chopped mint chocolate, crushed thin mint cookies, or even a drizzle of chocolate syrup.
Can I make this ahead of time?
Yes! It’s actually better that way. Chill it overnight and you’re good to go.
Can I use a chocolate cookie crust instead?
Absolutely. It’ll taste like a mint Oreo cheesecake pie. And no one’s complaining about that.
Final Thoughts
Chocolate Mint Pie is the dessert equivalent of a holiday hug. It’s cool, creamy, and just indulgent enough without being fussy. It checks every box for a busy home baker: fast prep, make-ahead friendly, no crazy ingredients, and guaranteed compliments. Whether you’re a mint-lover or just need a new dessert to shake things up, this pie’s got your back. For more minty dessert ideas, be sure to check out Shamrock Swirl Pie or Mint Oreo Truffles. Your sweet tooth will thank you.
Visit our Pinterest for regular slow cooker recipe updates, or join our Facebook discussions where cooking fans exchange their favorite hearty meal ideas.
PrintChocolate Mint Pie (Primary Keyword: Chocolate Mint Pie)

Indulge in this Christmas Chocolate Mint Pie—flaky pie crust, chocolate ganache, and no-bake mint cheesecake filling topped with pieces of Andes thin mints.
- Prep Time: 30 minutes
- Cook Time: 40 minutes
- Total Time: 3 hours 10 minutes
- Yield: 8 servings 1x
- Category: Dessert
- Method: No Bake
- Cuisine: American
Ingredients
- 1 9-inch pie crust, homemade or store-bought
- ⅔ cup (159 ml) heavy cream
- 1 cup (170 g) semi-sweet chocolate chips
- 12 oz (339 g) block-style cream cheese
- 1 ½ cups (180 g) powdered sugar, divided
- 1 to 2 tsp pure mint extract, not peppermint
- 3 drops liquid green food coloring
- 1 cup (237 ml) heavy cream
- 8 pieces Andes creme de menthe chocolates, chopped; optional, for garnish
Instructions
1. Blind bake 1 empty 9-inch pie crust until golden brown. Allow crust to cool completely, then chill in the fridge or freezer.
2. Combine ⅔ cup of heavy cream with 1 cup of semi-sweet chocolate chips in a microwave-safe bowl. Microwave at half power in 30-second increments, stirring between each, until fully melted and smooth.
3. Immediately pour the chocolate ganache onto the bottom of the baked pie crust. Chill until firm.
4. Beat cream cheese and 1 cup of powdered sugar with an electric hand mixer until smooth. Add mint extract and green food coloring. Mix until combined.
5. Whip heavy cream and remaining ½ cup powdered sugar until stiff peaks form. Fold into the mint cream cheese mixture and beat until thick.
6. Spread mint filling evenly over chilled ganache layer. Sprinkle chopped Andes mints on top.
7. Gently cover with plastic wrap and chill in fridge for at least 2 hours or in freezer for 30–60 minutes until firm.
8. To slice, run a knife under hot water and dry it before each cut. Serves 8–12, depending on slice size.
9. Cover leftovers with plastic wrap or foil and store in fridge up to 5–7 days.
10. To freeze, wrap tightly with plastic wrap and foil. Freeze up to 3 months. Thaw overnight in refrigerator before serving.
Notes
Start with 1 tsp mint extract and taste the filling before adding more. Use green food coloring to enhance the festive look. This pie is rich, so smaller slices are recommended.
Nutrition
- Serving Size: 1 slice
- Calories: 510
- Sugar: 38g
- Sodium: 180mg
- Fat: 36g
- Saturated Fat: 22g
- Unsaturated Fat: 12g
- Trans Fat: 0g
- Carbohydrates: 45g
- Fiber: 2g
- Protein: 5g
- Cholesterol: 95mg


