

Strawberry Kiss Cookies are the kind of treat that looks like they were made by Cupid himself — pink, sparkly, and with a sweet kiss right in the middle. If you’re hunting for the perfect Valentine’s Day cookie that’s adorable and foolproof, this is your match. They’re soft, chewy, and oh-so-pretty, made from sugar cookie mix and topped with a Hershey’s Strawberry Ice Cream Cone Kiss that melts just slightly into the center. Whether you’re baking for a classroom party, a romantic night in, or just because you needed an excuse to eat cookies (no judgment here), these Strawberry Kiss Cookies will win hearts faster than a box of chocolates.
Table of Contents
What is Strawberry Kiss Cookies?
Think of Strawberry Kiss Cookies as a love letter to sugar cookies with a pink twist. The base is made from a convenient Funfetti sugar cookie mix, which gives you a buttery, cake-like texture with rainbow flecks for fun. Cream cheese adds a subtle tang and richness, while the final touch — a Hershey’s Strawberry Ice Cream Cone Kiss — gives that perfect balance of creamy strawberry sweetness. Once baked, each cookie is coated in shimmering sugar or nonpareils, making them look like they belong in a bakery window. These cookies are soft in the middle, lightly crisp on the edges, and absolutely melt-in-your-mouth delicious.
Reasons to Try Strawberry Kiss Cookies
If you’ve ever needed a “wow” dessert that’s quick to whip up, Strawberry Kiss Cookies are your secret weapon. For starters, they look like they came from a fancy bakery, but they only take about 10 minutes of prep time. The ingredients are simple — you probably already have most of them. Plus, the recipe is flexible: make them pink and sparkly for Valentine’s Day, white and gold for weddings, or red and green for Christmas. Kids love rolling the dough in sprinkles (and sneaking a few Kisses while they’re at it), and adults love how soft and rich they taste. Oh, and did I mention there’s cream cheese in there? That alone is a reason to bake them.
Ingredients Needed to Make Strawberry Kiss Cookies
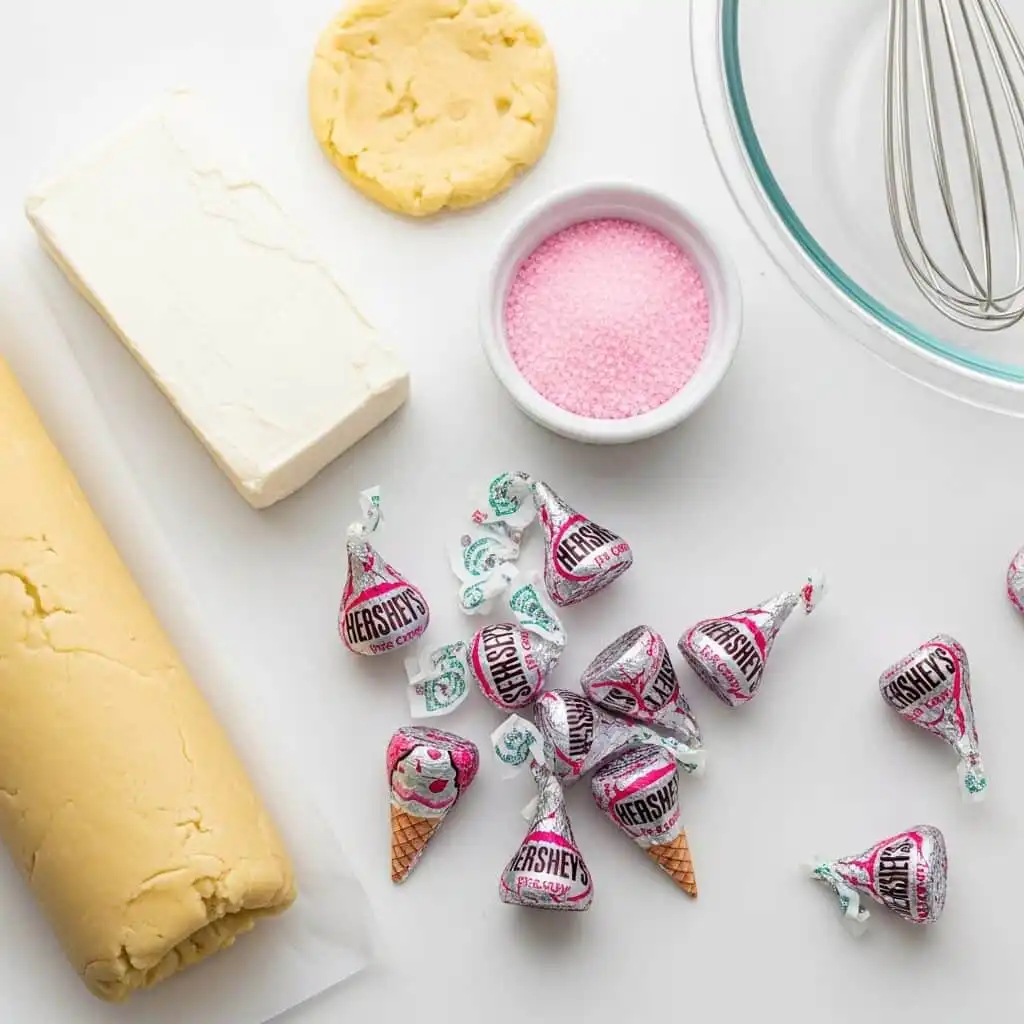
- 16-ounce bag Funfetti Sugar Cookie Mix
- 4 ounces cream cheese, softened (about half a standard block)
- 1 large egg
- ½ cup pink or white sanding sugar or nonpareils
- 18 Hershey’s Strawberry Ice Cream Cone Kisses
Instructions to Make Strawberry Kiss Cookies (Step by Step)
Let’s walk through these Strawberry Kiss Cookies step by step so even if this is your first time baking from a mix, you’ll feel like a total pro by the end. Each stage is quick, simple, and filled with tips that make your cookies look bakery-perfect. Ready? Let’s get baking.
Step 1: Prepare Your Baking Sheet and Oven
Before anything else, preheat your oven to 375°F (190°C) — that’s the sweet spot for baking these soft, chewy cookies to perfection. Line a large baking sheet with parchment paper to keep the cookies from sticking and to make cleanup a breeze. If you’re new to baking, check out my Valentine’s Day Cake Mix Cookies guide for more prep tips on getting your oven temperature just right — it can make a huge difference in texture!
Step 2: Mix the Cookie Dough
In a large mixing bowl, add the Funfetti Sugar Cookie Mix, softened cream cheese, and egg. Using a hand or stand mixer, beat everything together on medium speed until it’s smooth and fully combined. You should have a soft, slightly sticky dough that smells like a sugar cloud. The cream cheese helps create that melt-in-your-mouth texture we all crave, while the Funfetti mix gives a subtle hint of vanilla sweetness.
If you love soft, creamy cookies, you’ll adore my Creamy Strawberry Truffles — they’re another simple, rich treat made with minimal effort.
Step 3: Shape and Coat the Dough Balls
Pour your pink or white sanding sugar (or nonpareils) into a shallow bowl. This is where the magic sparkle happens. Using a 1½-tablespoon cookie scoop, scoop out balls of dough and drop them gently into the sugar bowl. Roll each piece until it’s evenly coated, giving it that perfect glimmering finish.
If you’ve ever made thumbprint cookies like my Heart-Shaped Thumbprint Cookies, this step will feel familiar — except here, you’re rolling instead of pressing. Once coated, roll each one between your palms to make a smooth, round ball.
Step 4: Optional Chill Time for Easier Handling
Now, let’s address the stickiness. This dough can be a little clingy — kind of like melted marshmallow. If it’s too sticky to handle, don’t panic! Pop the bowl in the fridge or freezer for 30–60 minutes. The chill helps firm up the dough, making it easier to scoop and roll without losing shape.
Pro tip: While the dough chills, unwrap your Hershey’s Strawberry Ice Cream Cone Kisses so they’re ready to go. You can even place them in a small bowl and pop them in the fridge — that helps them hold their shape when pressed into warm cookies later. For more prep hacks, check out my Valentine’s Day Treats Step-by-Step Guide — it’s full of time-saving tips for busy bakers.
Step 5: Bake the Cookies
Place your coated dough balls on the prepared baking sheet, leaving about 1½ inches of space between each one to allow them to spread slightly. Slide the sheet into the oven and bake for 8–12 minutes, depending on your oven’s temperament.
You’ll know they’re done when the edges look set and the tops have a light, soft sheen — not browned. Every oven bakes a little differently, so keep an eye on them around the 8-minute mark. For even baking, rotate your cookie sheet halfway through if you notice the back of your oven runs hotter (a little trick I also use when baking Red Velvet Snowballs).
Step 6: Add the Hershey’s Kiss
Once baked, let your cookies cool on the baking sheet for about 3–5 minutes — patience is key here. If you press the Kisses in too soon, they’ll melt into a strawberry puddle (delicious, yes, but messy). When the cookies have cooled slightly, gently press a Hershey’s Strawberry Ice Cream Cone Kiss into the center of each one. You’ll feel the cookie give just enough to hold the candy snugly.
If you prefer softer Kisses that slightly melt into the cookie, press them in sooner; for firmer Kisses that keep their shape, wait a few minutes longer. You can find more tips on controlling melt time and texture in my Valentine’s Day Red Velvet Truffles recipe.
Step 7: Cool and Serve
Transfer the cookies to a wire rack and let them cool completely before serving. This helps the Kisses re-firm and keeps their pretty swirl intact. Once cooled, admire your masterpiece — soft, sparkly, and topped with a creamy strawberry center that looks as good as it tastes.
Serve these cookies warm with a glass of milk or add them to a romantic dessert platter alongside Strawberry Cheesecake Truffle Balls for a festive mix of flavors and colors.
What to Serve with Strawberry Kiss Cookies
Pair these Strawberry Kiss Cookies with a cold glass of milk or a mug of hot cocoa for the ultimate comfort combo. They also make a beautiful addition to Valentine’s dessert trays alongside treats like my Creamy Strawberry Truffles or Valentine’s Day Cake Mix Cookies. Want something even more romantic? Serve them with a side of No-Bake Chocolate Berry Tart for a stunning dessert duo. If you’re hosting a get-together, stack them on a pink platter — they’re as pretty as they are delicious.
Key Tips for Making Strawberry Kiss Cookies
- Cool before kissing — Press the Kisses in too soon, and they’ll melt into puddles. Wait 3–5 minutes after baking for the perfect soft-but-holding shape.
- Sticky dough? Chill it! Cold dough is easier to roll and keeps its shape better in the oven.
- Use sanding sugar for sparkle. It adds crunch and that irresistible glittery finish.
- Cream cheese magic: Don’t skip it — it’s the secret to the cookie’s rich, velvety texture.
- Want to customize? Swap the Strawberry Kisses for milk chocolate or caramel ones to match any occasion.
Storage and Reheating Tips for Strawberry Kiss Cookies
Once cooled, store your Strawberry Kiss Cookies in an airtight container at room temperature for up to 4 days. For longer storage, refrigerate for up to a week or freeze them for up to 3 months. To freeze, layer the cookies between sheets of parchment paper in a freezer-safe container. When ready to enjoy, bring them to room temperature — no reheating needed. Avoid stacking or covering them while still warm, or the Kisses might lose their shape.
FAQs
Can I use a different cookie mix? Absolutely! Any sugar cookie mix works — even homemade dough if you have a favorite recipe.
What if I can’t find Strawberry Kisses? Try Hershey’s milk chocolate or white chocolate Kisses for a twist.
Do I have to chill the dough? Not required, but it makes rolling easier.
Can I make them gluten-free? Yes, just swap in a gluten-free sugar cookie mix.
Final Thoughts
There’s something downright magical about Strawberry Kiss Cookies — they’re quick, charming, and taste like love. Perfect for Valentine’s Day, date nights, or just a cozy evening craving something sweet. The creamy strawberry flavor and pink sparkle make them a showstopper without the stress of a complicated recipe. If you loved this one, don’t miss my Heart-Shaped Thumbprint Cookies or Valentine’s Day Red Velvet Truffles for even more festive fun. Go ahead — preheat that oven and bake up some edible love today.
Visit our Pinterest for regular slow cooker recipe updates, or join our Facebook discussions where cooking fans exchange their favorite hearty meal ideas.
PrintStrawberry Kiss Cookies Recipe: Sweet, Simple, and Perfect for Valentine’s Day

Strawberry Kiss Cookies are soft, sprinkle-coated sugar cookies topped with a strawberry-flavored chocolate kiss. This easy shortcut recipe is perfect for Valentine’s Day or anytime you want a festive sweet treat.
- Prep Time: 10 minutes
- Cook Time: 8 minutes
- Total Time: 48 minutes
- Yield: 16 cookies 1x
- Category: Dessert
- Method: Baking
- Cuisine: American
- Diet: Vegetarian
Ingredients
- 16 ounce bag Funfetti Sugar Cookie Mix
- 4 ounce cream cheese, softened (½ of an 8-ounce package)
- 1 large egg
- ½ cup pink or white sanding sugar or non-pareils
- 18 Hershey’s Strawberry Ice Cream Cone Kisses, unwrapped
Instructions
1. Line a large baking sheet with parchment paper and preheat the oven to 375°F.
2. In a large mixing bowl, beat together the cookie mix, cream cheese, and egg until combined and a soft dough forms.
3. Place the sanding sugar or non-pareils in a shallow bowl.
4. Use a 1½ tablespoon cookie scoop to portion dough balls and drop them into the sugar.
5. Gently roll to coat and form into even balls.
6. If the dough is too sticky, refrigerate or freeze for 30–60 minutes to make it easier to handle.
7. Place cookie balls on the prepared baking sheet about 1½ inches apart.
8. Bake for 8–12 minutes, until the edges are set.
9. Cool cookies for 3–5 minutes, then gently press a Strawberry Kiss into the center of each cookie.
10. Transfer to a cooling rack to cool completely or serve warm.
Notes
Storage: Store cooled cookies in an airtight container at room temperature for 3–4 days or refrigerate for up to 1 week. Freeze for up to 2–3 months.
Tips: Avoid covering cookies while warm to prevent the Kisses from deforming. Chilling the dough helps with stickiness. The longer cookies cool before adding Kisses, the firmer the chocolate will remain.
Nutrition
- Serving Size: 1 cookie
- Calories: 169
- Sugar: 21 g
- Sodium: 139 mg
- Fat: 4 g
- Saturated Fat: 1 g
- Unsaturated Fat: 0.2 g
- Trans Fat: 0.001 g
- Carbohydrates: 32 g
- Fiber: 0.1 g
- Protein: 3 g
- Cholesterol: 12 mg


