
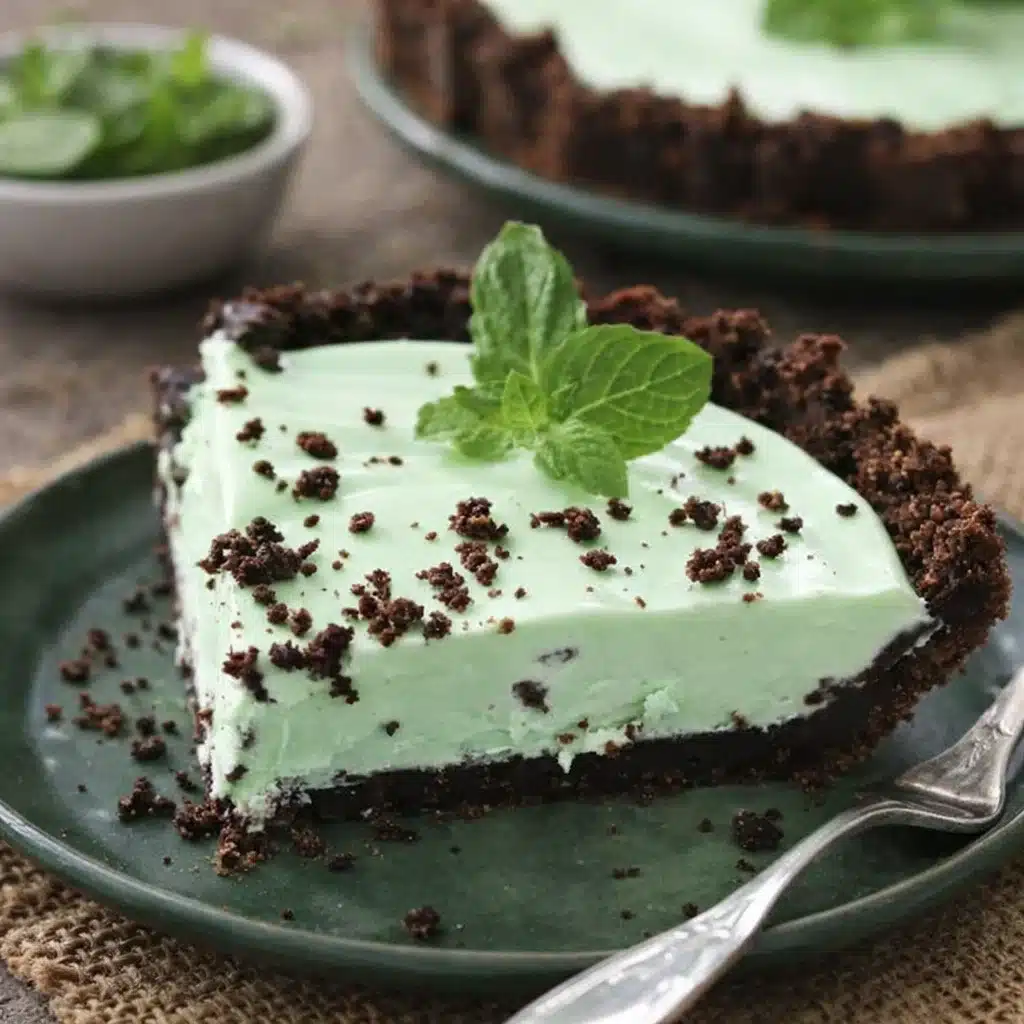
Irresistible Easy No Bake Grasshopper Pie is a total game-changer for dessert lovers—especially when turning on the oven feels like a full-body workout. If you’ve got 15 minutes, a soft spot for minty desserts, and maybe a fridge with room to chill, you’re halfway there. This pie is cool, creamy, and just the right amount of chocolatey without being too heavy. The best part? No fancy equipment, no baking, and barely any cleanup. Whether you’re prepping for a girls’ night in, a last-minute potluck, or just craving something sweet that feels like effort (but isn’t), this recipe’s got you. It hits that dreamy combo of Oreos, whipped cream, and mint—basically, a frozen Thin Mint in pie form.
Table of Contents
What is Irresistible Easy No Bake Grasshopper Pie?
Irresistible Easy No Bake Grasshopper Pie is that delightful no-bake dessert made with a crushed Oreo crust and a creamy, minty filling. It’s kind of like a frozen mousse pie, only easier to whip up and way more nostalgic. Inspired by the classic grasshopper cocktail (yep, that old-school mint-chocolate drink), this pie swaps the shaker for a spatula and turns that flavor profile into a decadent treat. The traditional version uses crème de menthe for a grown-up kick, but don’t worry—you can totally make it family-friendly with peppermint extract and a splash of milk. What makes this pie stand out is its simplicity.
Reasons to Try Irresistible Easy No Bake Grasshopper Pie
If you’re like most of us juggling 100 things and still expected to show up to the school bake sale with something “fun,” this easy no bake grasshopper pie has your name all over it. First off, it’s a make-ahead dream. You can prep it the night before, forget about it, and then casually show up with a pie that looks (and tastes) like a masterpiece. Second, it’s freezer-friendly—so whether you’re feeding a crowd or just you and your favorite sweatpants, it stays ready. It also checks the box for both mint lovers and chocoholics, which is not an easy combo to please.
Ingredients Needed to Make Irresistible Easy No Bake Grasshopper Pie
For the Crust:
- 24 Oreo cookies (whole, with filling)
- ½ cup melted butter
For the Filling:
- 1 jar marshmallow creme
- 2 cups Cool Whip (or homemade whipped cream)
- ½ cup crème de menthe (or peppermint extract + milk + green food coloring for non-alcoholic)
Optional Extras:
- 1 cup chopped chocolate mint cookies (like Thin Mints or Grasshopper cookies)
Equipment:
- 9-inch pie dish or springform pan
- Mixing bowls
- Ziplock bag or food processor
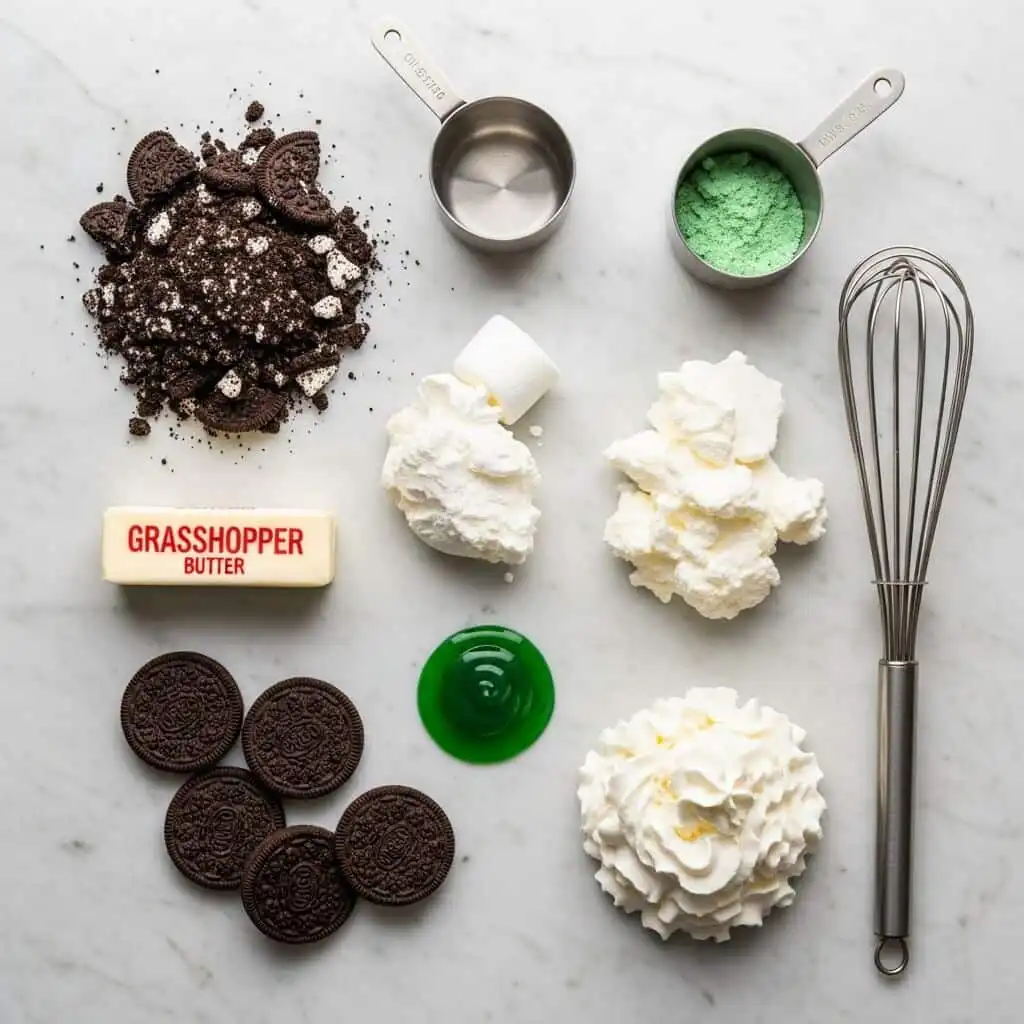
Instructions to Make Irresistible Easy No Bake Grasshopper Pie (Step by Step)
Ready to whip up this creamy, minty dream of a dessert? Let’s break it down step by step, so there’s no guesswork—just delicious pie in your future. Whether you’re a seasoned baker or brand-new to the dessert game, this no-bake pie is as stress-free as it gets. Grab your ingredients and let’s go!
Step 1: Crush the Cookies for the Crust
First things first—grab your Oreo cookies. You’ll need 24 of them, and yes, keep the cream filling! It helps the crust hold together and adds extra sweetness. Place them in a large ziplock bag and crush them using a rolling pin or heavy-bottomed mug. Want to save time? Toss them in a food processor and pulse until they turn into fine crumbs. You’re aiming for a sandy texture here, with no big chunks.
Need help with crust-making tips or other no-bake options? Check out our No Bake Chocolate Berry Tart for another crowd-pleasing dessert using a cookie crust.
Step 2: Mix and Press the Crust
Transfer the crushed cookies to a medium bowl and pour in ½ cup of melted butter. Stir until the crumbs are evenly coated and resemble wet sand. This buttery mixture is your pie’s base, and it needs to be firmly packed to avoid a crumbly mess later.
Press the mixture into the bottom of a 9-inch pie dish or springform pan using the bottom of a measuring cup or glass. Press up slightly along the sides for that classic pie shape. Once the crust is in place, place it in the refrigerator to chill for at least 1 hour. This helps the crust firm up and hold its shape beautifully.
Pro Tip: Want a thicker crust or crust-to-filling balance tips? You’ll love the tips in our Shamrock Swirl Pie recipe.
Step 3: Prepare the Creamy Filling
While your crust chills, it’s time to get to the step by step filling magic. In a large mixing bowl, combine one jar of marshmallow crème with two cups of Cool Whip (or your own homemade whipped cream). Use a spatula or hand mixer to blend until the mixture is smooth, fluffy, and well combined. It should look like a cloud of creamy minty heaven.
If you’re sticking with the classic version, now’s the time to add ½ cup of crème de menthe. This not only gives your pie its minty flavor but that signature soft green hue. Making it family-friendly? Use a combo of 1–2 tablespoons of milk, ½ teaspoon peppermint extract, and a drop or two of green food coloring instead. The taste is spot-on, minus the booze.
Looking for whipped cream options? We break down the best homemade vs. store-bought choices in our Mini St. Patrick’s Day Cheesecakes.
Step 4: Fold in the Chocolate Mint Cookies (Optional but Recommended)
This is the step where things get extra tasty. Chop up about a cup of chocolate mint cookies (like Grasshopper cookies or Thin Mints) and gently fold them into the creamy filling. This adds a burst of texture and flavor in every bite and complements the soft, smooth filling.
If you’re making this with kids, this step is a great one for them to help with—and maybe sneak a cookie or two. For another fun, minty treat kids love, try our Andes Mint Mini Cheesecakes.
Step 5: Assemble the Pie
Take your chilled crust out of the fridge and carefully pour the filling into it. Use a spatula to smooth the top so it’s nice and even. Don’t rush this part—it’s oddly satisfying and makes for a gorgeous presentation later.
Feeling festive? Swirl a little whipped cream on top or sprinkle extra chopped cookies for texture and visual appeal.
Step 6: Freeze to Set
This is the most important part of the step by step process—freezing! Place the pie in the freezer for at least 2–4 hours. Overnight is even better if you want perfectly clean slices. This helps the filling set up and slice like a dream.
If you’re planning a party or holiday dinner, freezing the night before makes your prep so much easier. You’ll look like you spent hours when it took you minutes.
Step 7: Slice and Serve
Before serving, let your pie sit at room temperature for about 10 minutes. This softens the texture just enough to make slicing easy without melting. Use a sharp knife dipped in warm water for clean cuts (trust us, it works!).
What to Serve with Irresistible Easy No Bake Grasshopper Pie
This pie is already a star, but it plays nice with others too. A hot cup of coffee or espresso balances out the cool minty sweetness beautifully. Want to keep it festive? Pair it with a mug of hot cocoa topped with whipped cream. Hosting a dinner party? Serve this after a savory meal like Parmesan Chicken Meatloaf or Creamy Mushroom Chicken—something hearty that leaves room for dessert without being too rich. Around the holidays or on St. Paddy’s Day, you could even double down on the mint and serve alongside Mint Oreo Truffles or Shamrock Fudge. It also looks great next to fresh berries or chocolate-dipped strawberries if you want to add a little color.
Key Tips for Making Irresistible Easy No Bake Grasshopper Pie
Start with room temp marshmallow crème—it blends way easier with whipped topping. Chill your crust well so it holds together like a dream when sliced. If you’re subbing out the crème de menthe, go light on the peppermint extract—too much and it’ll taste like toothpaste (we’ve all been there). Want clean slices? Dip your knife in warm water between cuts. For added crunch, stir in extra chopped cookies or sprinkle crushed ones on top before freezing. If using whipped cream instead of Cool Whip, make sure it’s stabilized with a bit of powdered sugar so it doesn’t deflate.
Storage and Reheating Tips for Irresistible Easy No Bake Grasshopper Pie
This pie is happiest in the freezer. Wrap it tightly in plastic wrap and foil to avoid freezer burn and stash it for up to two weeks. If you have leftovers (honestly, rare), slice the pie and store individual pieces in airtight containers. Great for late-night sweet tooth attacks. No reheating needed—just a 10-minute sit on the counter before serving. If you’re bringing it to a party, pack it in a cooler and transfer it to the fridge when you get there so it softens a little but doesn’t melt. If using homemade whipped cream, it’s best eaten within a few days since it may separate over time. Cool Whip holds up longer.
FAQs
Can I make this ahead of time?
Absolutely! This is the ultimate make-ahead dessert. Freeze it up to 2 days in advance.
What if I don’t have crème de menthe?
No problem. Use ½ teaspoon peppermint extract, 1–2 tablespoons milk, and a couple drops of green food coloring for the same vibe.
Can I use a store-bought crust?
Sure can! A pre-made Oreo crust works in a pinch, though homemade gives you that extra-thick, buttery base.
Is this kid-friendly?
Yes—just skip the alcohol and use the peppermint extract version instead.
Can I make it vegan?
Use vegan marshmallow fluff, coconut whipped topping, and plant-based cookies for a dairy-free twist.
Final Thoughts
There’s something ridiculously satisfying about pulling an Irresistible Easy No Bake Grasshopper Pie out of the freezer and hearing people go “wait, YOU made that?” It’s cool, creamy, and crowd-pleasing without demanding hours of your time or a pile of dirty dishes. Whether you’re mint-obsessed or just need a go-to no-bake dessert, this recipe will become a favorite. And if you’re loving the no-bake dessert life, check out my No Bake Raspberry Cheesecake or Shamrock Swirl Pie for more sweet inspiration. Now go ahead—grab a fork, share a slice, or sneak one solo. I won’t tell.
Visit our Pinterest for regular slow cooker recipe updates, or join our Facebook discussions where cooking fans exchange their favorite hearty meal ideas.
PrintIrresistible Easy No Bake Grasshopper Pie

This Easy No Bake Grasshopper Pie combines mint and chocolate flavors for a refreshing dessert perfect for any occasion.
- Prep Time: 15 minutes
- Cook Time: 0 minutes
- Total Time: 4 hours 15 minutes
- Yield: 8 slices 1x
- Category: Desserts
- Method: No Bake
- Cuisine: American
- Diet: Vegetarian
Ingredients
- For the Crust
- 24 pieces Oreo Cookies – Use whole cookies with filling for a sweeter, rich base.
- 1/2 cup Butter – Melted, binds the cookie crumbs.
- For the Filling
- 1 jar Marshmallow Creme – Adds sweetness and creamy texture.
- 2 cups Cool Whip or Whipping Cream – Use Cool Whip for convenience or homemade whipped cream.
- 1/2 cup Creme de Menthe – Elevates the mint flavor.
- Optional Extras
- 1 cup Chocolate Mint Cookies – Stir in for added mint flavor.
Instructions
1. Start by crushing the Oreo cookies in a ziplock bag until they resemble fine crumbs.
2. In a bowl, combine these crumbs with melted butter, then press the mixture firmly into a 9″ pie dish or springform pan.
3. Chill in the fridge for at least 1 hour to set.
4. In a large bowl, whisk together the marshmallow cream and Cool Whip until smooth and creamy.
5. For an alcohol version, add the creme de menthe now. For an alcohol-free alternative, mix milk, peppermint extract, and a bit of food coloring.
6. Optionally, fold in chopped chocolate mint cookies for an extra burst of flavor.
7. Carefully pour the filling into the chilled crust, smoothing the top with a spatula.
8. Place the assembled pie in the freezer for at least 2-4 hours, or overnight for a firmer texture.
9. Before serving, let the pie sit at room temperature for about 10 minutes to soften slightly.
10. Slice and garnish with whipped cream, additional cookies, or fresh mint leaves for a beautiful presentation!
Notes
Consider incorporating more crushed chocolate mint cookies into the filling or as a topping for an extra minty kick.
Nutrition
- Serving Size: 1 slice
- Calories: 350
- Sugar: 30g
- Sodium: 200mg
- Fat: 18g
- Saturated Fat: 10g
- Unsaturated Fat: 1g
- Trans Fat: 0g
- Carbohydrates: 45g
- Fiber: 1g
- Protein: 2g
- Cholesterol: 30mg


